

Alright, before we dig in, let’s get one thing straight: wood crafts DIY ain’t just a hobby—it’s a lifestyle! Whether you’re looking to spruce up your space, gift something special, or simply keep busy on the weekends, diving into the world of wood crafts DIY opens opportunities for both chill creativity and wildly practical achievements. Trust me, once you pick up that first piece of reclaimed wood, there’s no going back. You’ll be hooked, just like I was!
Why Wood Crafts DIY Rocks Your World
Let me just say, wood crafts DIY isn’t just about making cool stuff. It’s about empowerment. Every project you tackle makes you handier, more imaginative, and let’s face it, way cooler at parties. Here’s why folks just can’t get enough of wood crafts DIY:
- It’s Budget-Friendly: Let’s face it, materials for wood crafts DIY are often cheap, if not free. Raid your garage or find scraps—no need to break the bank!
- Customizable Everything: You get to design wood crafts DIY projects to match your personality or home décor (goodbye, boring store-bought stuff!).
- Therapeutic Vibes: There’s nothing like the smell of fresh cut wood and the chill zone you slip into when sanding or painting. Trust me, wood crafts DIY can seriously boost your mood.
- Sustainable & Green: Using reclaimed or reused wood makes your DIY crafts friendly for our planet (bonus points for eco-cool style).
- Bragging Rights: Show off your killer skills and handmade pieces on Insta or around your home. Wood crafts DIY is always a conversation starter.
Essential Tools for Wood Crafts DIY Success
You don’t need a fancy-pants workshop to get started. Here’s a quick checklist you’ll want to have handy for most basic wood crafts DIY jobs:
- A good ol’ handsaw (power saw if you’re feeling adventurous)
- Hammer and nails
- Screwdriver or power drill
- Sandpaper (various grits—smooth finish = happy hands)
- Wood glue
- Tape measure and a square (measure twice, cut once, folks)
- Clamps (cue the sigh of relief during glue-ups!)
- Paint, wood stain, or sealer (depending on your vibe)
Pro tip: Always throw on safety glasses. Nothing kills the wood crafts DIY mood like a splinter to the eye!

The Best Wood Types for Beginners
Not every wood type behaves the same, so pick wisely! If you’re just starting your wood crafts DIY journey, here’s what I recommend:
- Pine: Cheap, soft, and super easy to work with—ideal wood crafts DIY starter wood.
- Poplar: Slightly tougher than pine but still beginner-friendly.
- Birch Plywood: Smooth finish, perfect for signs or small furniture.
- Reclaimed Planks: For that rustic, one-of-a-kind look. Scour dumpsters or local buy-nothing groups!
If you’re feeling extra, grab some oak or walnut, but brace yourself: harder woods mean more effort and a bit pricier, but that pro look is *chef’s kiss*.

10 Mind-Blowing Wood Crafts DIY Projects You’ve Gotta Try
Alright, let’s check out some wood crafts DIY ideas that range from super simple to “Whoa!” Here’s my curated starter kit worth bragging about:
- Rustic Picture Frames: Upcycle old boards into farmhouse-chic frames. Sand, stain, and add cute hardware as you please.
- Floating Shelves: Minimalist and oh-so practical. Tweak the length/width for a custom fit even in awkward nooks. Perfect beginner wood crafts DIY project.
- Wooden Plant Holders: Modern triangle or hexagon shapes pair great with any verdant vibe. Hang, stack, or use as centerpieces.
- Wood Coasters with Carved Designs: Get creative with wood burning or paint. Bonus: these are quick wood crafts DIY wins for gifts.
- Farmhouse Candle Holders: Drill holes into salvaged wood, sand lightly, and pop in some tea lights for an insta-rustic mood.
- DIY Wooden Signs: Your favorite quote, your last name, or just a groovy “Welcome”— personalize it with paint, stencils, or wood burning tools.
- Birdhouses: Not only do you help the feathered residents, but these wood crafts DIY classics offer pure satisfaction.
- Mason Jar Wall Sconces: Secure jars onto stained wood. Add faux flowers or candles for a cottage-core pop.
- Reclaimed Wood Wall Art: Mix stain colors and wood grains for a geometric masterpiece. Anything goes, and mistakes just add to the story.
- Wood Pallet Furniture: Transform shipping pallets into coffee tables, headboards, or even garden lounges. Wood crafts DIY projects on this scale will leave your friends speechless.
Breakdown: How to Make a Simple Wood Crafts DIY Shelf
Let’s walk through the steps for one of my absolute faves: a floating shelf! Whether you want to display plant babies or stack up books, this wood crafts DIY project never fails to impress.
What You’ll Need:
- Piece of wood (your length/width choice)
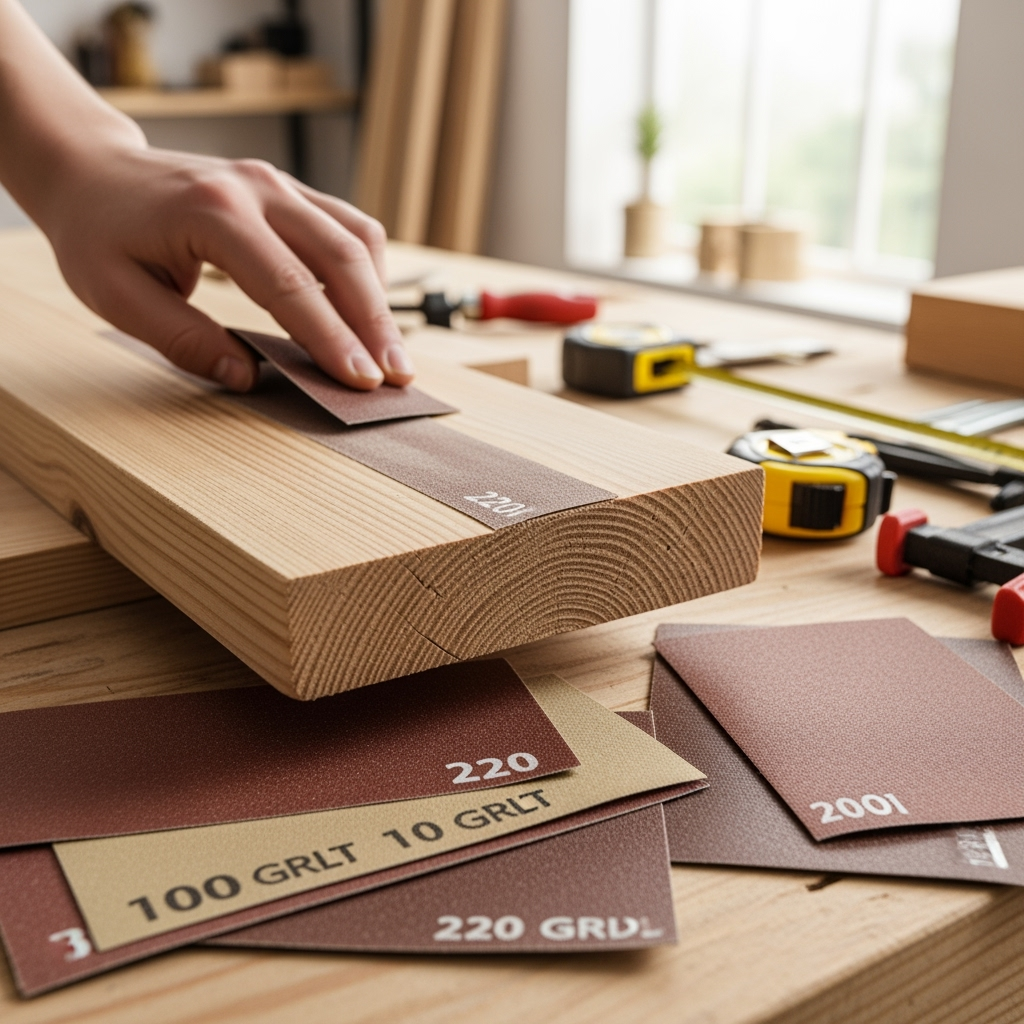
- Sandpaper (100 and 220 grit)
- Wood stain or paint (if desired)
- 2 shelf brackets
- Screws and anchors
- Drill, screwdriver, and level
Step-by-Step:
- Sand the board: Start with 100 grit, finish with 220 for a velvet-smooth surface. Don’t skip this—splinters suck!
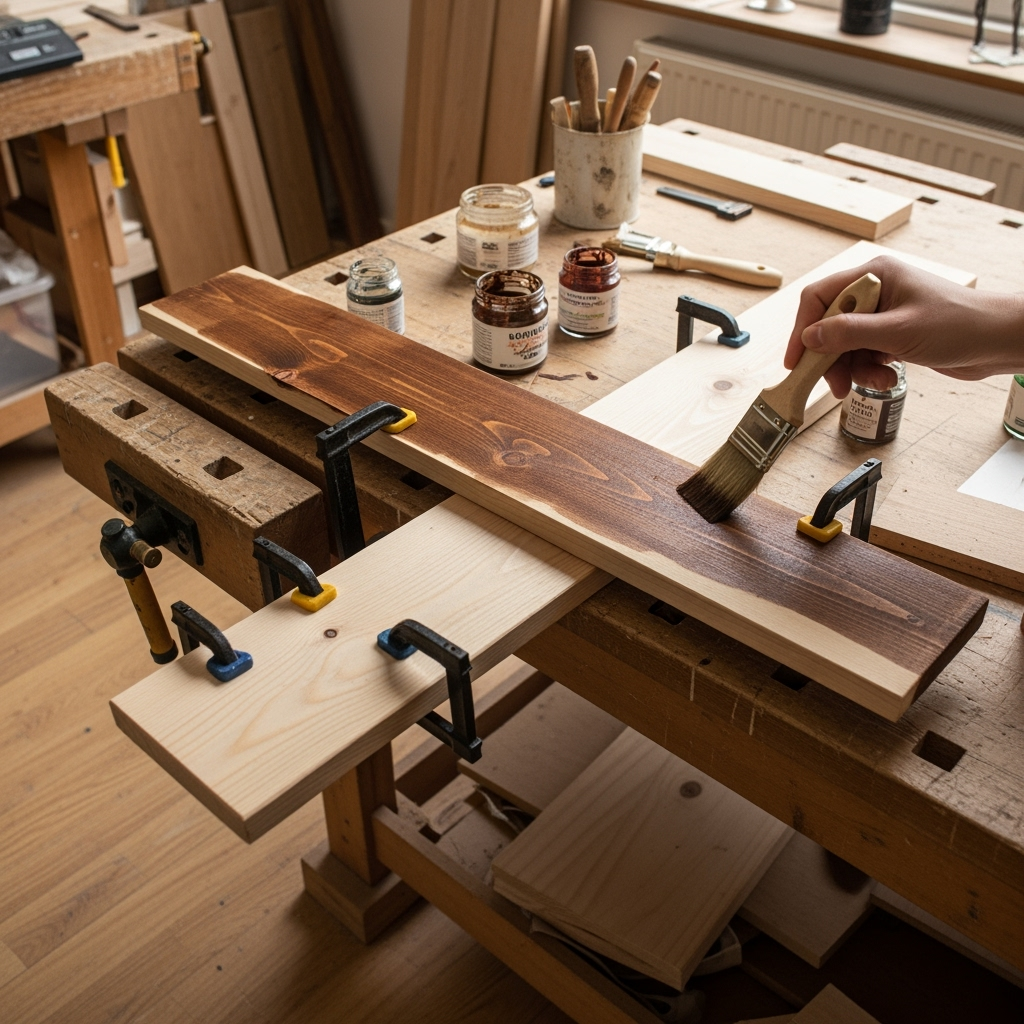
- Stain or paint the wood: Go bold or stick to natural grain. Let your creativity out—this is where some wood crafts DIY magic shines.
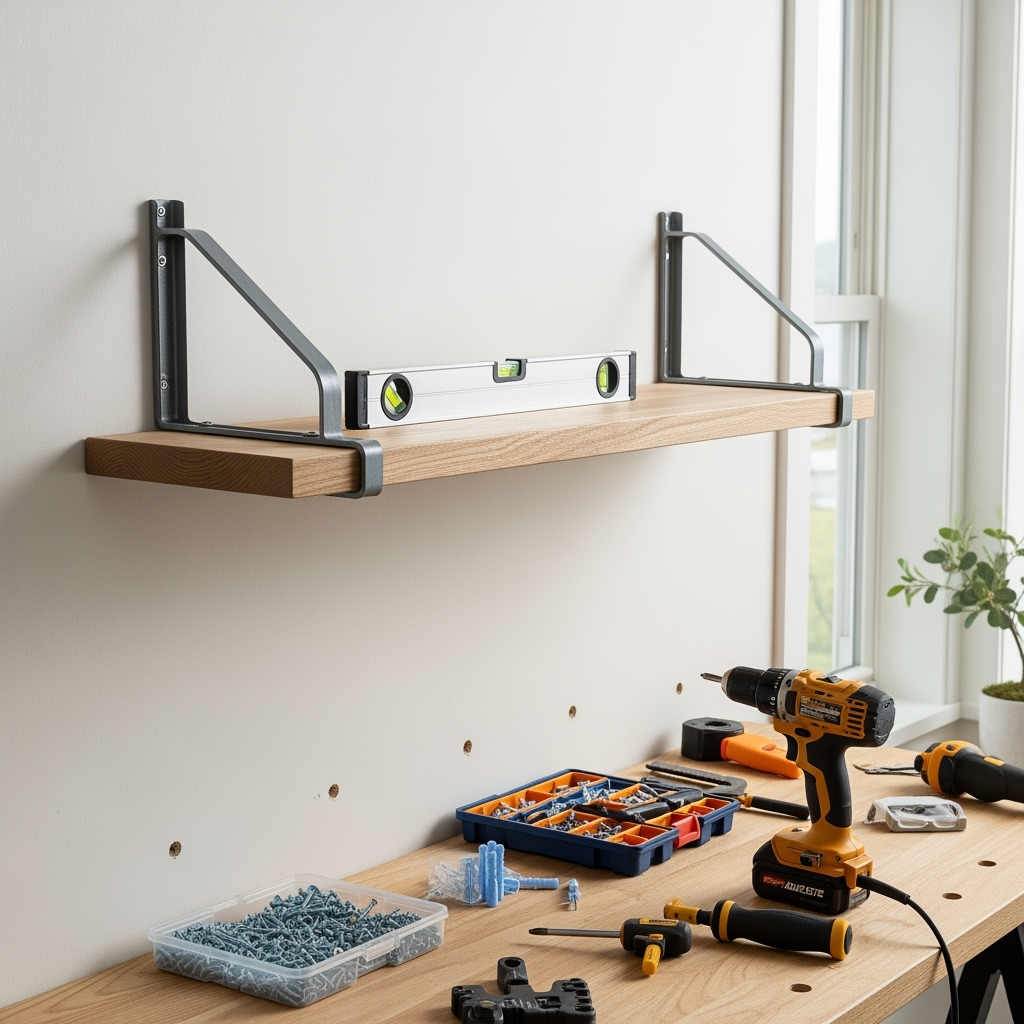
- Attach brackets: Use the level to make sure your shelf won’t look drunk on the wall. Drill pilot holes for a pro finish.
- Mount on the wall: Use anchors if you’re not drilling into studs (save your shelf from tragic collapse).
- Decorate and admire: Once up, load it up with whatever sparks joy! Step back and enjoy the fruits of your wood crafts DIY labor.
Wood Finishing Tips for a Pro-Look
The finish can totally elevate your wood crafts DIY projects. Here’s how to get that pro vibe going:
- Always sand between coats of paint or stain—it smooths out any dust bits or brush marks.
- Test finishes on scrap before committing (save yourself some tears!).
- Seal your pieces with a clear polyurethane for extra durability, especially for stuff that’ll take a beating (like tables or trays).
- Use painter’s tape for crisp lines or multi-color ideas. You’ll get that wd crafts DIY meets designer vibe instantly.
Creative Ideas for Repurposing Scraps
Let’s be honest, all those leftover wood bits from your bigger wood crafts DIY projects start piling up. But hey, waste not, want not! Here’s how to use every last inch:

- Mini Key Holder: Attach a few hooks to a painted wood scrap, hang by the door. Practical and cute!
- Plant Markers: Use small chunks, carve or paint plant names—perfect for gardens or gift baskets.
- Wooden Magnets: Glue magnets to the back of fun-shaped wood pieces, paint or burn designs on front. Wood crafts DIY love for your fridge!
- Jewelry Holders: Drill tiny holes in a painted board and insert hooks for necklaces or rings.
Small projects like these are the cherry on top if you’re hustlin’ through the wood crafts DIY scene. Plus, they make awesome last-minute gifts!
Wood Crafts DIY Safety Hacks
Okay, safety talk! Don’t skip this, people—wood crafts DIY is loads of fun, but only if you leave the workbench with all your fingers.
- Never rush through cuts. Take it slow and keep your attention sharp.
- Wear safety glasses. Always (yes, always) protect those peepers.
- Mask up if you’re sanding or dealing with fumes from finishes or glue. Nobody enjoys inhaling dust and chemicals!
- Keep tools sharp and clean. Dull blades mess up your wood crafts DIY results and can be mega dangerous.
- Know your tools. Read that manual or at least binge a few YouTube tutorials before going all in. Your future injury-free self will thank you.
Monetizing Your Wood Crafts DIY Passion
Here’s a killer secret: the wood crafts DIY world ain’t just for hobbyists. With a little hustle, you can turn those projects into cold hard cash. Here’s how many folks break in:
- Sell on Etsy or local markets: Handmade items fetch higher prices and wood crafts DIY is always hot.
- Social media shop: Post pics, take orders, brag a little. You’ll attract buyers who want custom pieces.
- Offer workshops: Teach others! Host classes online or in your local community (bonus: meet fellow fans of wood crafts DIY).
- Document your journey: Start a blog or YouTube channel sharing wood crafts DIY tips. Ad dollars and sponsorships come your way if you build a good following. Don’t be shy!
Top Tips to Keep Leveling Up in Wood Crafts DIY
- Start simple: Don’t stress it if your first project comes out a little wonky. Every wood crafts DIY master started as a newbie.
- Invest in upgrades: As you grow, upgrade tools one at a time. Believe me, a good clamp or saw is a gamechanger in the wood crafts DIY world.
- Join a local makerspace: Get access to bigger tools and connect with fellow wood crafts DIY fans. The community is amazing!
- Document your progress: Snap pics, keep a journal, or share on social. It’ll encourage you (and inspire others) on your wood crafts DIY adventure.
Troubleshooting: Common Wood Crafts DIY Fails & How to Avoid Them
We gotta keep it real: not every project is smooth sailing. Here are some classic wood crafts DIY fails and how to dodge ‘em:

- Splinter City: Skipping the sanding step. Don’t do it, even if you’re lazy like me. Run sandpaper on every edge and surface.
- Crooked Cuts: Dear old measurement motto: measure twice, cut once. Slow down, double-check, then commit.
- Drippy Paint or Stain: Apply thin, even coats. Patience pays off with a pro wood crafts DIY finish.
- Wobbly Builds: Over-tightening screws or skipping anchors when mounting. Be gentle and choose the right hardware for your project.
- Peeling Finish: Let paints and stains dry completely between coats. Rushing = mess.
Resources for Endless Wood Crafts DIY Inspiration
Looking for more wood crafts DIY inspo? Here’s where I always turn for new ideas and fresh motivation:
- Pinterest: Mega-library of creative wood crafts DIY designs and tutorials.
- YouTube: Everything from quick hacks to epic furniture builds.
- Instagram: Follow the #woodcraftsDIY hashtag for jaw-dropping daily content.
- Reddit’s r/DIY: Community vibes, real talk about what works (and what bombs).
- Local craft fairs: Inspiration city! Plus, chat with seasoned wood crafts DIY artisans.
Time to Get Your Hands Dusty!
That’s a wrap, folks! Whether you’re dabbling for fun or plotting your side hustle empire, wood crafts DIY brings endless opportunity for creativity, mindfulness, and downright pride when you step back and think, dude, I totally made that! Remember, every rough edge and tiny mistake tells the story of your journey. So stop scrolling, raid your garage, and dive into your first (or next) wood crafts DIY adventure. Your dream project is waiting. Don’t be shy—share your wins and fails, and keep leveling up your game. Happy crafting!


