
Ever feel like your small woodshop layout just ain’t cutting it? Trust me, I’ve been there — tripping over extension cords, searching endlessly for a lost chisel, banging my elbow on a cluttered bench… Don’t let a cramped space kill your vibe! With a smart approach, a small woodshop layout can absolutely deliver on efficiency and comfort. In this article, we’re diving deep into all the nitty gritty tips, hacks, and real-world advice you need to turn your modest space into a woodworking powerhouse.
Why Your Small Woodshop Layout Seriously Matters
If you’re dreaming up projects and getting frustrated by lack of room or clutter, you’ve gotta realize: the layout is everything. A killer small woodshop layout isn’t just about cramming tools in a corner. It’s about maximizing every inch for productivity, safety, and straight-up joy. When you nail your small woodshop layout, you get:
- Faster workflow (no more mad dashes across the garage!)
- Less fatigue — everything’s at arm’s reach
- Safety, because clear walkways mean fewer trips and slips
- More room for actual creativity and building, not clutter wrangling
Most of us start with whatever space we’ve got — maybe a corner of the basement, half the garage, or a shady old shed. But that just means you get to flex creativity and make every inch count. Let’s get to it: how do you truly make a small woodshop layout that works for real folks, not just magazine spreads?
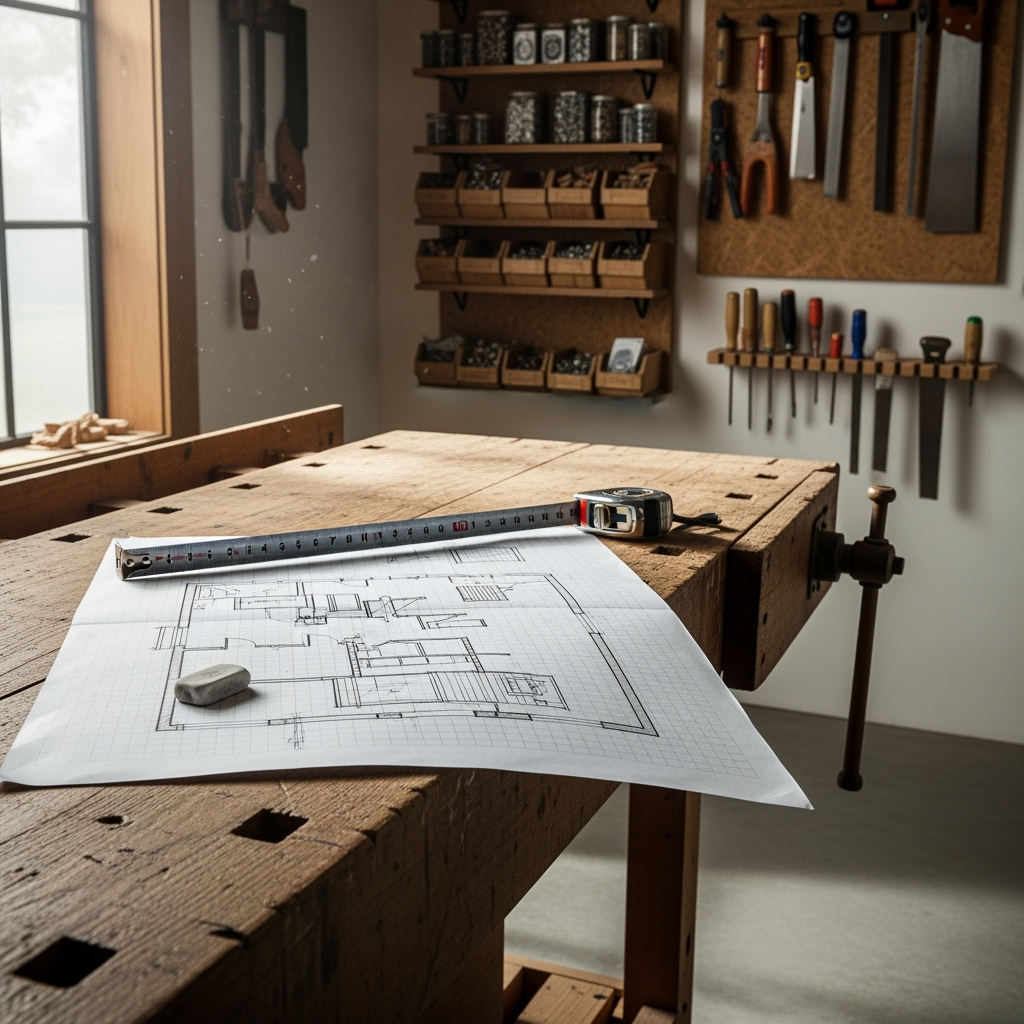
Start With the Bones: Measuring and Planning
Before you start moving stuff or buying fancy benches, break out your tape measure. Seriously, don’t skip this part. Even just sketching on a scrap of plywood helps. Measure your space, and jot down:

- Length and width of walls
- Location of doors and windows
- Clearances for moving around (leave yourself 2-3 feet between big tools)
- Height (so you know where shelves/cabinetry might go)
Trust me — a precise plan is the foundation of any winning small woodshop layout. Sketch it out on graph paper or use a free online tool, whatever floats your boat. The key is seeing on paper what you’re working with… before getting sawdust everywhere.
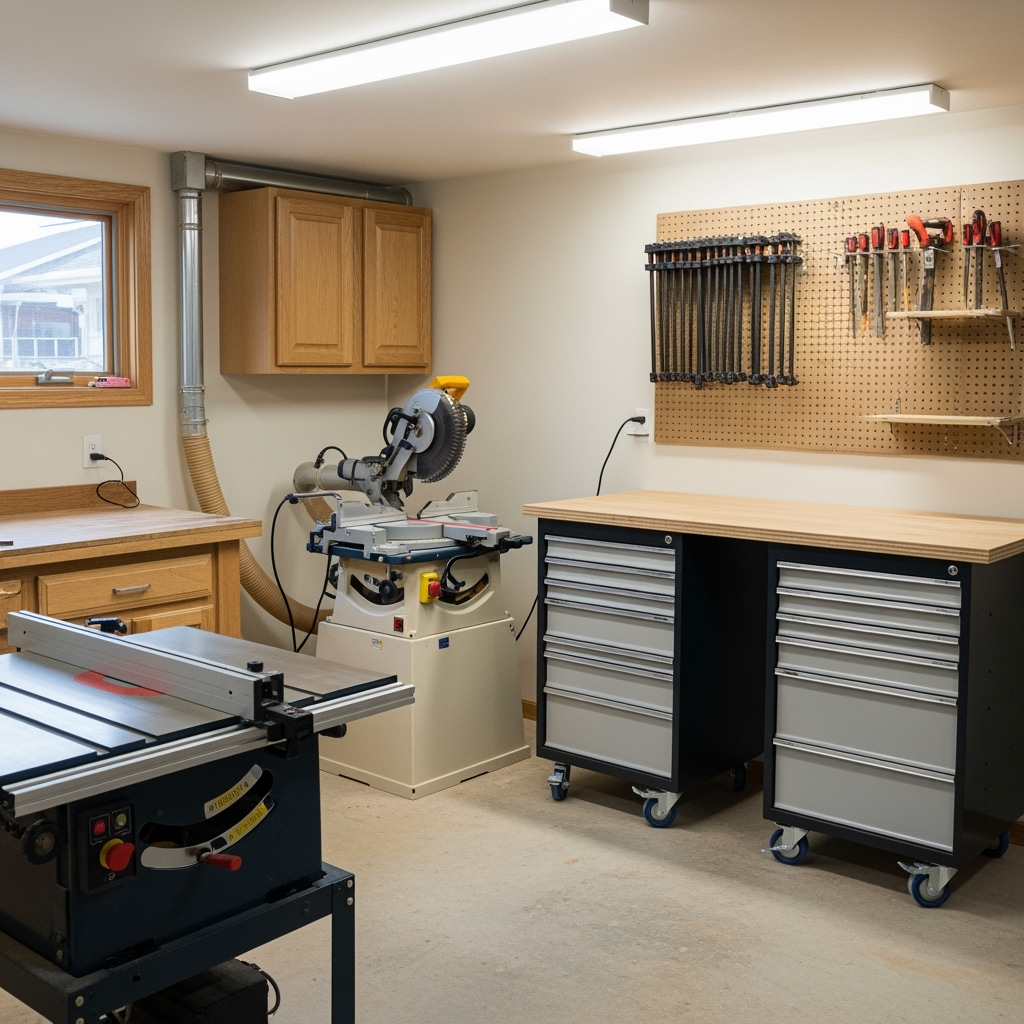
Zone Out: Work Zones for a Small Woodshop Layout
The best woodshop layouts, no matter the size, use zones. When working tight, this becomes more important than ever. So, what are these zones in a small woodshop layout?

- Raw material zone: Where wood enters. Keep heavy stuff close to the entry/exit (your back will thank you).
- Cutting/processing: Table saw, miter saw, bandsaw — plan to keep these close, so you’re not hauling large sheets far.
- Assembly/finishing: An open surface or bench, ideally away from the dustiest parts of the shop.
- Tool storage: All those hand tools, bits, clamps. Easy access = less time hunting.
- Finishing/painting: This might be a shared space with assembly, just make sure there’s a spot with airflow.
Each zone just needs a small footprint, but putting them in a logical flow makes work way easier. You don’t want to carry a giant sheet of plywood past a bunch of obstacles!
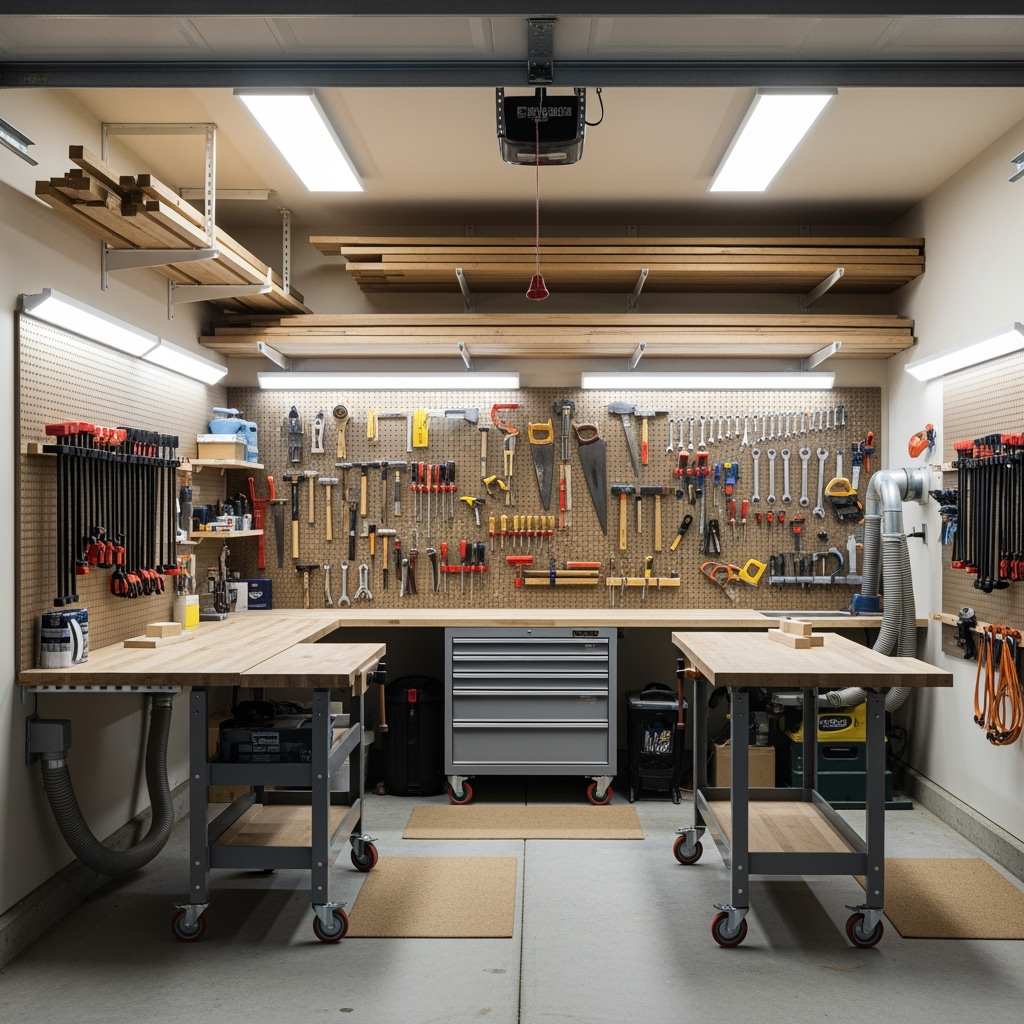
Get Mobile: Embrace Wheels and Flexibility
I’ll just say it: if you want a legit small woodshop layout, you NEED mobile bases. Seriously, put wheels or casters on nearly everything you can — workbenches, tool carts, even tool stands. Here’s why:
- Swap out benches for machines in a flash
- Clear floor space when you need to break down big projects
- Roll your tools outside for messy jobs (think sanding or finishing!)
- Clean up way easier (goodbye sawdust piles stuck under stationary bases)
Big pro tip: Don’t skimp on buying quality wheels, or you’ll end up cussing (ask me how I know haha). Locking casters keep everything in place when you’re working, but give you options when you need them fast. Total game changer for any small woodshop layout.
Vertical Storage: The Secret Weapon
Look up! Your walls are pure gold in a cramped space. Vertical storage is the magic trick for a tight small woodshop layout. Let’s break down the best ways:
- Pegboards: Ridiculously versatile for small hand tools, jigs, measuring gear
- Wall-mounted lumber racks: Keep boards off the floor, sorted and dry
- French cleat systems: Super customizable. Move tool holders, bins, and shelves around as your needs change
- Overhead racks: For rarely used tools or long boards, install strong ceiling racks
This strategy lets you claim floor space for bigger projects or mobility. Just be safe about loading up areas above workbenches or walkways — and secure racks into studs, not just drywall!

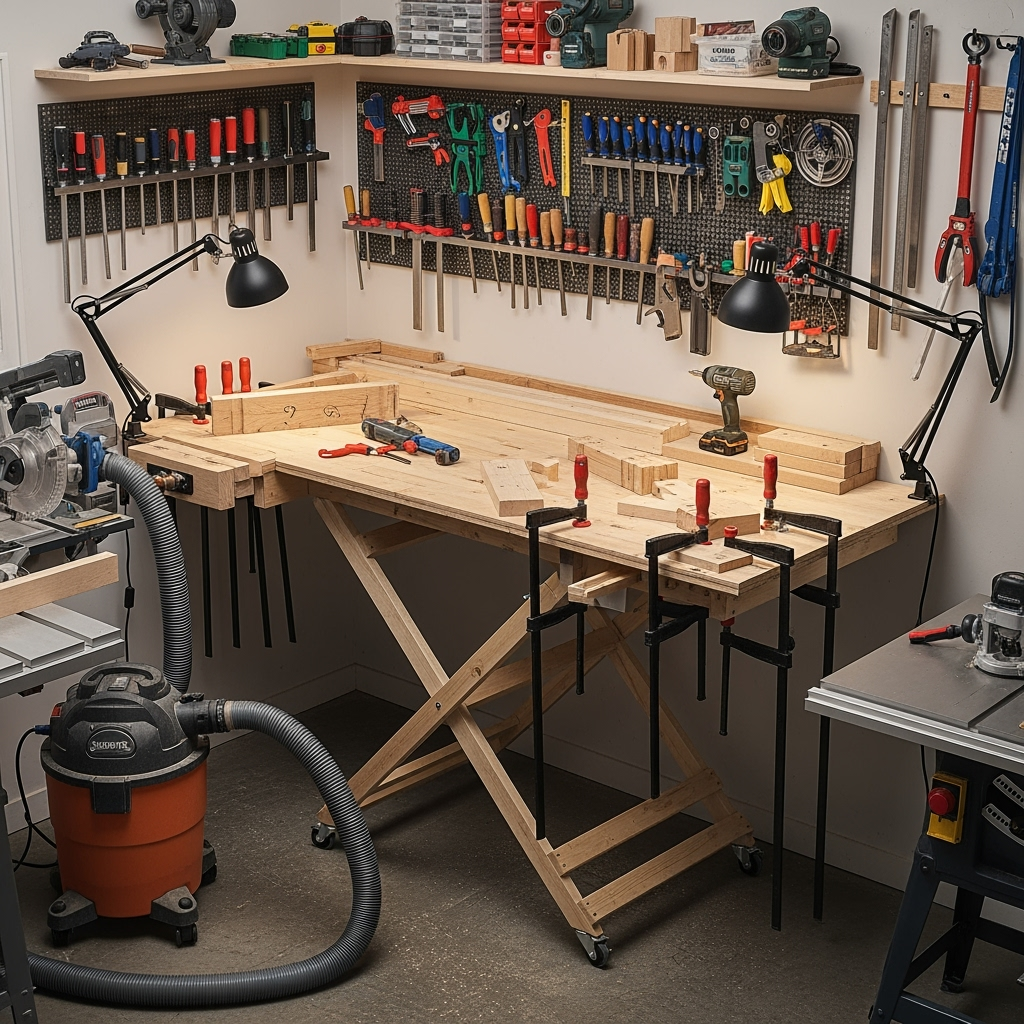
Workbenches and Surfaces: Go Multi-Functional
It’s tempting to want a huge, gorgeous traditional bench, but small woodshop layout reality usually demands multi-purpose solutions. You gotta go for maximum bang for your buck:
- Folding workbenches: Wall-mounted or collapsible styles save space when not in use
- Bench-on-wheels: Park it where needed, use as outfeed or assembly station
- Built-in storage: Every bench should have drawers or shelves below for tools, fasteners, clamps
- Modular add-ons: Secure removable vises or jigs only when needed
If you build your own, design the workbench with your workflow in mind. How high? How much knee room? Want to clamp stuff at the edges? Pay attention to those details for a killer small woodshop layout.
Clamps, Hardware, and Bits: Stay Organized
Let’s get real: a small woodshop layout can turn into chaos with all your small bits and pieces floating around. These tiny pieces can suck up more space than you realize. Here’s how to keep control:

- Magnetic strips: Hold chisels, drivers, and small hardware above the bench
- Drawer organizers: Even a simple tackle box or divided trays do wonders
- Dedicated clamp racks: Mount above bench or on a hinged panel for easy reach
- Clear bins: Label and stack them. Being able to see what’s inside saves a ton of time
Keeping organized feels a bit fussy, but in a small woodshop layout, it’s non-negotiable for your sanity. Every minute you save hunting for a clamp means more time spent building. More coffee breaks too, haha!
Lighting, Power, and Safety in a Small Shop
Don’t let your small woodshop layout become a dark, dangerous cave. For mega results, focus on:
- LED shop lights: Bright, energy efficient, and run cooler in tight spots
- Task lighting: Clamp-on lamps right over the bench or lathe help with detailed work
- Extra outlets: Use heavy-duty power strips or install more plugs. Just don’t overload circuits
- First aid and fire extinguisher: Don’t put’em off. Mount in easy-to-reach spots
Good light seriously boosts accuracy — and yeah, helps you avoid dumb mistakes like cutting to the wrong line. Never underestimate the power of safe, bright, and accessible layouts. The only thing more important is coffee… maybe.
Dust Collection: Keep It Clean, Keep It Healthy
A major pain point in any small woodshop layout is sawdust and chips. A clean shop is a happy shop, but in a small space, fine dust gets everywhere, and it’s a legit health risk. Strategies for keeping things under control:
- Shop vacs with HEPA filters: Hook to all major tools, empty regularly
- Mini cyclone separators: Cut down on clogs, boost efficiency
- Portable air filtration units: Hang from the ceiling or sit on a shelf, run them after every dusty session
- Sweep, sweep, sweep: Yeah, the old-school solution still works. Do it daily!
Don’t overlook sealing up gaps or cracks in the wall — leaks mean dust just keeps coming back in, especially in a detached shed or garage. Good air management should be part of every small woodshop layout, for real.
Project Storage: Dealing With Unfinished Builds
Nothin’ crowds a small woodshop layout faster than half-finished projects. Before you know it, every surface is covered and you can’t find your screwdriver. Smart storage is the solution:
- Rolling carts or shelves: Tuck unfinished projects out the way when working on something else
- Wall brackets: Hang doors, panels, or finished pieces safely away from active tools
- Clear labeling: Know what’s what and avoid knocking over glue-ups
- Dedicated project cubbies: If possible, have a small shelf or area just for active builds
It’s all about maintaining breathing room. A little bit of forethought lets your small woodshop layout handle even big ambitions!
Types of Small Woodshop Layouts: Garage, Basement, Shed
Let’s break down the three most common small woodshop layout types and what makes each special:
1. Garage Workshop
- Easy to ventilate/dust collection options
- Most flexible for moving big projects in/out
- But: Often needs to be packed away for cars/kids/stuff
2. Basement Workshop
- Climate controlled (no worries about freezing tools)
- Might be limited for dust collection/venting
- Noise might annoy the fam upstairs (sorry not sorry haha!)
3. Shed Workshop
- Separate from home = less dust inside, less noise complaints
- Needs power/water solution (could be a hassle)
- Security a concern? Invest in good locks!
Each is workable, you just gotta adapt your small woodshop layout to fit the realities of the space. For instance: a fold-up benchtop for garages, a mega shop-vac for basements, or off-grid lighting and dust control for sheds.
Real-Life Small Woodshop Layouts: Case Studies
Need a bit more inspo? Let’s peek into what real woodworkers do to absolutely crush it in a small woodshop layout.
Case Study 1: 1-Car Garage Woodshop
- Mobile base everything
- All tools push tight to wall when not in use
- Roll-out workbench doubles as outfeed and assembly table
- Pegboard tool wall behind main bench
- Doubles as family storage area (just keep paths clear!)
Case Study 2: 8×12 Shed Shop
- Wall-mounted lumber racks up high
- Bench under window for natural light
- Solo saw on a flip-up cart, doubles as other workspace
- Clamp rack on door, rolling storage for hardware
- Extension cord reel in the center of ceiling for easy power access
Case Study 3: Basement Dungeon (JK) Workshop
- Soundproof mats under noisy gear
- Air filtration at ceiling height to trap fine dust
- L-shaped wall bench + fold-out drywall table for big glue-ups
- Lighting divided in task zones for detail and cutting work
- Clamp and tool storage along stairwell
Takeaway? There’s no such thing as a one-size-fits-all small woodshop layout. Steal the ideas that work for you, remix, adapt, and before long, you’ll have somethin’ totally dialed-in.
Pitfalls To Avoid in Your Small Woodshop Layout
Lemme quickly save you from some classic rookie goofs when setting up that epic small woodshop layout:
- Ignoring clear walkways — tripping over scraps or cords is fun for no one
- Underestimating storage needs — you have more clamps than you think (trust me)
- Going tool shopping before layout planning — big mistake, plan first, buy second!
- Not enough outlets in the right spots
- Letting projects or junk pile up — keep it tight, keep it clean
Don’t sweat it if your small woodshop layout feels less than insta-ready at first — it’ll evolve with you! Just keep fiddling and fixing till it fits your workflow.
Final Thoughts: Small Space, Big Dreams
Who says you need a warehouse-sized shop to build furniture, crafts, or custom goods? Your small woodshop layout, done smart, can be every bit as awesome and productive as a giant one. In fact, many of the greatest woodworkers got their start in small, scrappy spaces just like yours.
The takeaway? Put in the effort to plan, organize, and tweak. Wheels, vertical storage, flexible bench space, solid lighting, and hardcore dust control — these are the secrets that unlock your small woodshop layout’s full potential. Soon enough, you’ll be cranking out cool projects, minus the chaos.
Happy building, and keep those chips flyin’!


