
Ever stood in your garage, surrounded by piles of leftover wood, and thought, “Dang, what do I do with all this stuff?” Well, I feel ya! Let me introduce you to the wild and wonderful world of scrap wood art—where bits and bobs transform into show-stopping masterpieces. Whether you’re a DIY rookie or a woodworking whiz, there’s a scrap wood art project out there calling your name. In this guide, I’ll spill all the tips and tricks so you’ll never look at scrap wood the same way again.
What Is Scrap Wood Art Anyway?
Scrap wood art is all about reimagining those offcuts, splinters, and leftovers from your past projects and turning them into something creative and pretty darn awesome. Instead of tossing those pieces out (honestly, who wants to waste money?), you use them for eye-catching art that can jazz up your walls, shelves, or even your yard. It’s sustainable, fun, and—let’s be real—a major conversation starter when friends drop by.
Why Should You Try Scrap Wood Art?
- Saves money: Who doesn’t love free materials?
- Eco-friendly: Upcycling helps our planet. Less waste, more wow.
- Endless customization: Unique color, texture, and style with every project.
- Therapeutic value: Working with your hands? Feels good, man. Relieves stress, too.
- Proud bragging rights: Show off your new wall art and impress the neighbors!
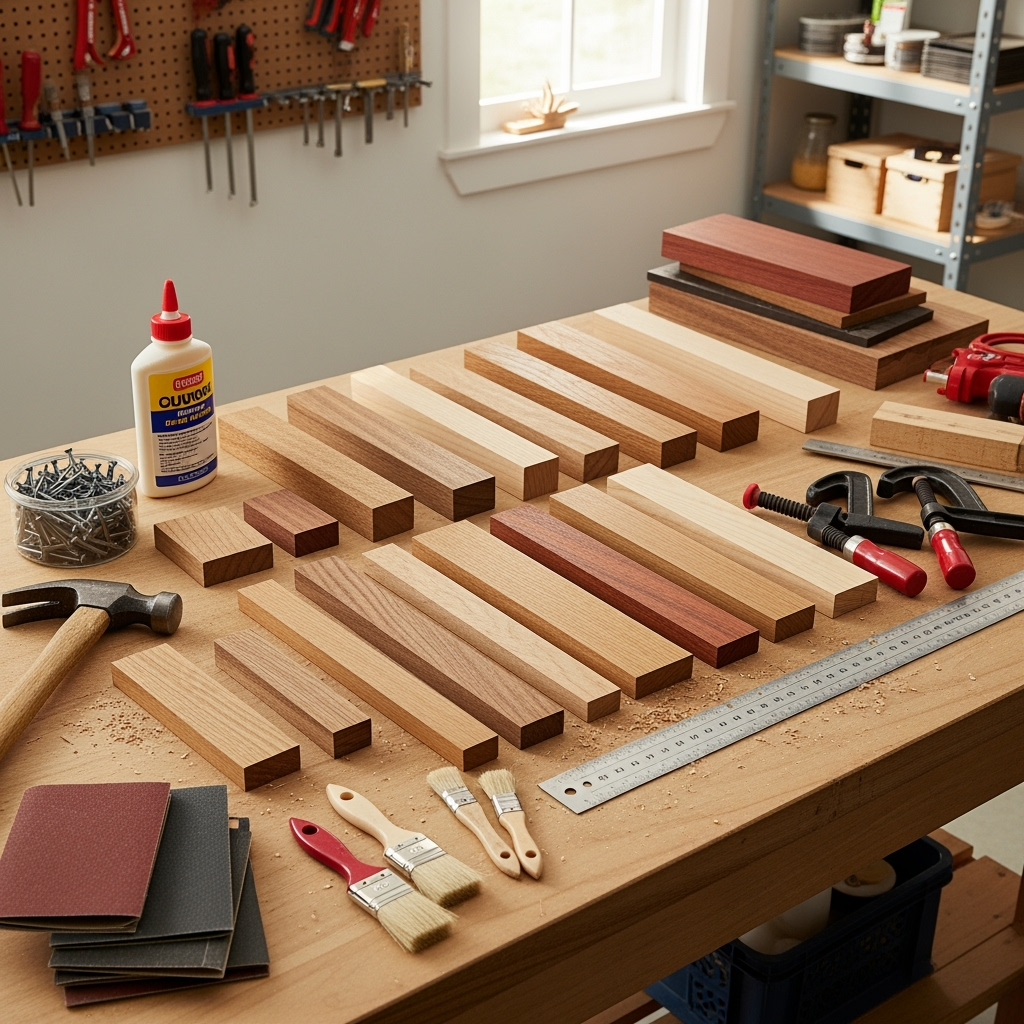
Must-Have Tools for Scrap Wood Art
Let’s talk gear. For most scrap wood art projects, you won’t need a fancy workshop. Here’s a quick list of handy tools that’ll make the magic happen:
- Hammer and nails
- Saw (hand saw, jigsaw or miter saw)
- Wood glue
- Sandpaper or power sander
- Ruler, measuring tape
- Paints, stains, brushes
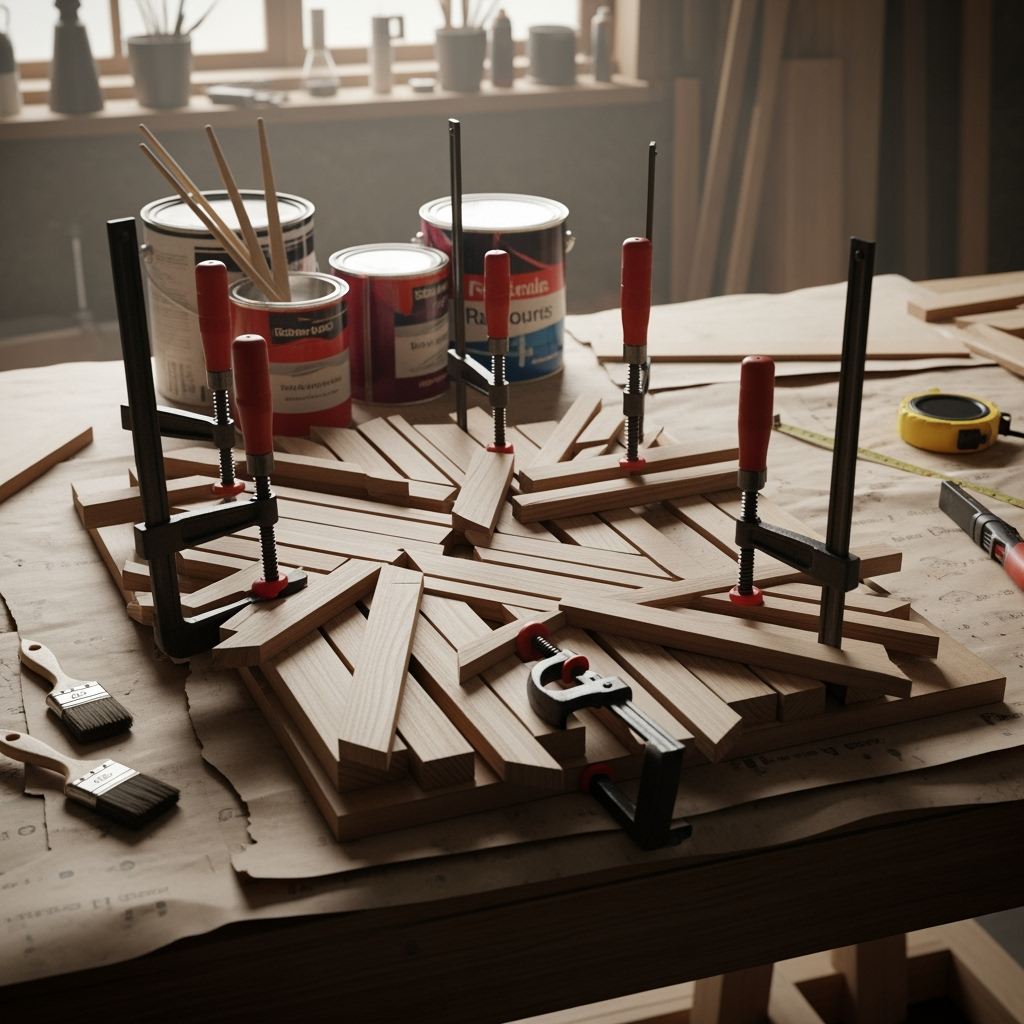
- Clamps (super helpful for gluing up pieces)
Optional upgrades: nail gun, wood burner, stencils for design buffs.

Choosing the Right Scrap Wood for Art Projects
Not all scrap wood is created equal. Some of those gnarly bits are perfect for scrap wood art—others, not so much. Here’s how to separate the keepers from the firewood:
- Size matters: Pick a mix of sizes for dynamic designs.
- Wood type: Pine, oak, cedar, and maple are great picks. Avoid rotted or cracked pieces.
- Safety check: No rusty nails, weird stains, or splinters that’ll make you curse.
Clean your wood and give it a quick sand. You’d be amazed how a grungy piece can shine up!

Planning Your Scrap Wood Art Project
You’ve got piles of scrap. Now what? Time for some creativity! Here’s how to turn a pile of randoms into jaw-dropping scrap wood art:
- Seek inspiration: Scroll Pinterest or Instagram for ideas. Look for wall hangings, sculptures, and signs.
- Sketch it out: Rough out a basic design on paper. Don’t worry if it ain’t pretty—just map your vision.
- Gather supplies: Organize your wood by shape and size. Pick your paints, stains, and other accents.
- Prep workspace: Trust me, it gets messy. Lay down paper or an old sheet.
5 Unbelievable Scrap Wood Art Projects You Can Start Today
To get your creative wheels turning, let’s run through some of the best beginner-friendly—and a couple wild—scrap wood art projects out there. Ready to roll?
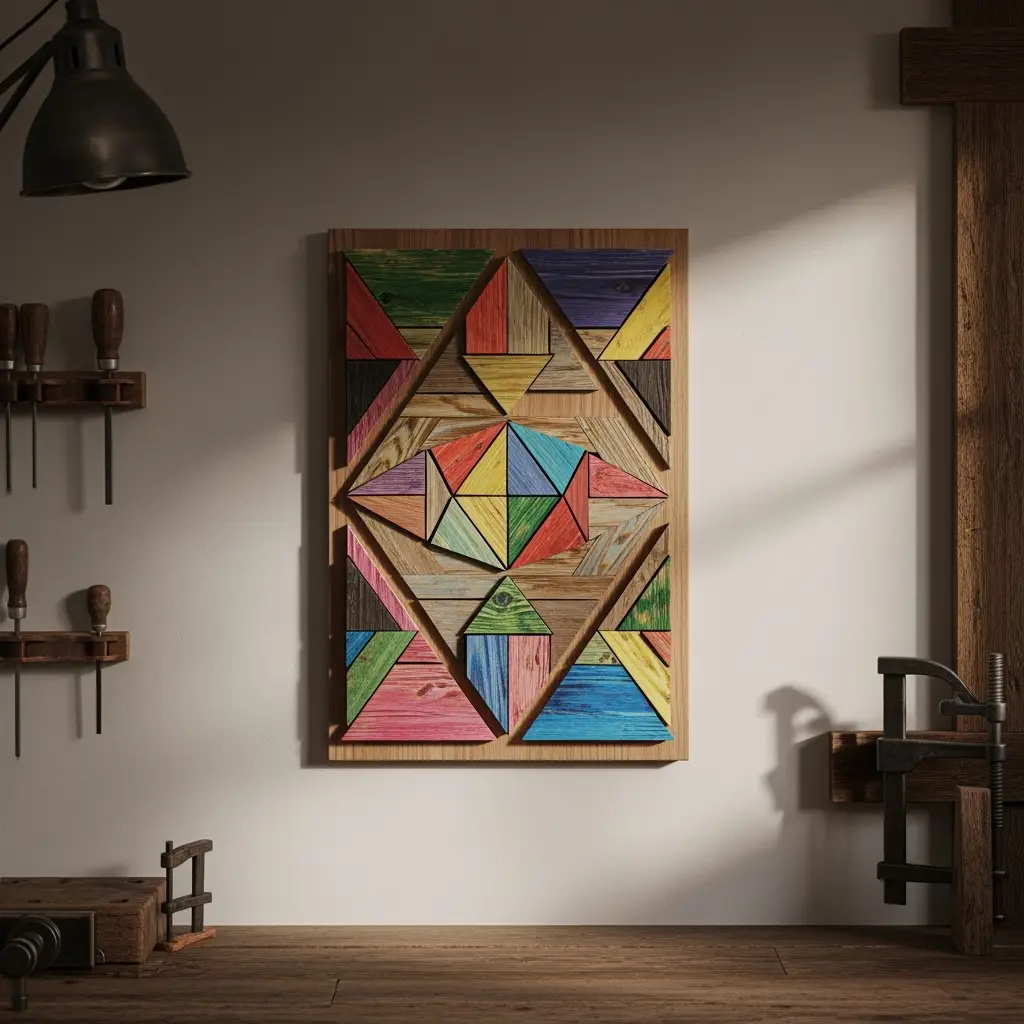
1. Geometric Wall Art
This classic style is everywhere for a reason. Arrange your wood scraps in triangles, diamonds, chevrons—you name it. Mix and match colors for a stunning modern look. Attach the pieces on a backing board, glue or nail ‘em, and mount it on your wall. Don’t be afraid to experiment with different lengths and colors!
2. Rustic Wooden Signs
Say what you wanna say! Whether it’s your family name, a cheesy quote, or “Dogs Welcome,” rustic wooden signs are a go-to scrap wood art project. Just sand, paint or stain your scrap pieces, add stenciled letters, and hang up the finished work. Easy win.
3. Mosaic Photo Frames
Gather thin slivers and small pieces of scrap. Arrange them like a patchwork quilt around a plain frame. Paint a few pieces for pop or leave them natural for a laid-back vibe. Every time you snap a cute pic, you’ll have the perfect frame ready!

4. Abstract Sculptures
Let your wild side out! Stack, glue, nail, or screw a bunch of different scraps together into a one-of-a-kind tabletop or shelf sculpture. Play with texture, height, and shape. There’s no right or wrong here—just keep building until it looks right. That’s the beauty of scrap wood art—it’s unique every time.
5. Outdoor Scrap Wood Art
Yep, you can decorate outside, too! Build a funky birdhouse, garden marker, or even a whimsical fence or trellis. Seal your project with exterior-grade finish so the weather doesn’t wreck your hard work.
Finishing Techniques: Take Your Scrap Wood Art to Pro Level
Don’t skip this part! The finish you choose totally transforms the vibes of your piece. Here’s a rundown of DIY-friendly techniques for your scrap wood art:
- Sanding: Smooths sharp edges and splinters.
- Staining: Deepens color and shows off grain patterns. Try a few sample swatches first.
- Painting: Go bold with colors or subtle with washes. Don’t overthink it—it’s supposed to be fun!
- Distressing: Rub sandpaper after painting for a weathered look. Love a bit of “shabby chic?” This is it.
- Sealing: Topcoat with poly or wax for lasting beauty—especially on outdoor scrap wood art.

Safety Tips for Scrap Wood Art Projects
Look, no art is worth a trip to the ER. Quick reminders for all scrap wood art projects:
- Use gloves when handling old/nasty wood.
- Wear goggles if you’re sawing or sanding.
- Check for hidden nails or screws—ouch!
How to Display Your Finished Scrap Wood Art
You did it! Now make sure all your hard work gets some love. Here’s some top ways to show off your scrap wood art:
- Hang art pieces above mantels, beds, or in entryways.
- Prop up sculptures on shelves or side tables.
- Add picture-hanging kits or sawtooth hangers for stability.
- Try creating a gallery wall from several small pieces for max impact.
Eco-Friendly Bonus: Why Scrap Wood Art Matters
Yeah, these projects look good, but they do good too. Every bit of scrap wood art you create helps prevent waste and reduces demand for new lumber. That’s a win for your wallet AND the planet.
- Each reused scrap equals less landfill waste.
- Reduces your carbon footprint.
- Helps foster a culture of creativity and sustainability at home.
Common Mistakes in Scrap Wood Art—and How to Avoid ‘Em
- Ignoring prep: Always sand, clean, and check for nails before getting started.
- Gluing without clamping: Wood moves—those clamps are your besties.
- Not sealing outdoor pieces: Weather is not your friend. Seal it or lose it.
- Lack of planning: Sketch out your design, even if it’s just a doodle. Saves headaches later.
Find Your Style: Popular Trends in Scrap Wood Art
Not sure what vibe you’re chasing? Here are some hot trends in scrap wood art right now:
- Boho geometric: Triangular pieces, pastel paints, exotic textures.
- Farmhouse rustic: Reclaimed wood, distressed paint, barn-style layouts.
- Minimalist: Neutral colors, simple lines, focus on grain patterns.
- Whimsical shapes: Hearts, animals, abstract forms—go wild!
FAQs About Scrap Wood Art
- Q: Can I use pressure-treated wood?
A: Not for indoor or food-contact projects. That stuff’s loaded with chemicals. - Q: What paint should I use?
A: Acrylic and chalk paints work great. Spray paint is a good quick fix, too. - Q: Is it okay to mix wood types?
A: Heck yes! Mixed wood gives your scrap wood art tons of personality.
Advanced Projects for the Scrap Wood Pro
Ready to flex your skills? Try your hand at:
- Light-up wall panels with inlaid LEDs
- Intricate marquetry using tiny scrap pieces
- Furniture accents: attach scrap wood art as headboards, cabinet fronts, or coffee table designs
Don’t be afraid to mess up—fixing mistakes is part of the fun. Each piece you create adds to your toolkit for the next go-round.
Final Thoughts: Let Your Scrap Wood Art Shine
Look, if you’ve stuck with me this far, you’re primed to start transforming leftovers into art. Scrap wood art isn’t just a craft—it’s a statement about creativity, sustainability, and pure DIY awesomeness. Dig through your scrap pile, crank up your favorite tunes, and let’s make something epic. If it doesn’t come out perfect, no stress. Every project is a step on your journey. You got this!
Share Your Creations and Get Inspired
Pop your finished scrap wood art on your socials and tag your fellow woodworker pals! Inspire someone and maybe spark a friendly project rivalry (it’s all love though, right?). Got a killer tip or a disaster story? Drop a comment and let’s keep the creativity rolling.
Now get out there and create. The world’s waiting to see your scrap wood art glow!


