
Let’s get straight to it: nothing, and I mean nothing, ruins a woodworking groove like a dull chisel. You’re ready to carve a joint, but instead of clean shavings, you’re mashing grain and riskin’ your precious fingers. If you’ve ever wondered how to sharpen chisels the right way (without turning your shop into a total mess), you’re in the perfect place. Grab your favorite drink, buckle up, and let’s slice through the confusion — after this guide, your chisels will be scary sharp every time.
Why Bother Learning How to Sharpen Chisels?
Sharpening chisels isn’t just a snobby thing old-school woodworkers brag about. It’s the game-changer for:
- Safety – A sharp chisel cuts wood, not your fingers.
- Precision – Get clean, crisp joints every time.
- Productivity – Spend less time forcing dull edges and more time woodworking.
- Tool longevity – Properly sharpened tools last a lifetime… sometimes even longer.
You can’t afford to ignore how to sharpen chisels — your projects (and knuckles) will thank you!
The 101 of Chisel Anatomy
Before we talk about how to sharpen chisels, let’s do a quick anatomy class. Y’got:

- Blade – The business end. Includes the bevel (the angled part) and the flat back.
- Bevel – Set around 25 to 30 degrees — this is the bit that actually needs sharpening.
- Back – The perfectly flat part. Trust me, even the back needs to be dead flat.
Once you know your chisel anatomy, you’re halfway to learning how to sharpen chisels like a pro.
Essential Gear for Sharpening Success
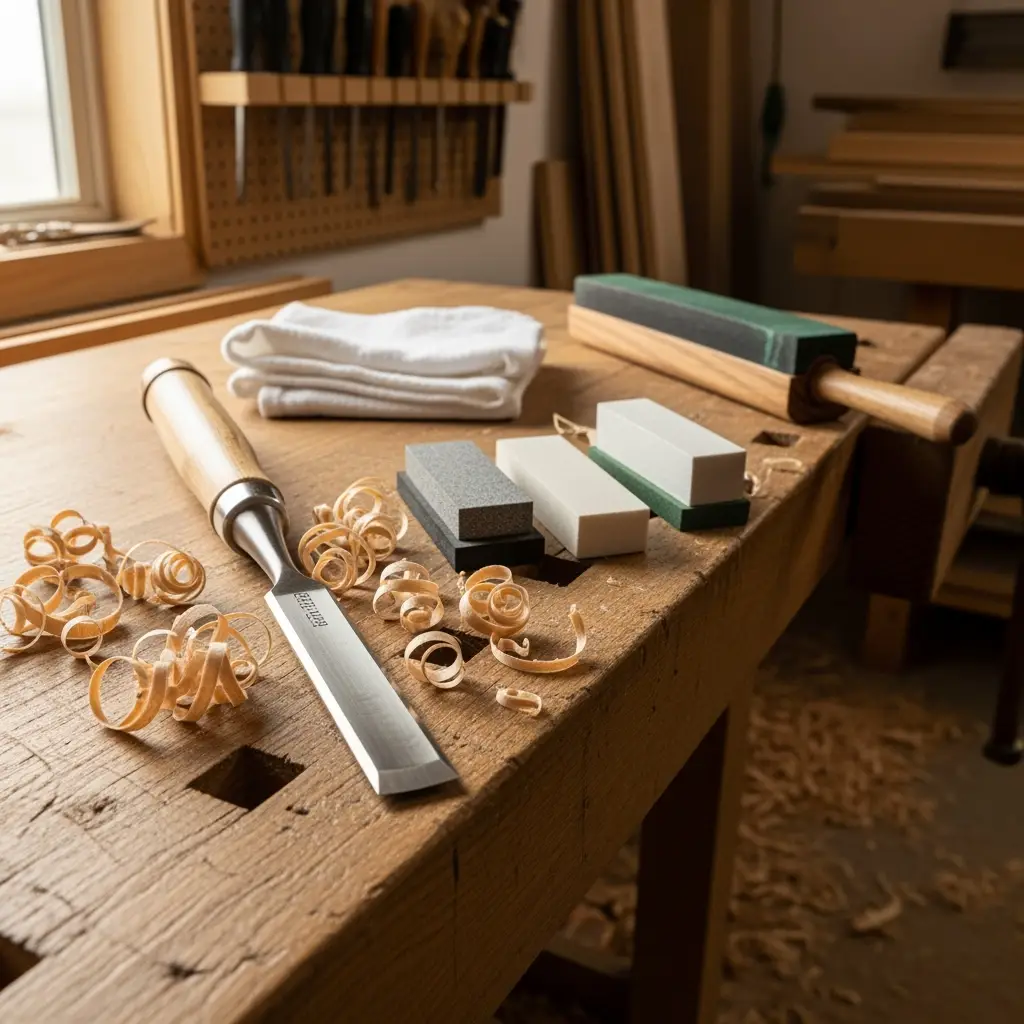
Diving into how to sharpen chisels is way easier if you have the right stuff around. Don’t worry — you don’t need to break the bank. Here’s what you need:
- Sharpening stones (whetstones, oil stones, or diamond stones)
- Honin’ guide (not essential, but makes the job so much easier)
- Honing oil or water (depending on your stone type)
- Strop (charged with polishing compound for that extra sharpness!)
- Clean rag, marker, and good lighting
From here, let’s break down the exact steps for how to sharpen chisels the right way.

Step 1: Prepping the Chisel for Sharpening
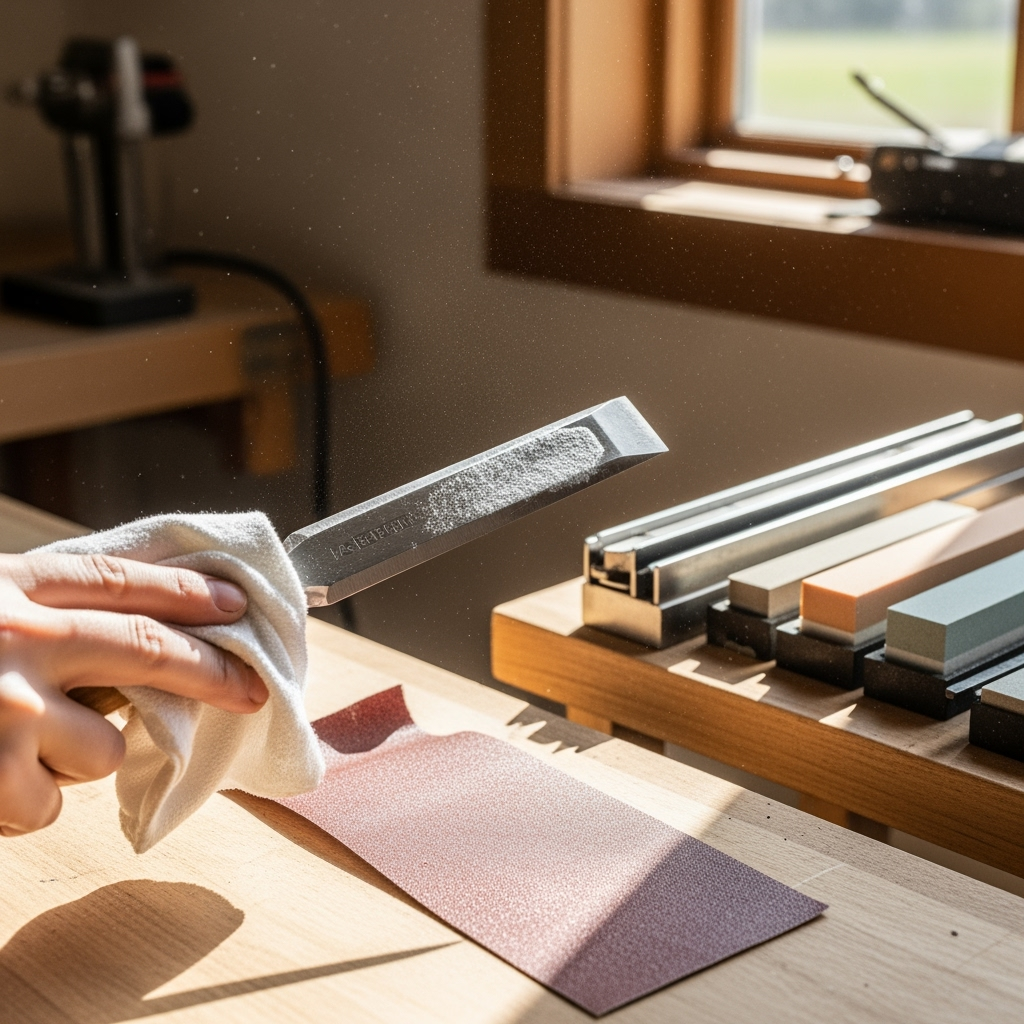
Actually, the first pro move for how to sharpen chisels is super simple: make sure your chisel is clean! Wipe off sawdust, pitch, and any annoying gunk with a rag. If there’s rust, gently remove it with some fine sandpaper. The sharper you want it, the cleaner you need to start.
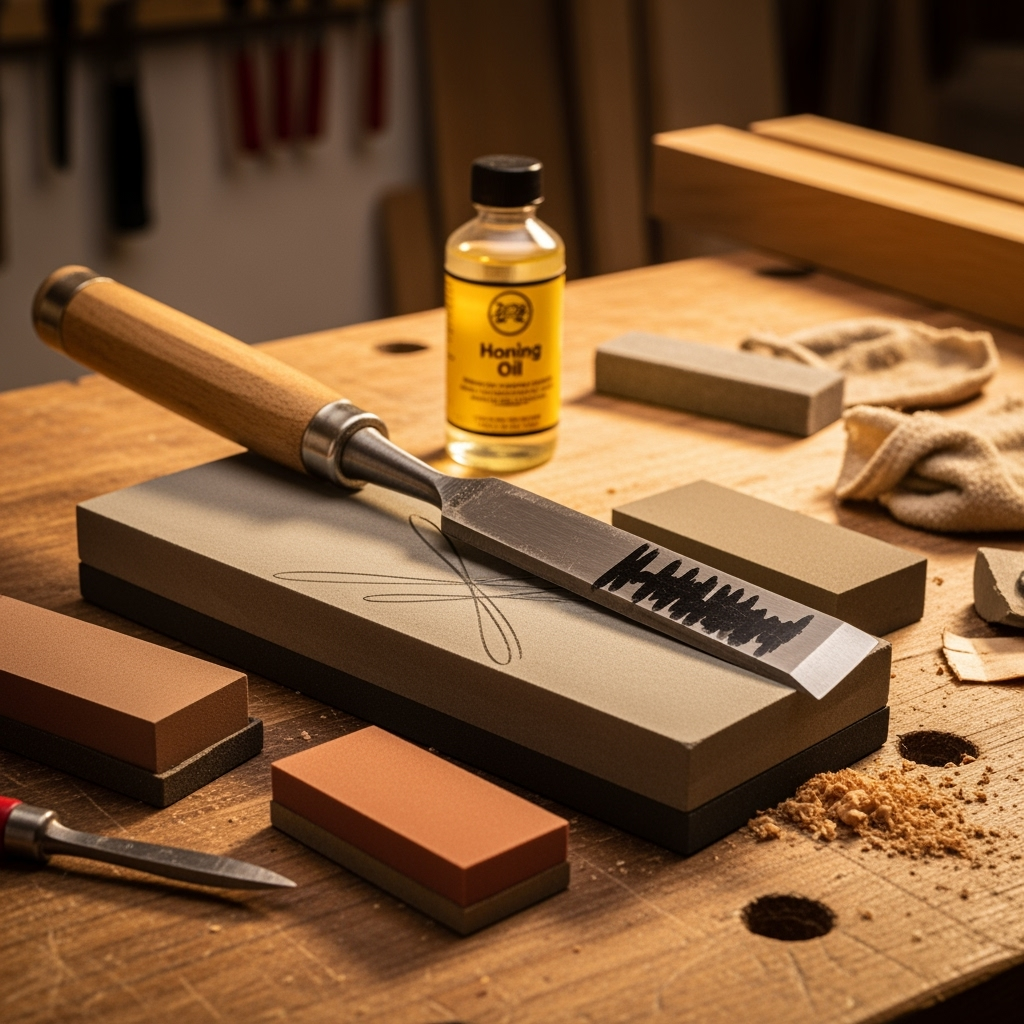
Step 2: Flatten the Back (No Shortcuts Here!)
A wicked sharp bevel is useless if the back is wavy. Place the back flat on your coarsest stone. Move it in figure eights til’ you see an even, scratchy pattern. Switch to your medium, then fine stones. Take your time — this step is everything in how to sharpen chisels.
Hot tip: Mark the back with a marker. As you polish, the disappearing ink tells you if you’re actually flattening the whole area (life saver, trust me!).
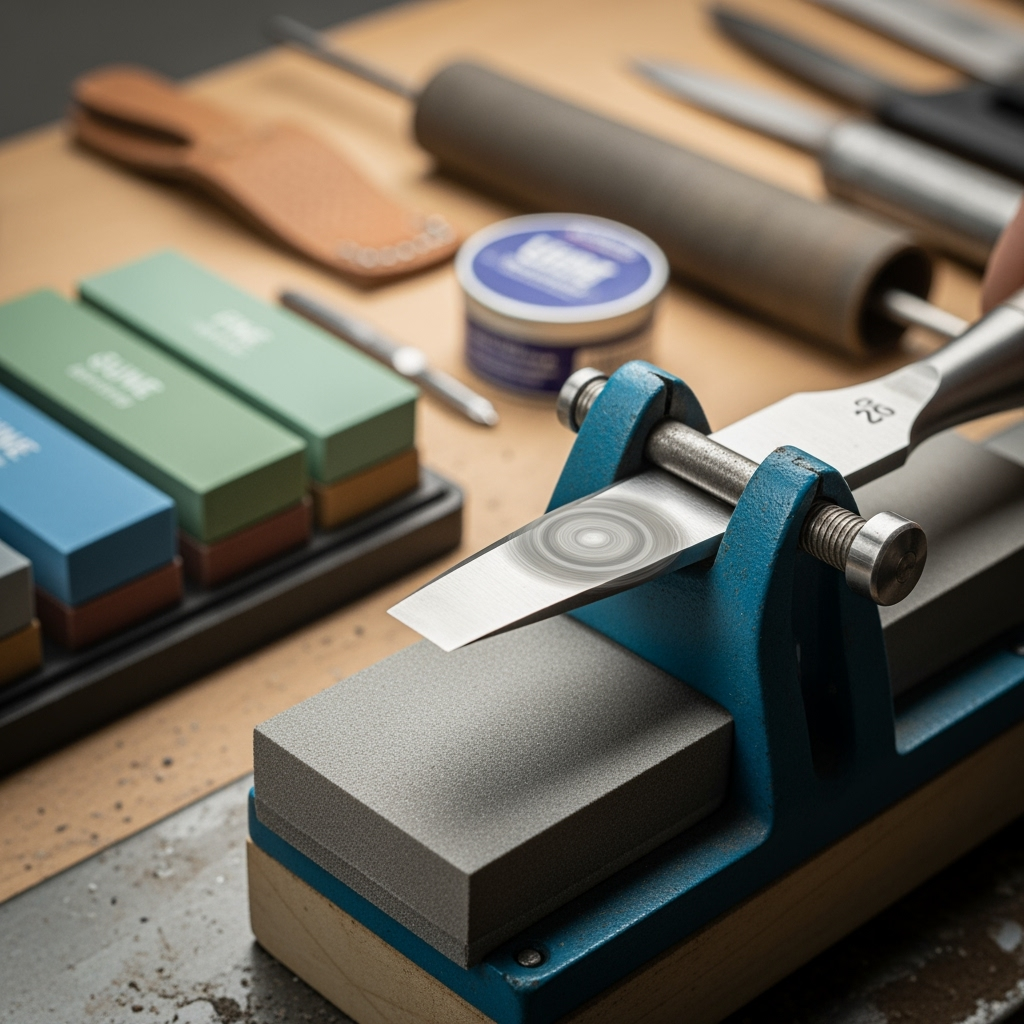
Step 3: Set the Bevel Angle
Now for the money maker. How to sharpen chisels means keeping the bevel angle stupid-consistent — that’s why a honing guide rocks. Set the chisel in the jig at about 25-30 degrees. Double check the angle (if it’s your first time, a cheap angle guide from the hardware store helps!).

Step 4: Sharpen on the Coarse Stone
Get your coarse stone ready (with water or oil if needed). With steady pressure, move the chisel back and forth, keeping the whole bevel against the stone. Don’t go off the edge! Sharpen in a figure-eight or circular motion if you’re feelin’ fancy.
After a few passes, check for a burr on the flat side. No burr yet? Keep grinding. The burr means you’re ready for the next grit and is crucial for mastering how to sharpen chisels.
Step 5: Hone the Bevel on Finer Stones
Swap to your medium, then fine, and then (if you really wanna flex) your super-fine polishing stone. Use the same motion as before, always checking that you’re maintaining that perfect angle. With each upgrade in grit, your edge is getting sharper — and your woodworking is getting better.
Step 6: Flip and Remove the Burr
Once you raise a burr with your finest stone, flip the chisel and make a few passes flat on the stone. The goal: wipe that burr right off. This step in how to sharpen chisels is what actually makes the edge razor-sharp — don’t skip it!

Step 7: Strop Like a Pro
If you want that mirror finish, finish up by stropping. That’s a fancy way to say “polish the edge on leather with a little compound.” Pull the chisel backwards over the strop (never push, or you’ll slice it up like cheese). It removes any micro burrs and gives a sweet shiny, hair-popping edge. If you’re all about how to sharpen chisels to next-level sharp, this is the secret sauce.
How Often Should You Sharpen Chisels?
Honestly, it depends on how often you use ’em and how much abuse they take. A quick rule of thumb? If your chisel won’t easily shave wood, flicks up dust instead of shavings, or feels rough — it’s time. For most folks, that’s every few hours of serious work, or at the start of every project. Make how to sharpen chisels a regular thing and you’ll save way more time in the long run.
What Can Go Wrong? (And How to Fix It!)
- Chisel won’t stay sharp: You probably didn’t flatten the back fully or kept changing angles. Back to square one, friend — patience wins.
- Weird edge shape: Uneven pressure or rolling the chisel at the end of the stroke. Keep it flat, and slow down.
- No burr forming: You aren’t hitting the edge at the right angle, or your stone’s too fine. Get coarser.
Mastering how to sharpen chisels means learning from every screw up and never rushing the process.
The Real-World Test: Is Your Chisel Sharp Enough?
There’s only one way to truly know you’ve nailed how to sharpen chisels: Try it! Here are a couple quick tests:
- Paper test: Can you slice thin paper with the chisel? If yes, you’re golden.
- Shave test: Carefully try to shave your arm hair. Sounds wild, but it works (just don’t cut yourself, ok?).
- Wood shaving: Should be whisper-thin without crushing fibers.
Advanced Tips for Sharpening Chisels Even Faster
After you get comfortable with the basics of how to sharpen chisels, here are a few power moves:
- Micro-bevel magic: Add a 2-degree steeper micro-bevel at the very edge. Quicker to sharpen later, stays sharper longer.
- Strop between projects: Often, just a few passes on the strop gets your edge back — no full sharpening needed!
- Flatten your stones: Every few uses, check your stone for low spots. A lapping plate keeps em’ flat as a pancake.
Common Myths About Sharpening Chisels (Busted!)
- Only expensive stones work: Not true! Decent hardware store stones can get blades super sharp. It’s about technique, not money.
- Powered sharpeners are better: Eh — they’re fast, but can overheat and ruin temper. For fine tools, hand sharpening is king.
- You don’t need to flatten the back: The back is half your cutting edge! No shortcuts, folks.
Sharpening on the Cheap: DIY Alternatives
You don’t need to splurge to master how to sharpen chisels. Sweet hacks include:
- Wet/dry sandpaper on glass or a tile as a makeshift stone (works shockingly well).
- Homemade strop: Just glue leather to a wood block, rub in compound, and go to town.
If your budget’s tight, you can totally get razor sharp results with these methods. Don’t let fancy gear hold you back!
Sharpening Chisels: a Skill That Stresses Less
The more you practice how to sharpen chisels, the faster and smoother it all becomes. At first, expect a little wobblin’, a few mistakes, and plenty of “is it sharp enough yet?” questions. You’ll get there. Stick with it, and soon you’ll be sharpening chisels without stopping to think (and, not to brag, but you’ll have the best-looking joints in the shop!).
Maintaining That Razor’s Edge
Keep that sharpness alive with these habits:
- Always clean your chisels after use
- Use the right chisel for the right job (don’t lever stuff!)
- Quickly strop before/after every session
- Store sharp chisels in a roll or rack, not loose in a toolbox (seriously saves your hands)
Make how to sharpen chisels a part of every project prep, and you’ll always be cutting clean, not hacking away like a caveman.
How to Sharpen Chisels: Conclusion
If you’ve ever felt frustrated with rough joints, mashed edges, or tools that just don’t feel right — now you know why. The big secret? How to sharpen chisels is surprisingly simple, kinda soothing, and crazy satisfying once you get the hang of it.
From prepping the blade, flattening the back, honing at the perfect angle, to finishing with a strop, every step stacks up to a tool you’ll actually love to use. No need for fancy gear or magic tricks. It’s all about slow, calm repetitions.
So roll up those sleeves and try it today! You’ll never wanna use a dull chisel again. If you’re stuck or got questions, drop a comment — let’s keep your shop sharp and projects epic!


