
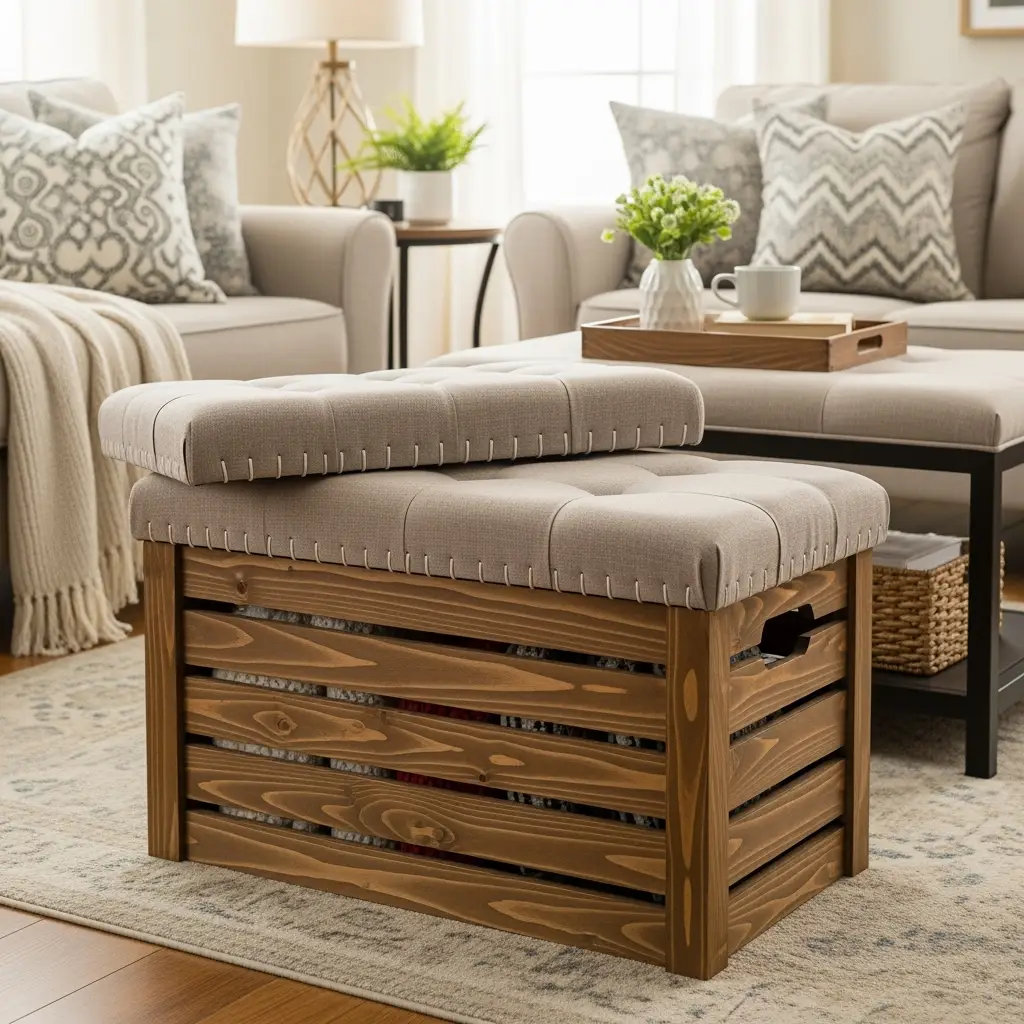
Ever tripped over scattered shoes, rogue toys, or stacks of books in your living room? Yeah, been there! If you’re craving an easy way to conquer clutter and reclaim your floors, you’ve landed in the right spot. Let’s talk about the DIY storage ottoman—your soon-to-be secret weapon for turning chaos into calm.
Why a DIY Storage Ottoman Rocks
- Multi-Function, Baby: It’s not just a pop of style – it’s a seat, a table, AND a secret stash spot. Who knew one dude could wear so many hats?
- Money Saver: Store-bought ottomans can be outrageously pricey, right? Making your own DIY storage ottoman saves you big bucks, plus you get to brag about the craftsmanship.
- Custom Style: Forget cookie-cutter! With your DIY storage ottoman, every detail is up to you. Match your vibe, your space, your wild ideas.
- Sense of Accomplishment: There’s something unbeatable about sitting back on your creation, high-fiving yourself every time you stash stuff inside.
Gathering Your DIY Storage Ottoman Materials
Before you start, let’s make sure you’ve got your arsenal ready. Building a DIY storage ottoman is easier than most folks think—as long as you’ve got the right beginner woodworking tools & materials.
- One large wooden crate or plywood (make your own box if you wanna go super custom)
- High-density foam (for that cloud-soft seat)
- Batting and fabric (the fun part! Pick colors and textures that scream “you”)
- Staple gun & staples
- Screwdriver, wood screws, and hinges (cause, you gotta open that lid)
- Paint or wood stain (if you wanna jazz up the wood even more)
- Optional: Wheels/casters (for rolling your DIY storage ottoman wherever the party calls)
Step-by-Step Guide: Building Your Dream DIY Storage Ottoman
Ready to jump in? Here’s the breakdown of how to make a DIY storage ottoman that’s sturdy, stylish, and totally practical.

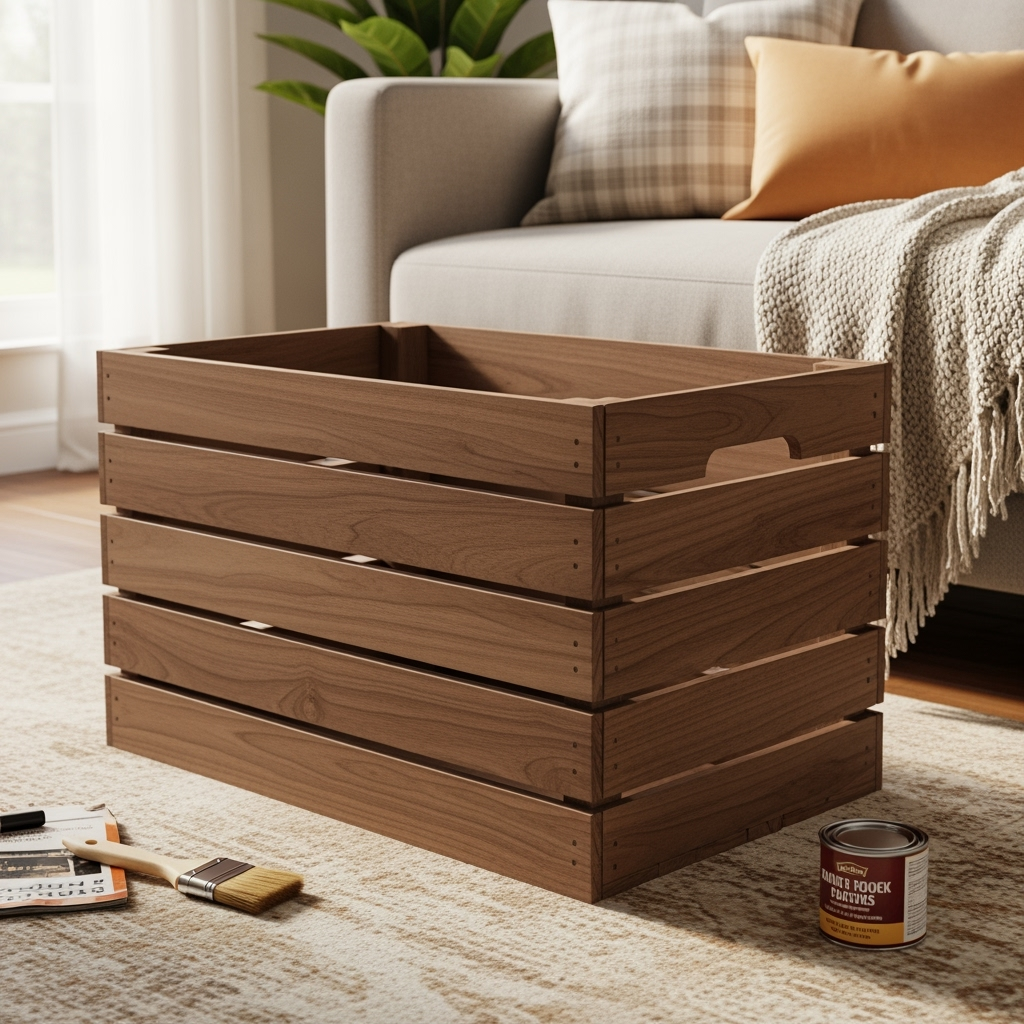
Step 1: Prep the Base of Your DIY Storage Ottoman
Start with your wood crate or box. Sand down any rough edges, wipe off dust, and, if you want, paint or stain it. Let it dry – don’t rush it, trust me. Your DIY storage ottoman should look and feel top-notch from the get-go.
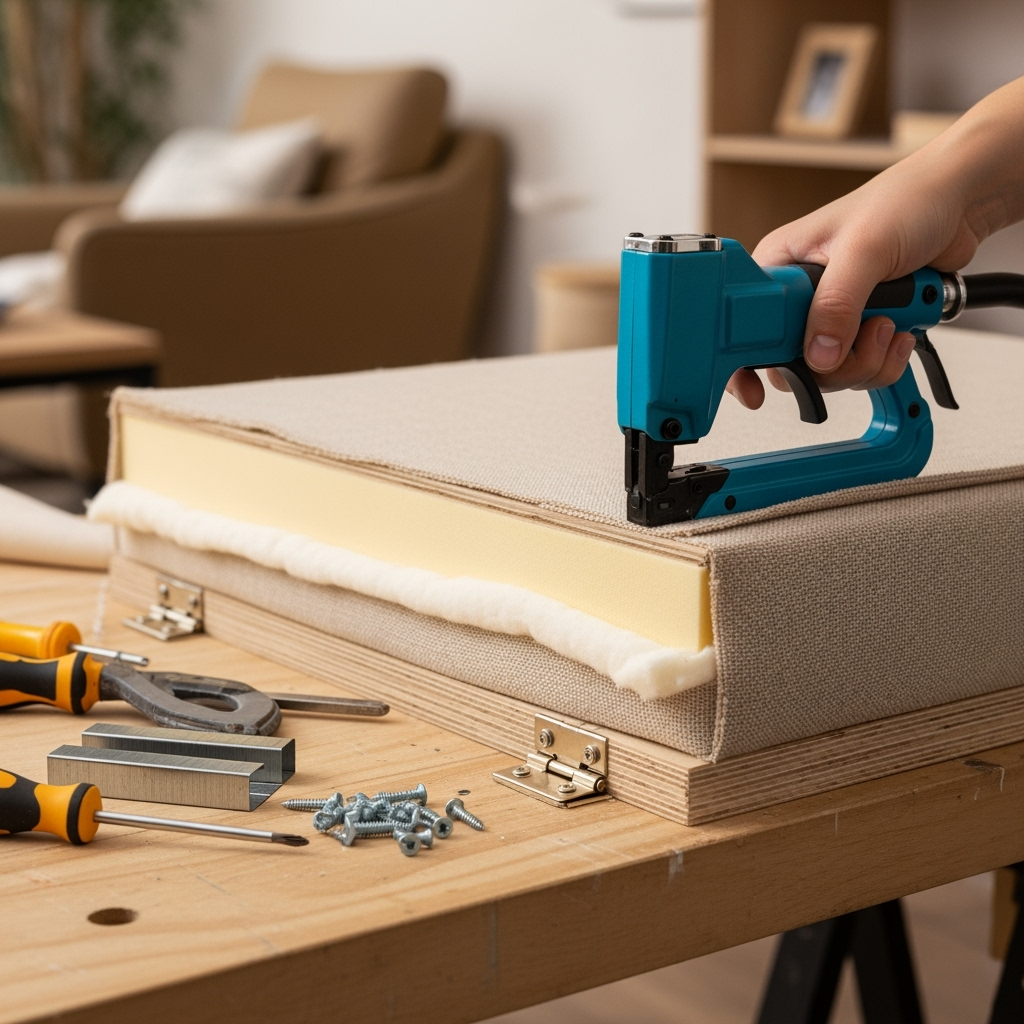
Step 2: Construct the Top (Cushy Style)
On the plywood that’s destined for your ottoman top, lay the foam, batting, and your chosen fabric. Fold & wrap the fabric tightly, kinda like wrapping a present. Use your staple gun to attach the fabric to the underside of the board so nobody sees those stapled bits when the DIY storage ottoman is strutting its stuff.
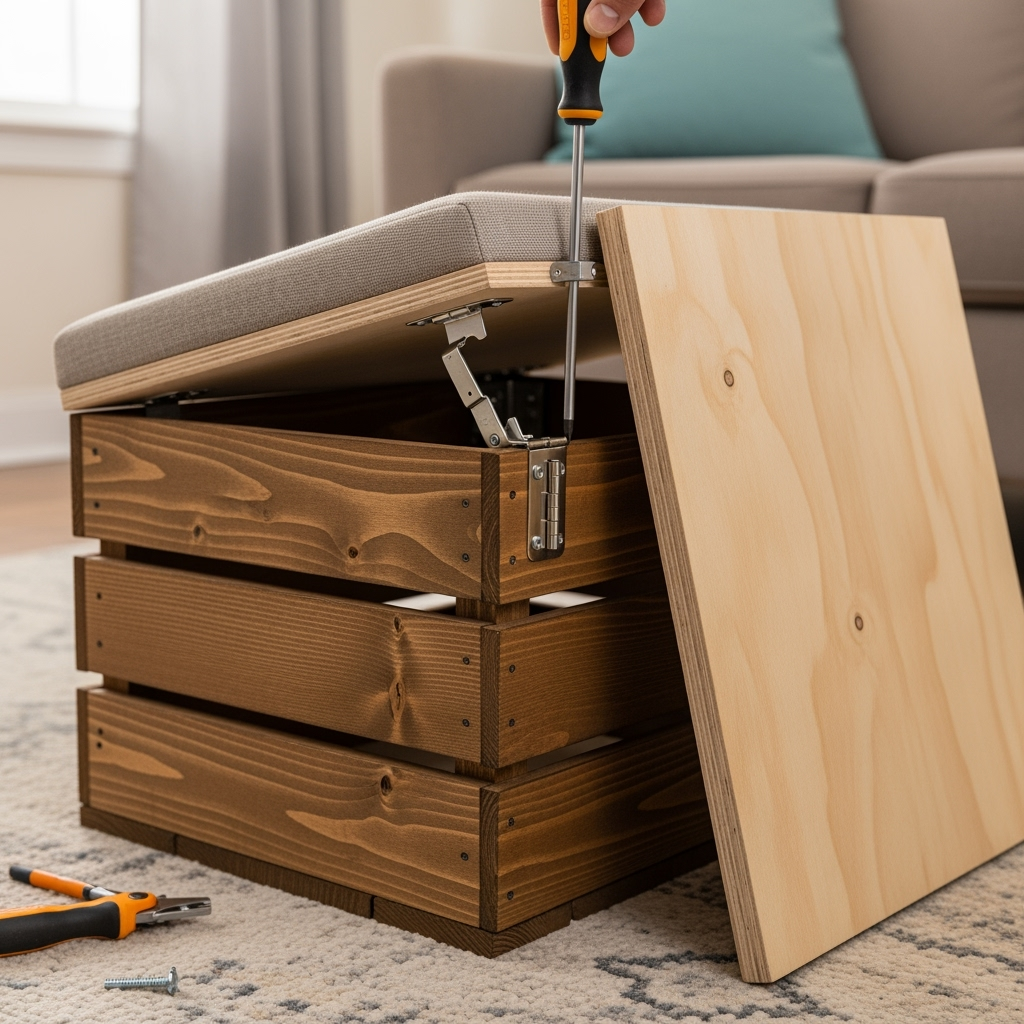
Step 3: Attach Hinges for a Smooth Opening
Grab your screwdriver and hinges. Center your lid on the box, then attach hinges so the top pops open easily. Test it a couple times to make sure it isn’t janky. Your DIY storage ottoman should open with zero snags.

Step 4: Optional–Add Wheels
If you plan to roll your DIY storage ottoman around, now’s your moment to screw caster wheels to the bottom. That way, you can slide it wherever you need a seat or a footrest!
Step 5: Bask in the Glory of Your DIY Storage Ottoman
You did it! Stash blankets, books, or anything else inside, plop your feet up, and enjoy your brand new furniture. Invite some friends over and let them marvel at your DIY storage ottoman—‘cause flexing is part of the fun, right?
Pro Design Tips for an Epic DIY Storage Ottoman
- Mix Fabrics: Try faux leather for easy wipe-downs or bold patterns for a visual punch.
- Add Nailhead Trim: Fancy it up on the cheap!
- Tuft the Top: Buttons + tufting = major luxury hotel vibes for your DIY storage ottoman.
- Use Stencils: Add monograms or cool designs to the side panels for a custom look.
Awesome Uses for Your DIY Storage Ottoman
This trusty piece isn’t just for hiding your clutter. Here’s how a DIY storage ottoman can seriously amp up your space:
- Footrest: After a long day, plop down and kick up those dogs.
- Coffee Table: Place a tray on top for snacks, drinks, or chill decor.
- Kid’s Toy Box: Outta sight, outta mind! Plus, no stubbed toes at night.
- Entryway Bench: Sit down to tie your shoes and stash scarves or hats right underneath.
- Pet Bed: Top it with a blanket for your furry pal and store toys inside!
- Guest Room Hero: Fill it with linens, towels, or even board games.
Common Mistakes (And How to Dodge Them)
Messing up a DIY project is pretty normal—hey, nobody’s perfect! But if you wanna keep things on track, here’s how to swerve the classic screwups folks make with their DIY storage ottoman:

- Wobbly Hinges: Use heavy-duty hardware and double-check your measuring before you drill.
- Floppy Top: Cheap foam gets squished fast, so pick dense stuff for that pro finish.
- Sloppy Corners: Take your time stapling the fabric – no rush jobs, buddy!
- Choosing the Wrong Size: Double measure your space before you start building your DIY storage ottoman so you don’t end up with a monster blocking your doorway.
- Going Too Bold With Fabric: Statement fabrics are awesome, but think about stains and how much use the DIY storage ottoman will get. Sometimes simple is best for the long haul.
Where to Buy Materials for Your DIY Storage Ottoman
Not sure where to start hunting? Most big box hardware stores and craft shops will have the basics for your DIY storage ottoman. Online deals can be clutch too—sometimes you score high-density foam way cheaper on the web. Need upcycled parts? Local FB Marketplace or thrift stores can cough up killer crates and wood bits just asking for a second chance.
Budget Breakdown: How Cheap Can You Go?
Let’s talk cash. The beauty of a DIY storage ottoman is you set the price tag. Scavenge at home for fabric or wood scraps and you could build one for under $40. Going upscale with velvet, fancy legs, and designer foam? It might run $120+. Still, way cheaper (and way more satisfying) than buying new off the showroom floor. Plus, your DIY storage ottoman doesn’t have that generic, anybody-could-own-it look.
Making DIY Storage Ottoman Kid-Friendly
Have little monsters at home? No worries. Safety is clutch for a DIY storage ottoman, so safety tips for woodworking:
- Use soft, rounded corners (nobody wants a forehead bruise)
- Install slow-close hinges to stop finger pinches
- Choose durable, washable fabrics that can take the messiest kids
A DIY storage ottoman means you get the best of both worlds: grown-up style and kid-proof strength.

Frequently Asked Questions about DIY Storage Ottoman
How long does it take to build a DIY storage ottoman?
Depends on your hustle and your tools—most folks crank one out in a weekend, maybe even an afternoon if you’ve got help. Sanding, painting, and fabric drying eat up most of the time, so plan for breaks!
Is building a DIY storage ottoman hard?
Nah. If you can wield a screwdriver and a staple gun, you’re good. Precision helps but you don’t need to be Bob Vila or anything.
Can you use a DIY storage ottoman outside?
Sure… with the right prep! Pick weather-resistant fabric & paint, and seal any wood to keep water out. Your DIY storage ottoman might just become the star of your deck or patio.
How much weight can a DIY storage ottoman hold?
If you use thick enough plywood and solid build methods (don’t skimp on screws!), most DIY storage ottomans can support 200 lbs or more for seating.
Next-Level DIY Storage Ottoman Ideas
- Add Internal Dividers: Keep stuff sorted with simple plywood pieces inside.
- Lighting: Put a little battery-powered LED with a motion sensor inside so it lights up when opened.
- Personalized Labels or Engraving: Woodburn your initials or use a paint pen for custom flair.
- Double-Decker Storage: Create a little shelf inside for even more room!
DIY Storage Ottoman Maintenance Tips
- Vacuum the fabric or brush it off once a week
- Spot clean stains ASAP to prevent long-term damage
- Tighten up screws every few months for a wobble-free experience
- Swap the fabric cover every year or two when you wanna change things up – fresh look, zero effort
Why DIY Storage Ottoman Beats Store-Bought Any Day
- Cheaper AND tougher
- One-of-a-kind creation
- Fits your exact space and style needs
- Feels a lot more personal – every scratch = a story you made
Conclusion: If you crave a dual-purpose furnishing solution that declutters your room, showcases your personality, and lets you flex your crafty skills, a DIY storage ottoman is a no-brainer. Get creative, put your own spin on it (heck, add some secret compartments if you want), and enjoy the satisfaction every time you stash, sit, or style. Don’t be surprised if your friends beg you to make them one too! 🚀


