
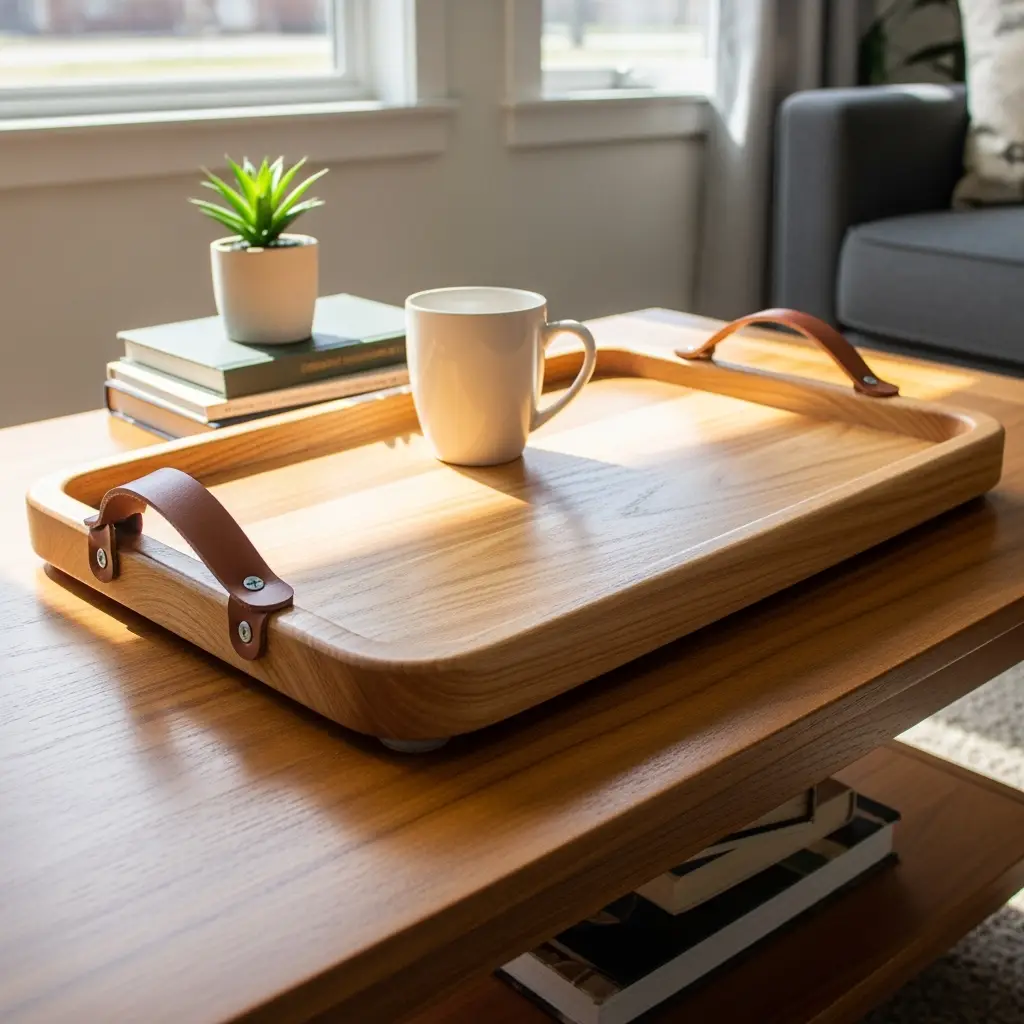
Raise your hand if you’ve ever wanted to impress your buddies, family or just yourself with a custom-made DIY serving tray, crafted by your own two hands? Yeah, I’m right there with ya! There’s nothing like rolling up to a brunch, backyard BBQ, or cozy Netflix night with an elegant, quirky, or downright show-stopping tray that screams, “Heck yeah, I made this!” Whether you’re a seasoned woodworker or, like me at first, tend to hammer your thumb more than nails, this epic guide to DIY serving tray projects is packed with ideas, tips, and step-by-step wisdom so you can whip up a tray that’ll turn heads every dang time.
So, go ahead, grab a mug of coffee, prop up your feet, and let’s dive deep into the wild and wonderful world of DIY serving trays!
Why a DIY Serving Tray is Totally Worth It
Alright, before we bust out the wood glue, let’s break down why making a DIY serving tray rocks. First off, they’re hella useful. Transport snacks from kitchen to couch like a boss, organize your morning coffee ritual, or give your vanity a glow up. But here’s the real flex: a DIY serving tray lets you show off your own personal flair. You set the vibe, you pick the materials, and you shape the whole dang project. Plus, these bad boys make top-tier gifts (bonus points if you add a cheeky message or a cool handle).
- Budget-friendly: You control costs and can even upcycle wood scraps
- Unique style: No cookie-cutter stuff — yours is custom, baby!
- Skill-building: Every project gives you new woodworking tricks to flex
- Gift potential: Instantly heartfelt, 100% original
Getting Your DIY Serving Tray Project Rolling
Before you dust off your saw or start raiding grandma’s garage, let’s chat about the absolute basics. For any killer DIY serving tray, there are a few things you gotta line up first. No stress, though — it’s way more fun than homework.

Pick Your Wood Wisely
Wood is like the heart of your DIY serving tray. Oak and maple are super sturdy and will outlast your morning coffee habit, but pine and cedar give off rustic-chic vibes for days. You can also use plywood if you want to keep it budget and lightweight; just seal it up good so it lasts. Don’t sleep on upcycling old furniture or leftover wood from other projects — it’s green and always tells a cool story!
- Maple – Clean, smooth finish and ultra-durable
- Pine – Great choice for casual, farmhouse trays
- Oak – Hefty, timeless, a bit fancy if you’re feeling it
- Plywood – Affordable and holds up with proper sealing
- Barnwood or pallet wood – For that trendy, rugged look
Essential Tools for Your DIY Serving Tray
You don’t need to drop a fortune at the hardware store, promise. The coolest thing about making a DIY serving tray is that your toolbox can be super basic. Here’s what you should have locked and loaded:
- Circular saw or hand saw (for slicing your wood to size)
- Sander or sanding block (nobody likes a splintered tray!)
- Measuring tape and pencil (measure twice, cut once, right?)
- Wood glue (stays strong, zero mess)
- Screws or nails (depends how classic or modern ya wanna go)
- Paint brushes or foam rollers (for finishes, stains & topcoats)

Don’t Forget Awesome Handles
Handles can make or break a DIY serving tray! They’re not just for carrying; they’re for style points, too. Swing by your local hardware store, thrift shop, or even home decor aisle for:
- Leather straps (screwed or riveted in place)
- Old cabinet pulls or drawer handles (vintage, chic, or industrial)
- Rope or twisted cord (nautical, earthy, or whimsical)
- Branch slices (a literal touch of nature!)
Step-by-Step: Build Your First DIY Serving Tray
Alright, let’s stay real — the idea of building your first DIY serving tray might sound epic or intimidating (or both). Don’t worry, fam, I’ve got you covered with an easy-peasy, can’t-mess-it-up blueprint to get the party started. Let’s get sawdusty!
1. Choose Your Size (Golden Rule: Function First!)
Start with the size: think of what you’ll actually serve on it. If you like to go big with snacks or coffee runs, aim for something about 16″ x 24.” Small space? Try 12″ x 18.” Ultimately, your DIY serving tray should fit wherever you wanna use it most (coffee table, bed, patio, you name it).
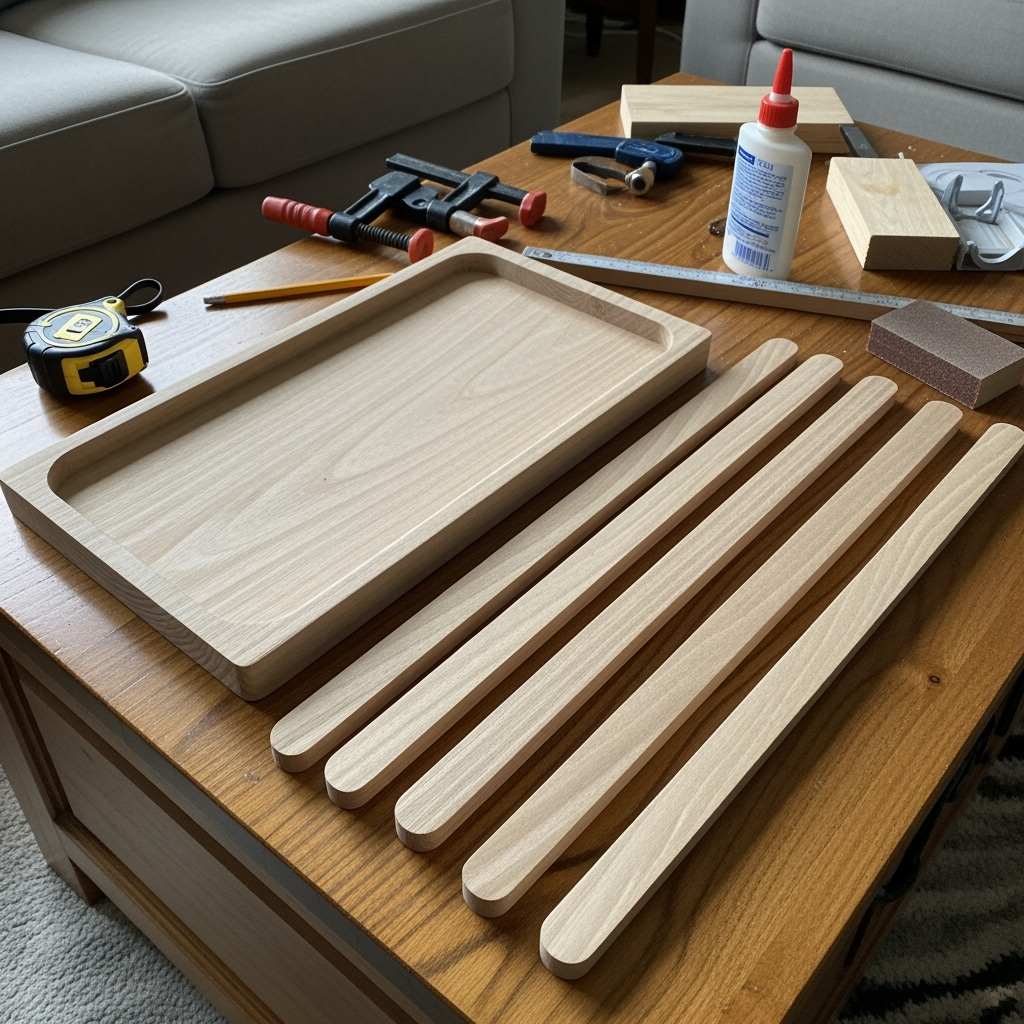
2. Cut Your Base & Sides
Take your wood (or plywood) and cut out the base of your tray. For a super basic tray, you want one flat rectangle and four narrow side strips. Sand all your cut pieces to avoid splinters — don’t skip this step, trust me, it’s a real finger saver.
- Pro tip: Round the edges a bit with your sander for a pro finish.
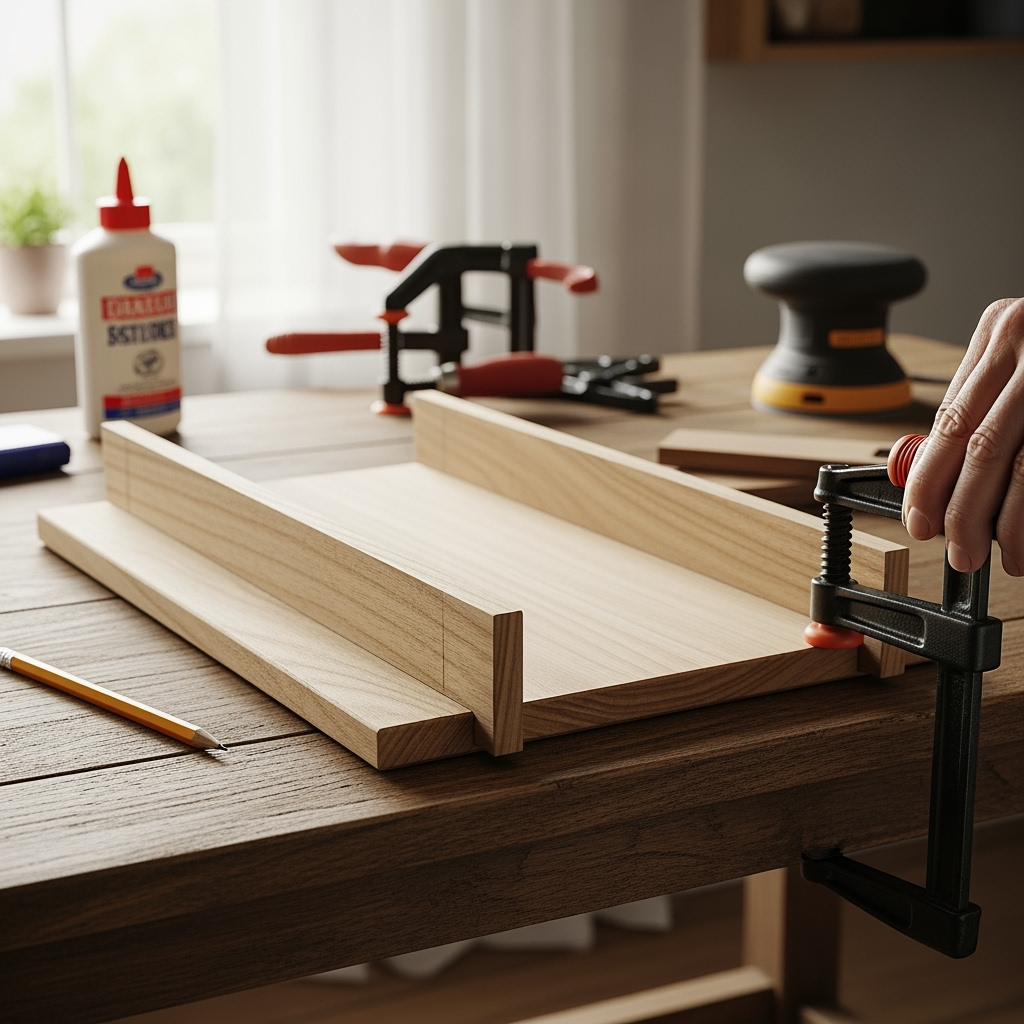
3. Attach the Sides
Slap a bead of wood glue along the edge of your tray base and hold those side strips in place. Clamp them if ya got clamps, or carefully nail or screw them from the base up into the sides for extra security.

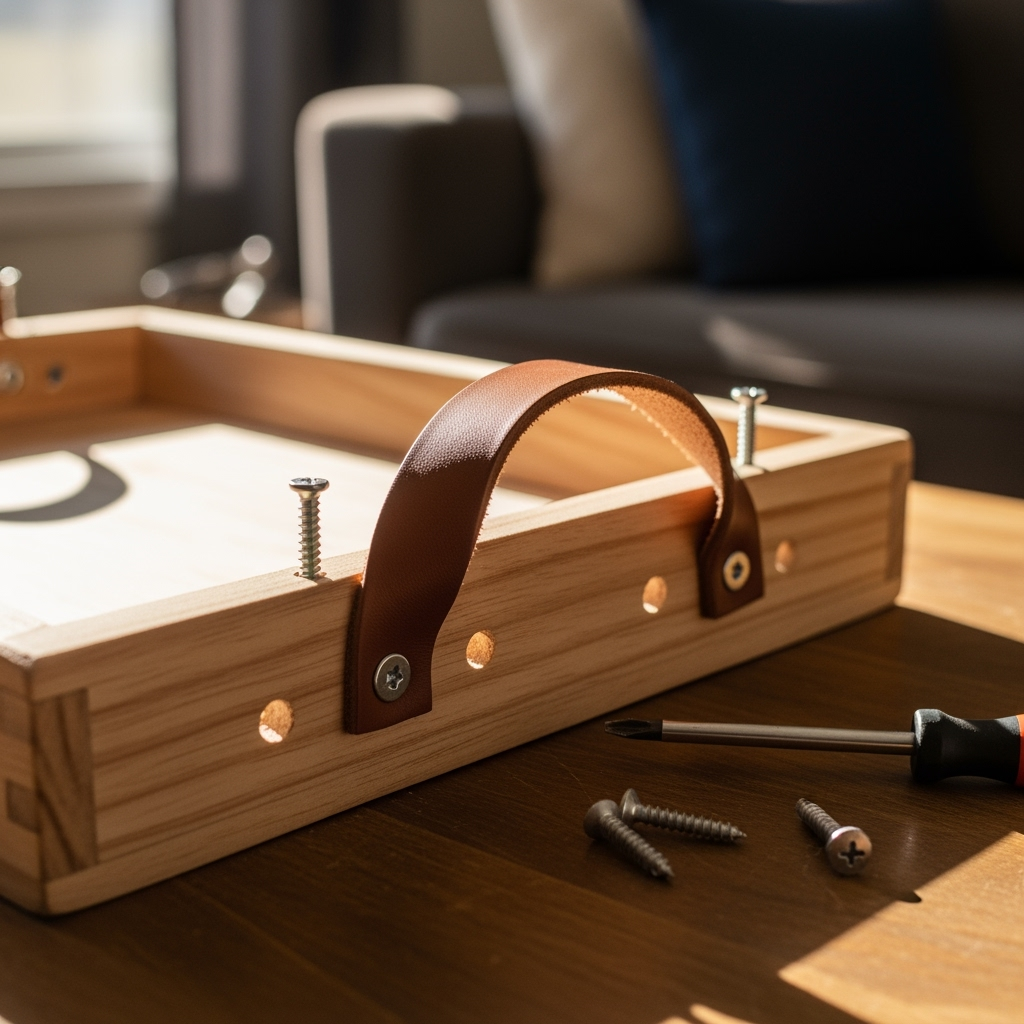
4. Drop in Handles
This is your chance to shine! Space your handles evenly, pre-drill holes to avoid splitting the wood, then screw or glue handles right where you want ‘em. If you’re using rope or leather, use sturdy knots and reinforce with glue, seriously.
5. Sand & Finish (Stain, Paint, or Both!)
Before you go wild with color, do another round of light sanding to catch any rogue rough spots. Then, pick your finish:
- Stain: Brings out the grain in wood, super classic look
- Paint: Brights, pastels, or even bold black for a mod twist
- Decoupage: Slap on fab wallpaper, maps, or pics under a layer of clear seal
- Sealers: Water-based polyurethane for durability (food-safe is always smart!)
Creative DIY Serving Tray Ideas for Every Vibe
Once you’ve built one, you’re officially a DIY serving tray pro, and trust me, you’ll wanna make more. Here’s a quick brainstorm on some wicked cool tray styles you can totally DIY at home:

- Minimalist Modern: Use glossy white paint, slim brass handles, and zero fuss.
- Rustic Farmhouse: Distress your paint, use chunky wood, and sand just enough for that lived-in feel.
- Vintage Upcycle: Revamp old picture frames or window sashes. Add a mirrored or wallpaper base.
- Boho Chic: Go wild with bright stencils, macrame handles, or even glued-on beads for extra flair.
- Industrial: Metal handles, dark stains, rough edges — super edgy, Mad Max style.
- Coastal Vibes: Weathered wood, sea-colored stains, and rope pulls.
Next-Level: Customizing Your DIY Serving Tray
If you’re ready to go beyond the basics, customize the heck out of your next DIY serving tray! Some fun tricks to jazz things up include:
Inlay or Epoxy Resin Magic
Want something that pops? Get creative with inlay — set small stones, dyed wood pieces, or metal strips right into the tray base. If you’re brave, pour a shallow layer of epoxy resin over embedded art, fabric, or even pressed flowers for a table-protecting, glass-like finish.
Pyrography (Woodburning) Art
Nothing says “one-of-a-kind” like custom burned designs, monograms, or doodles on your tray. Grab a simple woodburning kit (they’re easy and cheap online!) and let your imagination go wild. Practice first on scrap though, just in case. Nobody wants a lopsided cat or wonky lettering, ya know?
Stencil & Paint Techniques
Love bold patterns or inspirational quotes? Lay down a stencil, dab on acrylic paint, and peel for instant drama. Stripes, chevrons, or even animal prints are absolutely dope additions to your DIY serving tray.
Hardware Hacks
Handles don’t have to be boring. Look for:
- Repurposed belt straps (for a rugged statement)
- Knobs or hooks used as pull handles
- Antique drawer pulls (scour flea markets!)
DIY Serving Trays for Special Occasions
These trays aren’t just for serving lemonade or cheese puffs (though, let’s face it, that’s important). Make special occasion trays to amp up your next gathering:
- Holiday-themed trays: Think pumpkins for fall, snowflakes for winter, or hearts for Valentine’s Day.
- Birthday trays: Stick on numbers, confetti paint, or space for cupcakes.
- Wedding or anniversary trays: Carve initials, paint dates, or embed memorable photos under resin.
Troubleshooting: Common DIY Serving Tray Mistakes (and Fixes!)
Okay, real talk — even seasoned DIYers make a few face-palm mistakes now and then. Here’s how to dodge the most annoying DIY serving tray goofs:
- Tray is wobbly? Double check all your side attachments. Loose screws? Add glue, or swap for longer nails.
- Splinters galore? Sand, baby, sand! Use finer grit—like 220—to finish off.
- Handle holes splitting? Drill pilot holes smaller than your screws. Or, use epoxy for added strength.
- Paint or stain looks patchy? Apply in thin, even coats, and let each dry fully before adding another. Sand lightly between coats for buttery smoothness.
- Tray warping? Use only dry wood — moisture ruins everything. Always seal your finished tray, especially if it’ll live near water (plants, drinks, etc).
Finishing Touches: Making Your DIY Serving Tray Last
After all your hard work, you wanna make sure your epic new tray stands the test of time (and spills). Once your masterpiece is dry, add a last protective coat. Polyurethane works wonders and comes in glossy, semi-gloss, or matte — totally your pick.
Finally, add some soft felt pads on the bottom corners. Protects your table or ottoman from scratches, and gives your tray a floating look (fancy stuff, right?).
FAQs: DIY Serving Tray Troubleshooting and Tips
- Can I put food directly on a DIY serving tray? Use a food-safe sealer (like a cutting board oil) if you want to serve charcuterie or snacks straight on the surface.
- Can I make a DIY serving tray without power tools? Yup! A basic handsaw and some elbow grease gets the job done; don’t forget the sandpaper.
- How do I clean a wood tray? Wipe spills right away, use a damp cloth, and avoid soaking your tray.
- Ideas for lightweight trays? Use thin plywood, skip heavy handles, and avoid chunky embellishments.
Where to Show Off Your Finished DIY Serving Tray
Your DIY serving tray doesn’t just belong in the kitchen. Here’s some inspo for using it all around the house (or on your next adventure):
- On your coffee table with a candle and decor stacked up for instant class
- As a portable workspace—hello, breakfast-in-bed days
- Display art, succulents, or even turn it into a catch-all drop spot in your entryway
- Host outdoor picnics or backyard parties and show off your creation
- Take killer Insta shots and tag the woodworking DIY community (trust, there’s a cult following for trays!)
Wrapping It Up: The World of DIY Serving Trays Awaits
If you’re looking for a woodworking project that’s friendly for newbies, deeply customizable, and honestly just dang practical, a DIY serving tray is where it’s at. Plus, you get the thrill of wielding saws and sanders (or just a handsaw and glue gun if you’re keeping it chill). Whether you want to stun at your next party, give a jaw-dropping gift, or just upgrade your daily routine, the DIY serving tray is your ticket.
So — what are you waiting for? Grab your wood, pick those handles, plug in your sander (or flex your biceps with manual sanding), and get to crafting. Your hand-crafted DIY serving tray will be the showpiece of your room, your secret sauce for serving up style, and a seriously awesome story to tell. Happy building, and may your snacks safely travel from kitchen to couch in DIY glory!


