
If your backyard’s lookin’ cluttered and your patio furniture cushions are usually battling the elements, boy, do I have a fix for you. Today, we’re talking about the super practical, always-handy DIY outdoor storage box—that one project that’ll get your yard organized, boost your outdoor style, and save you cash at the same time. Sounds epic, right? Trust me, by the end of this guide, you’ll be itching to bust out your toolbox and upgrade your outdoor game!
Why Every Home Needs a DIY Outdoor Storage Box
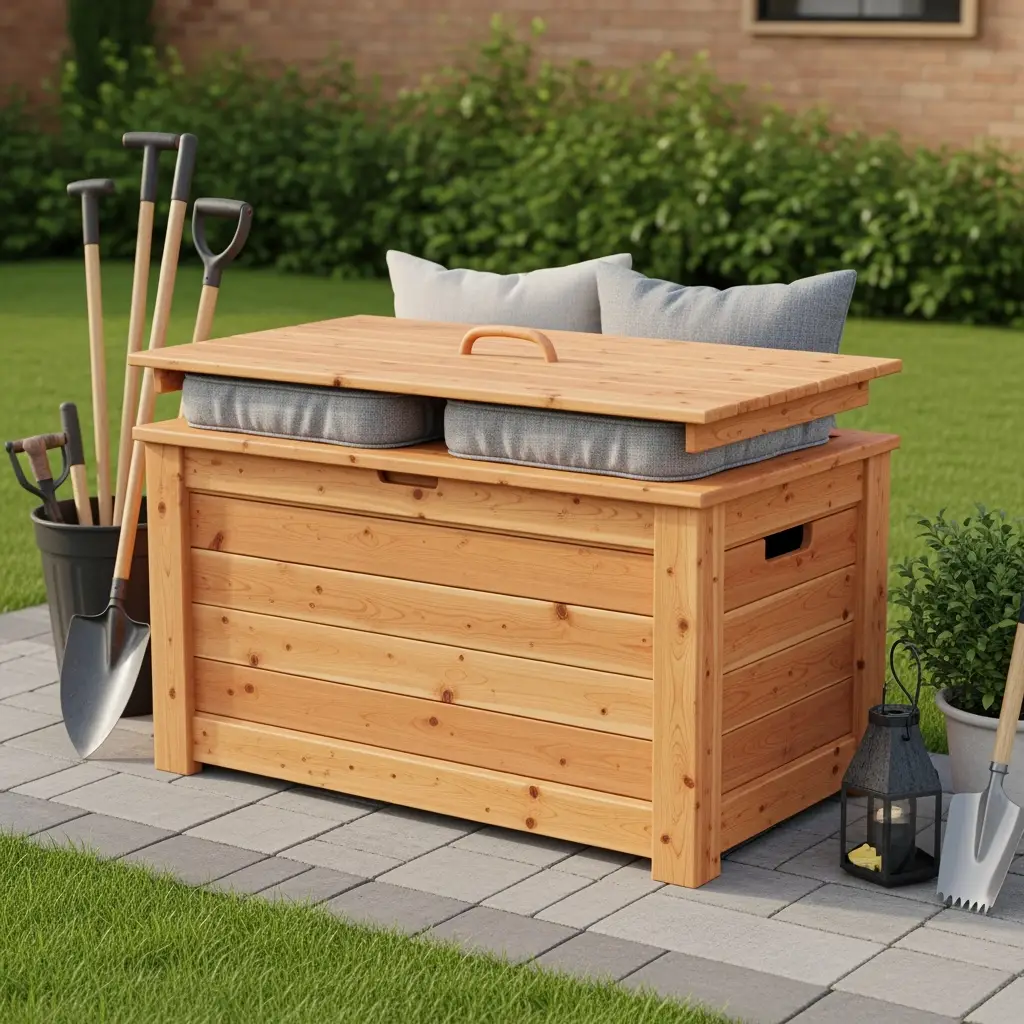
Look, life gets messy, and so do backyards. Between kids’ toys, gardening gear, pool stuff, and grill supplies, it’s wild how fast outdoor spaces get taken over. That’s where a slick DIY outdoor storage box steps in. It’s your secret weapon for taming chaos and protecting your stuff from rain, sun, and nosy critters. Plus, building it yourself means you score that custom look, perfect dimensions, and serious bragging rights—all without breaking the bank. Sound good? Heck yeah!
The Real-World Benefits
- Clutter Control: Toss in all those random tools, toys, and hoses for a cleaner yard vibe.
- Weather Protection: Keep your outdoor cushions dry and safe from sun-fade or mildew.
- Multi-Purpose: Use it as extra seating, a coffee table, or even a place to chill with a drink.
- Custom Fit: Build it just the right size for your space, whether it’s a tiny balcony or sprawling patio.
- Cost Savings: Skip the overpriced store models and invest in durable materials you pick yourself.
So, with all that in mind, let’s deep-dive into making your own DIY outdoor storage box—from planning to that sweet final reveal!
Planning Your DIY Outdoor Storage Box: What You Need To Know
Before you hammer a single nail, you gotta plan it out. Trust me, a little strategy now saves major headaches later. Here’s what to figure out first:

Step 1: Decide On Your Box’s Job
What will your DIY outdoor storage box mainly be for? Some classic uses include:
- Storing pool toys
- Protecting patio cushions
- Hiding garden tools
- Stashing firewood (raised off soggy ground!)
Knowing the purpose will guide the size, style, and materials you choose for your DIY outdoor storage box.
Step 2: Measure Your Space
Grab your tape measure and scope out where your box will go. Good storage means access and fit—it shouldn’t block traffic or look weirdly huge/small. Jot down width, length, and max height you can get away with. Most folks find something around 4 feet long, 2 feet wide, and 2 feet tall works out nicely, but heck, it’s DIY—you do you!

Step 3: Pick Materials For The Win
The longer your DIY outdoor storage box lasts, the less you’ll face doing repairs in crappy weather. Here’s what’s tried and true:
- Cedar or Pressure-Treated Pine (for all-weather durability and a classic look)
- Composite Deck Boards (if low-maintenance is your jam)
- Plywood with Exterior-Grade Finish (cheaper, but seal it up good!)
- Stainless Steel Fasteners (prevent rust & prolong box life)
Got a color scheme or favorite stain? Now’s the time to plan so your DIY outdoor storage box blends right in or makes a bold statement, up to you!
How To Build A DIY Outdoor Storage Box: Step-By-Step Guide
Alright, roll up those sleeves, because now we’re gettin’ hands-on with your DIY outdoor storage box project. We’ll walk you through each step, plus some hacks you’ll be stoked to know!
Step 1: Gather Your Tools & Materials
New to woodworking? Check out this best beginner woodworking tools guide to get started.

- Cordless drill/driver
- Circular saw (or handsaw but good luck lol)
- Measuring tape and square
- Exterior wood glue
- Galvanized screws
- Sander or sanding block
- Paint or wood sealer (optional)
- Materials from your pick (cedar, pine, etc.)
- Hinges and handle for the lid
- (Optional) Pneumatic nail gun for speed!
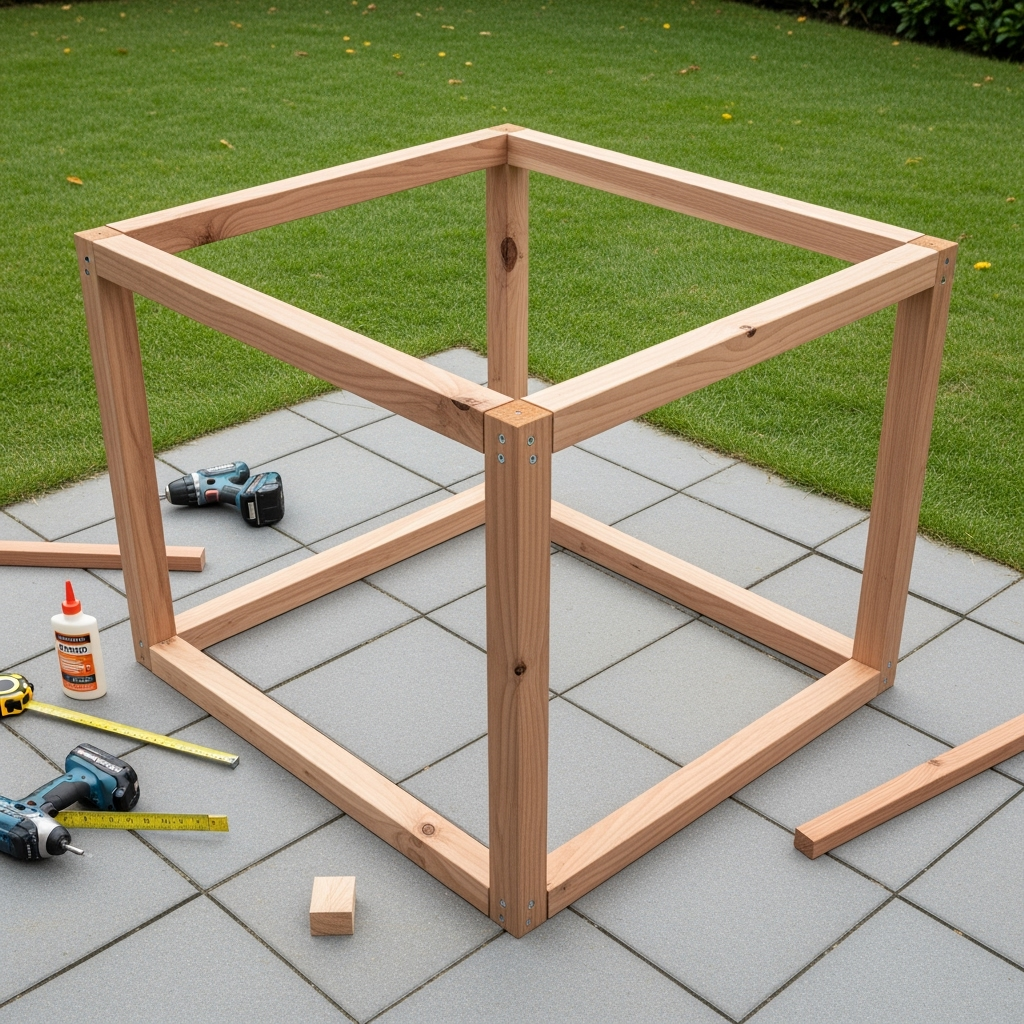
Step 2: Build the Frame
Start with the bones. Cut your 2x2s or 2x4s (depends how beefy you want it) for the frame: two each for the front/back and sides, plus four corner posts. Lay them flat, drill pilot holes to avoid splits, and assemble with screws. Make sure it’s square!
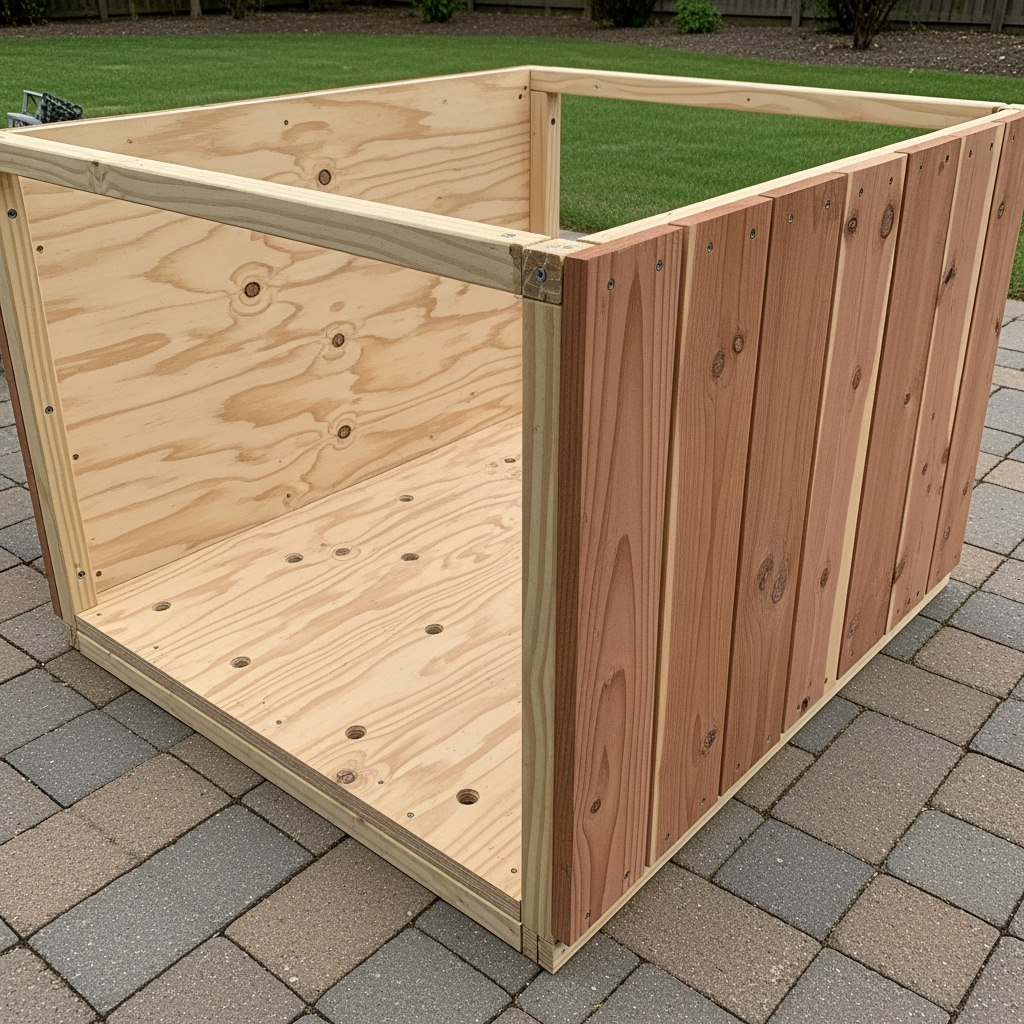
Step 3: Attach the Base Panels
Use exterior plywood or planks for the box’s base. Pre-drill and screw these into your bottom frame—this way your DIY outdoor storage box can actually hold weight without sagging. Extra tip: Drill a few small drainage holes in the bottom panel if you’re in a rainy zone. Mildew? Not today!
Step 4: Add Side Panels
Next up, clad that frame with whatever boards or panels you picked. Space them out for a rustic look or butt them up tight for a modern vibe. Tack ‘em on with exterior screws, making sure everything’s square. (Twisted box = annoyed you, so go slow and measure twice.)
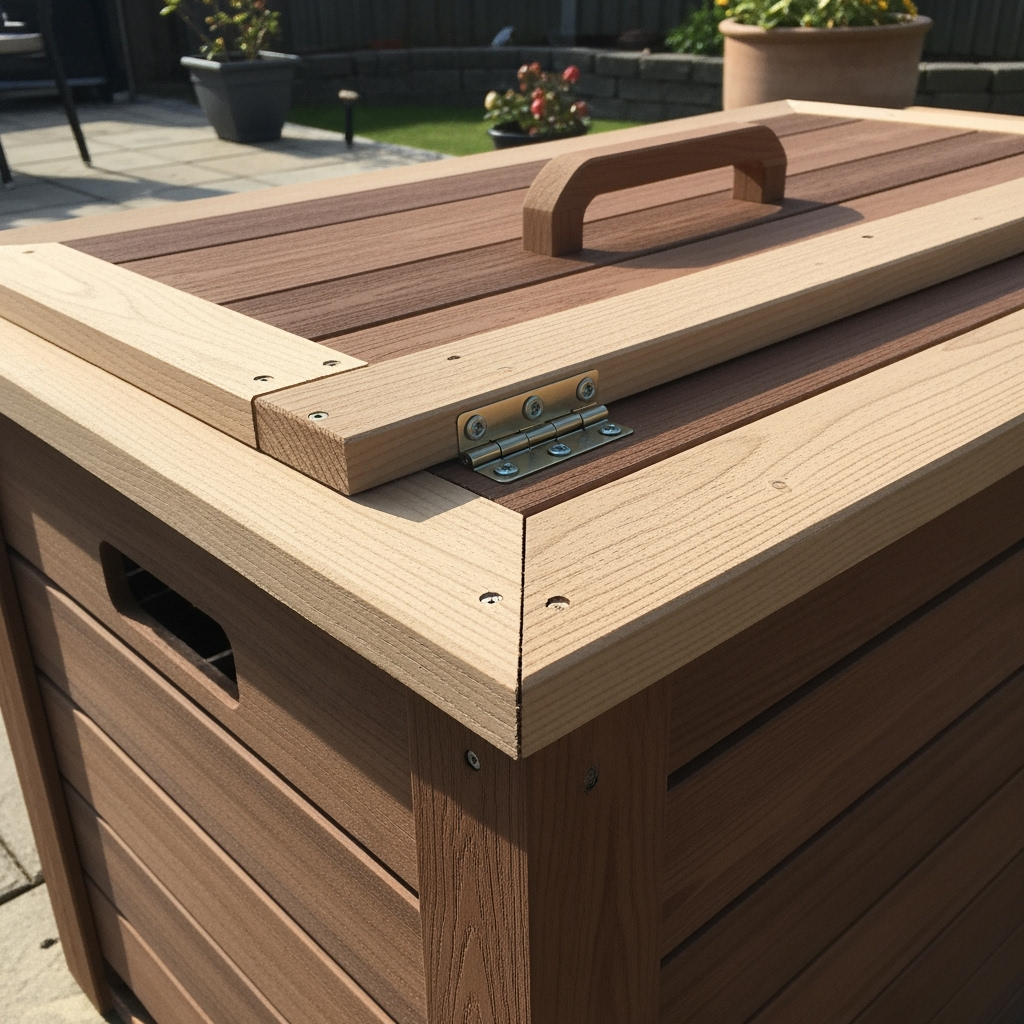
Step 5: Build & Attach the Lid
Measure and cut your lid so it slightly overhangs the box—rain will roll off instead of sneak right in! Build a simple frame and top it with wood or composite. Screw in your hinges, making sure they align so the lid swings easily. Add a handle or rope loop; it’s a small touch that makes using your DIY outdoor storage box so much better.

Step 6: Finish and Protect Your Box
Sand down rough spots, fill any screw holes, and wipe clean. Then, choose your finish:
- Clear Outdoor Sealer: For a natural wood look.
- Exterior Paint: For bold color and added protection.
- Deck Stain: For that pro, wood-rich finish.
Let everything dry, then—bam!—your DIY outdoor storage box is ready for action.
Styling Your DIY Outdoor Storage Box
Don’t just plop your box down and call it quits. With a little flair, your DIY outdoor storage box becomes an outdoor feature, not just a utility. Try these style boosters:
- Top with a weatherproof cushion and it’s an extra seat.
- Throw on some stenciled numbers or painted designs for personality.
- Mount simple feet or casters for mobility and to prevent rot.
- Grow a mini-herb garden in planters right on the lid corners.
For extra seating ideas, you might also love this DIY storage ottoman tutorial.
Extra Features to Take Your DIY Outdoor Storage Box From Good To Epic
Your DIY outdoor storage box should work hard for ya. Consider these upgrades:
- Gas Strut Hinges: Keeps the lid open (no crushed fingers!).
- Weather Seals: Use foam tape for a super-waterproof lid.
- Internal Dividers: Organize by tool type or keep sports gear separated from cushions.
- Ventilated Sides: Lattice or slats mean stuff dries out quickly after rain.
- Locks: Store valuables or keep animals out with a simple padlock or hasp.
Maintaining Your DIY Outdoor Storage Box
If you want your DIY outdoor storage box to stick around for years, a little maintenance is key. Here’s what to keep an eye on:
- Check every season for splinters, loose screws, or warping.
- Touch-up paint or sealer as needed, especially the lid.
- Clean out debris and make sure drainage holes stay clear.
- Store it on pavers or feet to avoid ground contact and rot.
Yeah, sometimes it’s boring to do upkeep, but trust—your hard DIY work deserves it!
Frequently Asked Questions About DIY Outdoor Storage Boxes
- What’s the best wood for a DIY outdoor storage box?
Cedar, redwood, and pressure-treated pine slay at resisting rot. Composite boards are great for low-care too. - How do you keep a DIY outdoor storage box waterproof?
Good construction, overhanging lid, and sealing edges with exterior caulk or weatherstripping equals dry gear. - How big should I make my box?
For cushions and pool supplies, 4’ x 2’ x 2’ is typical, but measure your stuff and your spot for a dialed-in fit. - Can I sit on my DIY outdoor storage box?
If you attach your lid solidly and build a beefy frame, your box is perfect for double duty as extra seating!
Real User Tips: Taking Your DIY Outdoor Storage Box To The Next Level
- “Add hidden wheels to your DIY outdoor storage box, especially if you wanna move it around for parties.”
- “Label inside dividers so kids know where to put things = way less mess.”
- “Install motion solar lights inside your DIY outdoor storage box for late night gear grabs.”
- “Use marine hinges if your climate is crazy wet—no rust ever!”
- “Mount a magnetic strip for tools on the inside lid—super handy for gardening.”
Estimated Costs and Time Commitment
- Materials: $100-250 depending on wood/composite choices
- Tools: Assume you have the basics; rentals add about $20-40
- Time: Expect a solid weekend for newbie DIYers; skilled folks can rock it out in 6-8 hours
Think about all those store-bought models that cost way more, look generic, and are rarely as tough as your custom DIY outdoor storage box. Building your own rocks!
Final Thoughts: Your DIY Outdoor Storage Box is More Than Just A Box
At the end of the day, a DIY outdoor storage box is like your yard’s best friend. It keeps things organized, dry, and looking freakin’ sharp while doubling as seating and a focal point for your patio space. Plus, every time you use it, you get that fist-pump feeling from building it yourself. Whether you’re hiding away messy outdoor cushions, wrangling kids’ toys, or storing that barbecue grill gear, nothing beats the custom fit, durability, and personal flair a DIY outdoor storage box brings to your home.
So what are you waiting for? Snap a pic of your messy yard, dream up your ideal DIY outdoor storage box, and get building. Your future, organized self will thank you like crazy. Now get out there and make some sawdust!


