

Alright, let’s get straight to business—so you’re dreaming of a DIY kitchen island build, huh? Trust me, you’re about to unleash some serious magic on your kitchen. If you’ve been scrolling Pinterest or watching those home improvement shows with a bit of envy, it’s your turn now! Building your own kitchen island isn’t just for pros (promise!). With a little elbow grease, patience, and my handy tips, anyone can pull off a solid DIY kitchen island build that totally wows guests and makes daily life easier.
Why a DIY Kitchen Island Build is a Game Changer
If your current kitchen struggles with counter space or storage, a DIY kitchen island build can turn things around fast. Not only does it offer a fresh focal point, but it also provides extra workspace, a place for quick meals, and bonus storage. The cool part? You custom build it to fit your lifestyle—whether you need drawers for utensils, shelves for cookbooks, or even a sweet little breakfast bar.
But let’s be honest, the best part of a DIY kitchen island build is the bragging rights. Like, “Yeah, I built that!” Kinda feels good, right?
Planning Your DIY Kitchen Island Build Like a Pro
You don’t start swinging a hammer without a plan, trust me. A rock-solid DIY kitchen island build always begins with thoughtful planning.

- Assess Your Space: Measure your kitchen. Place painter’s tape on the floor where you want the island. Make sure you’ve got enough room to walk around comfortably—you don’t wanna play kitchen Tetris every time you cook.
- Define Your Island’s Purpose: Is your DIY kitchen island build for extra prep space, serving, storage, or all three? Maybe you want to sneak in a wine rack?
- Pick Your Style: Modern? Rustic? Farmhouse? The sky’s the limit. Looking at other DIY kitchen island build projects online can spark loads of inspo.
- Jot Down Must-Haves: Outlet for appliances? Wheels for portability? Overhang for stools? Make a list before you start the actual build.
Choosing Materials for Your DIY Kitchen Island Build
So you wanna flex your DIY skills, but picking the right materials makes or breaks your DIY kitchen island build. Here’s a look at the main components:
- Base: Most folks use plywood, MDF, or hardwood for the frame. Reclaimed cabinets are a cool upcycling move!
- Countertop: Butcher block is classic, but you could go for granite, tile, stainless steel, or even concrete if you’re feeling bold.
- Finishes: Paint or stain to match your vibe. Sandpaper, primer, handles, and hinges for finishing touches.
Don’t forget screws, brackets, casters (if you want it moveable), and wood glue. Hate extra trips to the store as much as I do.

Must-Have Tools for a Smooth DIY Kitchen Island Build
You don’t need expensive gadgets, but a handful of basic tools go a long way in any DIY kitchen island build:
- Drill and bits
- Circular or table saw
- Tape measure
- Hammer and mallet
- Clamps
- Level
- Sander or sandpaper
Pro tip: A pocket-hole jig is seriously clutch for making tight, hidden joints.
Step-by-Step Guide: Your DIY Kitchen Island Build Blueprint
Let’s break down the process into clear, actionable steps so anyone—from newbies to seasoned DIYers—can tackle a DIY kitchen island build:
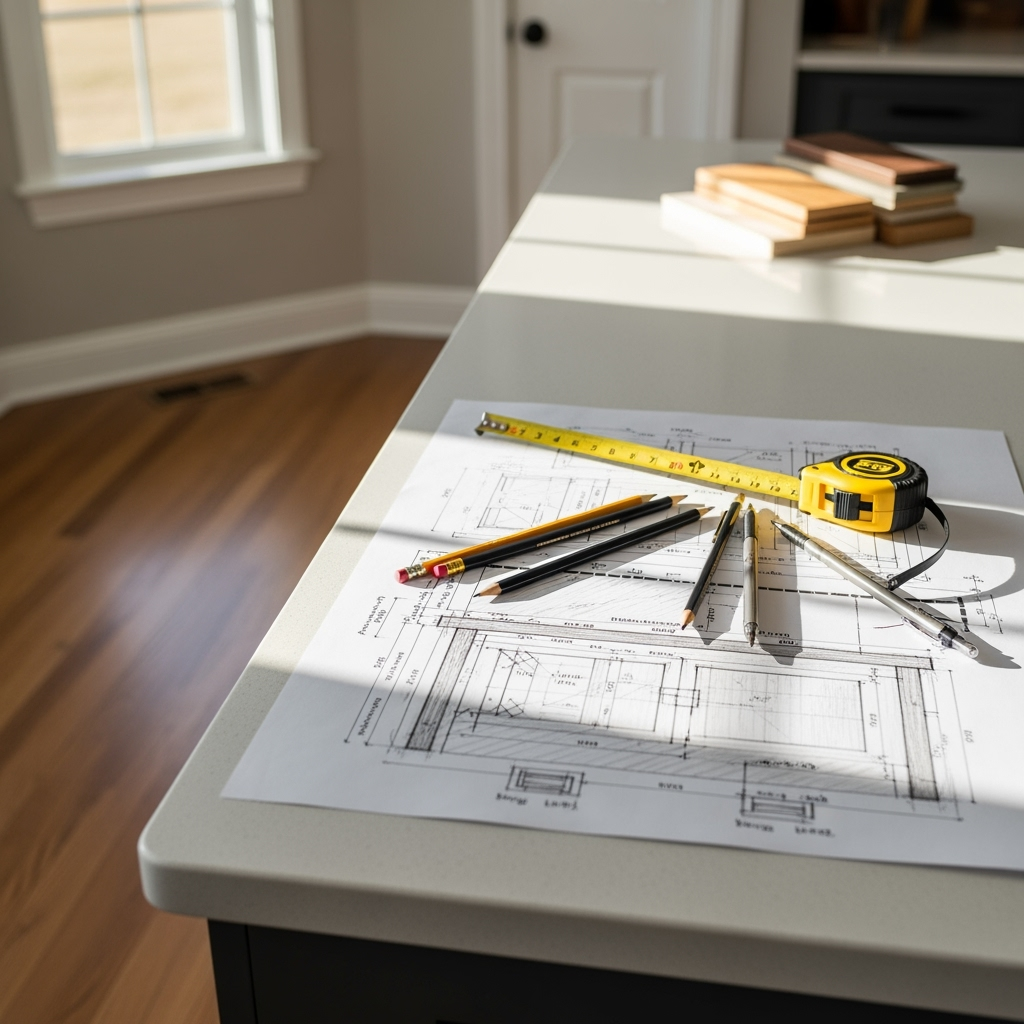
1. Sketch and Plan Your DIY Kitchen Island Build
- Draw a detailed sketch showing length, width, and height.
- Include any shelves, cabinets, or appliance cutouts you want in your DIY kitchen island build.
- Decide if you want the island to match your cabinets or stand out as a feature piece.
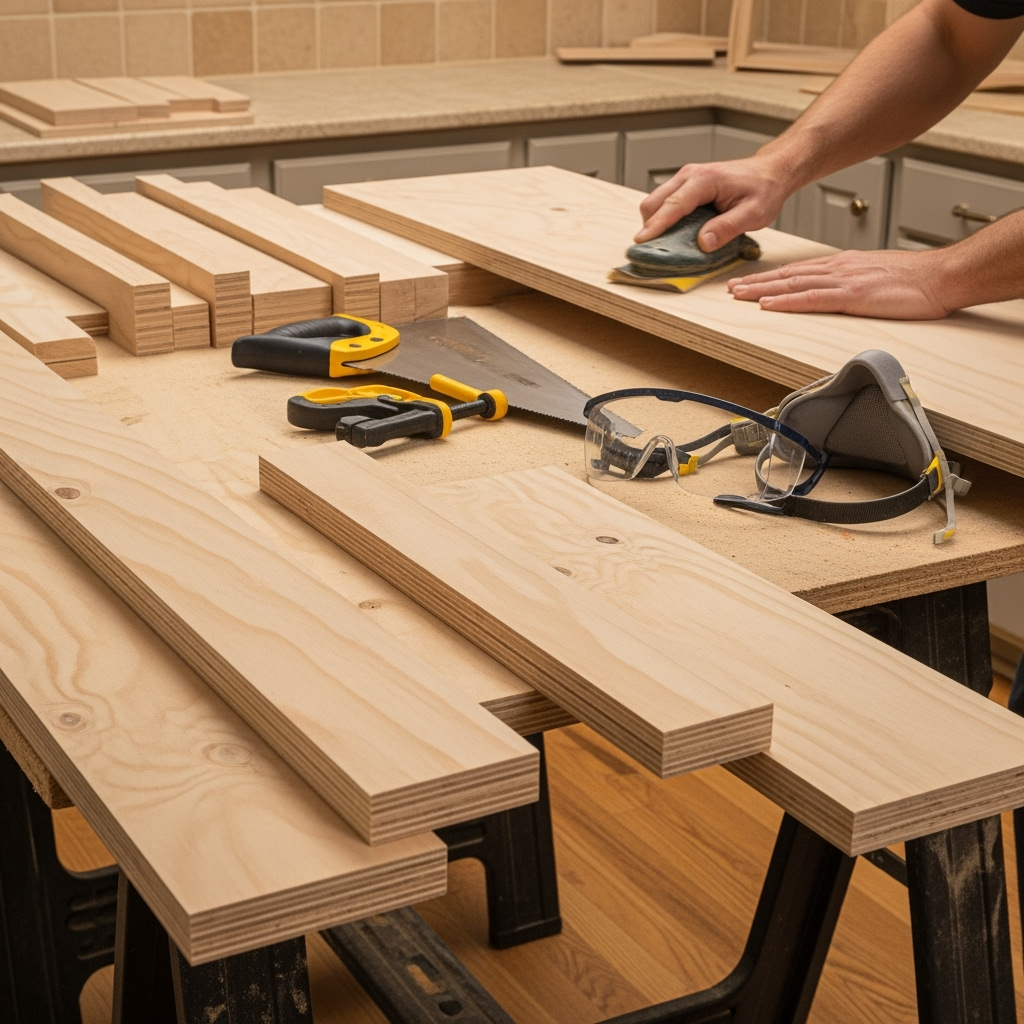
2. Cut Your Wood and Prep Materials
- Measure twice, cut once—seriously, double check! Even pros mess this up sometimes.
- Cut the frame pieces, base, and shelves for your DIY kitchen island build.
- Sand all surfaces so you don’t get splinters later (ouch!).
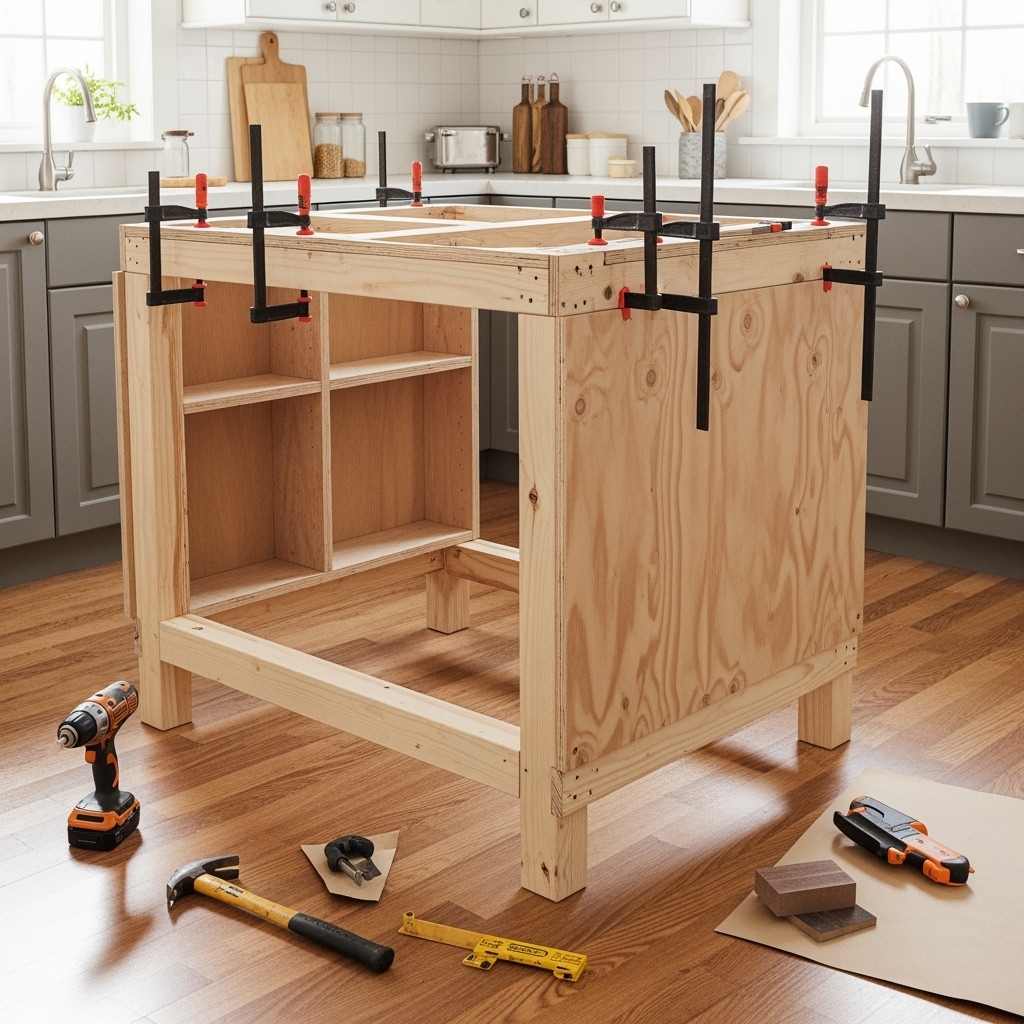
3. Assemble the Base
- Build a simple rectangle or square frame using 2x4s or similar sturdy lumber.
- Attach plywood or MDF panels for sides and back.
- Install interior supports for shelves or cabinets as needed in your DIY kitchen island build.
4. Add Shelves and Storage
- Securely attach shelf supports or install drawer boxes if you want extra storage.
- For open shelving, make sure the alignment is perfect for a clean, pro look in your DIY kitchen island build.
- Attach doors with concealed hinges or leave them open for a modern feel.
5. Mount the Countertop
- Place your chosen counter material on top of the base frame.
- For butcher block, add wood glue to prevent shifting before screwing it down.
- Allow for a couple inch overhang for seating space in your DIY kitchen island build.
6. Finishing Up Your DIY Kitchen Island Build
- Fill screw holes with wood filler, then sand down for a smooth surface.
- Apply stain or paint. Multiple coats look best. Seal the counter for longevity, especially if it’s wood.
- Install handles, knobs, and protective bumpers where doors close.
- Add casters for mobility if you want a moveable DIY kitchen island build.
Personalize Your DIY Kitchen Island Build with Creative Ideas
The real magic? That’s in the details. Here’s how you can make your DIY kitchen island build stand out (and totally yours):

- Chalkboard Panel: Leave messages or jot down your shopping list.
- Towel Rack: Easy add-on for practicality.
- Wine Rack: Because who doesn’t want wine at arm’s reach during dinner prep?
- Open Shelving: Show off your cookbooks or cute dishes.
- Hooks for Utensils: Prevent digging through drawers for that one spatula.
Making your DIY kitchen island build unique is all about matching it to your cooking and entertaining style.
Common Mistakes to Dodge in Your DIY Kitchen Island Build
Okay—nobody likes do-overs. Watch for these classic traps in your DIY kitchen island build:
- Not Enough Clearance: Always make sure you’ve got at least 36 inches to walk around the island. Any tighter and it feels like a maze.
- Wrong Height: Standard is about 36 inches, but bump it to 42 inches if you want a standing bar area.
- Cheap Materials: Saving now means replacing sooner. Invest in quality wood and hardware for a longer lasting DIY kitchen island build.
- Weak Base: Don’t skimp on bracing—especially if you’re adding a hefty countertop. Wobbly islands are a no-go.
- Skipping Finishes: Unsealed wood stains and scratches easily. Protect your hard work with a good topcoat!
And please—measure twice, cut once! I learned that the hard way more than once (facepalm).
Budgeting Your DIY Kitchen Island Build
The beauty of a DIY kitchen island build is you set your own price tag. Depending on your materials and extras, most islands cost between $100 (using mostly reclaimed supplies) to over $1000 (top-shelf, granite counters, etc.).

Ways to Save on Your DIY Kitchen Island Build:
- Reuse old cabinets or scrap wood
- Look for discounted paint and stain
- Source countertops from salvage yards or online marketplaces
Safety Tips for DIY Kitchen Island Builds
Don’t lose a finger over a kitchen upgrade! I always follow (and recommend) a few basic safety rules for every DIY kitchen island build:
- Wear safety glasses and gloves
- Clamp down wood before cutting
- Keep your workspace clean—tripping over cords is no joke
- Use a dust mask when sanding or cutting
Have your phone handy, too—just in case. (Though let’s hope you’ll only need it for snapping amazing “after” pics.)
Finishing Touches: Painting, Staining, and Sealing
This is where your DIY kitchen island build really pops. Whether you opt for a classic white paint, a bold color, or a rich wood stain, prep is everything:
- Sand with fine grit (220+), wipe down all dust
- Prime if painting—prevents stains from showing through
- Apply two or three coats of paint or stain. Let dry fully between layers.
- Finish with polyurethane or a food-safe sealer if you plan to do food prep on the counter
This little bit of TLC ensures your DIY kitchen island build stands up to spills, scratches, and everything in between.
Adding Power and Plumbing to Your DIY Kitchen Island Build
BONUS round! If you’re up for a challenge (and know a good electrician or plumber), consider upgrading your DIY kitchen island build with power outlets or even a prep sink. Always follow code and call in a pro for the technical stuff—safety first.
Pop-up outlets are a slick way to keep your island functional but tidy looking. And an under-counter microwave saves counter space like a champ.
Real-Life Stories: DIY Kitchen Island Build Makeovers
Let’s rewind and peek at a couple of awesome DIY kitchen island build projects readers have sent in:
- Sarah from Ohio turned an old dresser into a killer island with a new butcher block top and funky blue paint. Total cost? Under $200.
- Dave in Texas built a rolling island with wheels, drop-leaf for more seating, and hidden storage. He admits he measured wrong at first and had to start over, but now it’s the centerpiece of family pizza night.
If they can do it, so can you—and maybe even better.
Maintenance Tips for Your DIY Kitchen Island Build
Your DIY kitchen island build is gonna see spills, scratches, and occasional abuse (thanks, kids). Keep it looking fresh with these quick tips:
- Wipe down spills ASAP to prevent stains
- Use food-safe oil on wood counters as needed
- Tighten loose screws or handles
- Touch up paint chips every so often
Wrapping Up: Why Your DIY Kitchen Island Build is Worth It
It’s okay to feel a bit intimidated before you start, but building a DIY kitchen island build is 100% doable, even for beginners. You’ll upgrade your kitchen, boost your home’s value, and have a serious sense of accomplishment. Don’t be afraid to experiment, make mistakes, and have fun with it.
So, whether you’re a weekend warrior or just dipping your toes into the DIY world, dive in. Your kitchen (and your family) will thank you—and so will your wallet.
Now, go make your dream DIY kitchen island build a reality!


