
If you ever sat there, wrestling with tangled necklaces and searching for that missing earring back (ugh, who hasn’t?), then let me tell ya—there’s a mega-handy solution literally at your fingertips: the DIY jewelry box. Whether you’re a pro at woodworking or you can barely tell a chisel from a screwdriver, rolling up your sleeves and making your own DIY jewelry box is not just a serious game changer for your bling collection, but also a wicked-fun way to flex your creative muscles! So, let’s jump in and uncover how you can whip up a custom storage solution that’s as unique as your tastes.
Why Build a DIY Jewelry Box?
- Custom vibes: You get to choose the size, materials, and style that match your decor.
- Save some cash: Fancy store-bought jewelry boxes? Big ouch for the wallet. DIY lets you go all out for half the price.
- Skill up! Crafting your own DIY jewelry box means you learn woodworking, finishing, and even a bit of upcycling.
- Sentimental value: Handcrafted storage for your favorite pieces? That’s next-level meaningful.
No more boring boxes from big chain stores, fam. With a DIY jewelry box, you design every little detail. Let’s dive deeper into the process and all the killer ideas that can make your jewelry storage a showstopper.
Essential Tools and Materials for Your DIY Jewelry Box
Let’s keep it real: you don’t need a full-blown workshop to get started with your DIY jewelry box. Even in a tiny apartment, these basics will get you sorted:
- Wood—Pine, oak, maple, or a cool reclaimed pallet
- Wood glue and thin finishing nails
- Saw (handsaw or a jigsaw if you’re feeling extra fancy; check out this guide to squaring wood cuts)
- Sandpaper (grits 120–220)
- Ruler and measuring tape
- Pencil for marking cuts
- Hinges and clasp (add a cute little lock if you wanna go secret box style)
- Paint, stain, or varnish
- Felt or velvet (for lining—fancy, right?)
- Screwdriver and drill
Gather up that gear, and you’re halfway to becoming a DIY jewelry box legend.

Choosing the Right Design for Your DIY Jewelry Box
Okay, so before you break out the power tools, pause and think: What kind of DIY jewelry box do you really want?
- Classic single compartment—Minimal, simple, great for rings or as a beginner project
- Multiple drawers—Next-level organization for hardcore jewelry fans
- Dividers and trays—Perfect for keeping earrings, bracelets, and necklaces chillin’ separate in style
- Portable travel box—Compact, snap-shut, maybe even with a little mirror inside
- Wall-mounted organizer—Save dresser space and show off your box on the wall
Sketch your DIY jewelry box—seriously, even stick figures help! Decide on dimensions based on your jewelry stash size. If you’re a sucker for chunky statement pieces, make those compartments roomy. Love sleek daily chains? Thin, shallow trays are best.

Building Your First DIY Jewelry Box: Step-by-Step
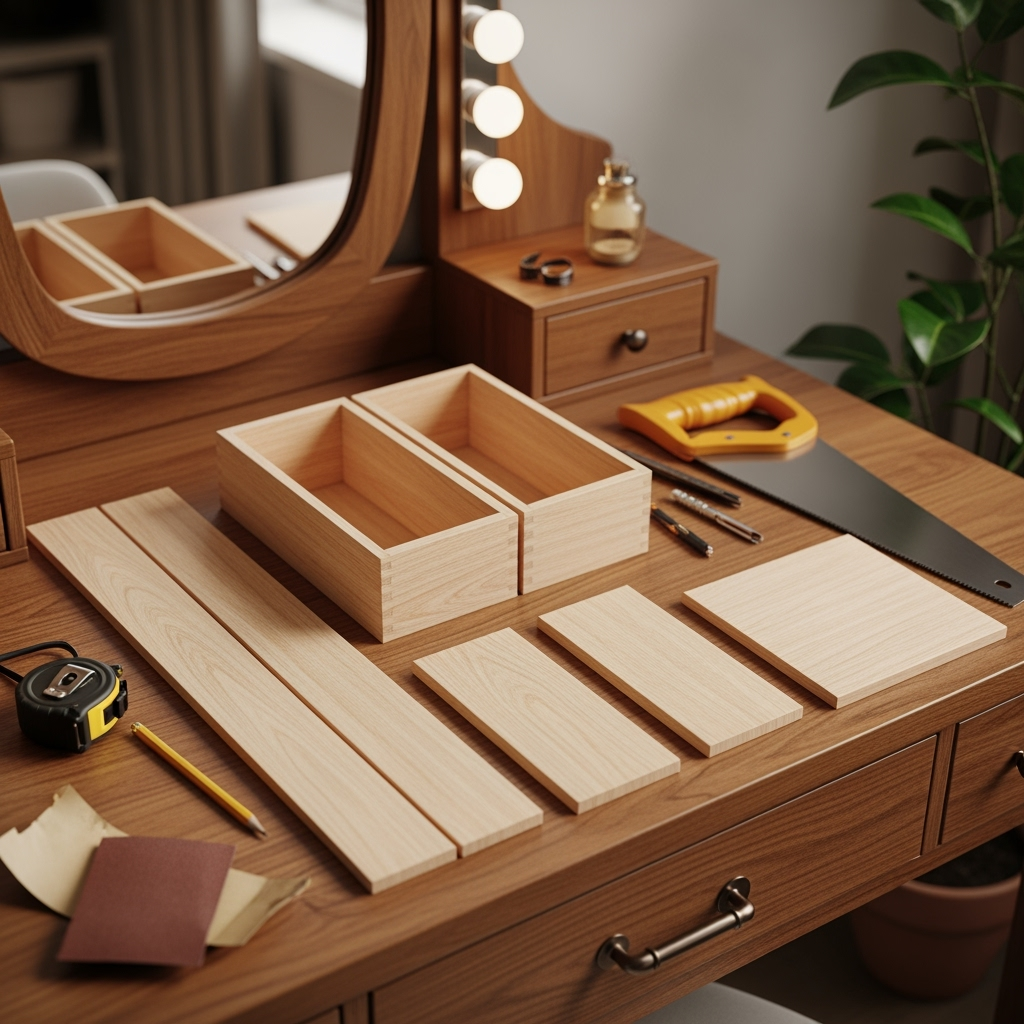
Step 1: Cut and Prep Your Wood
Start by measuring and sawing the wood for your DIY jewelry box body—top, bottom, and sides. Double-check your lengths (hey, measure twice, cut once, right?).
- For a simple rectangle box: 2 long sides, 2 short sides, a top and base.
- Give all pieces a good sanding so you won’t snag your favorite bracelet later.
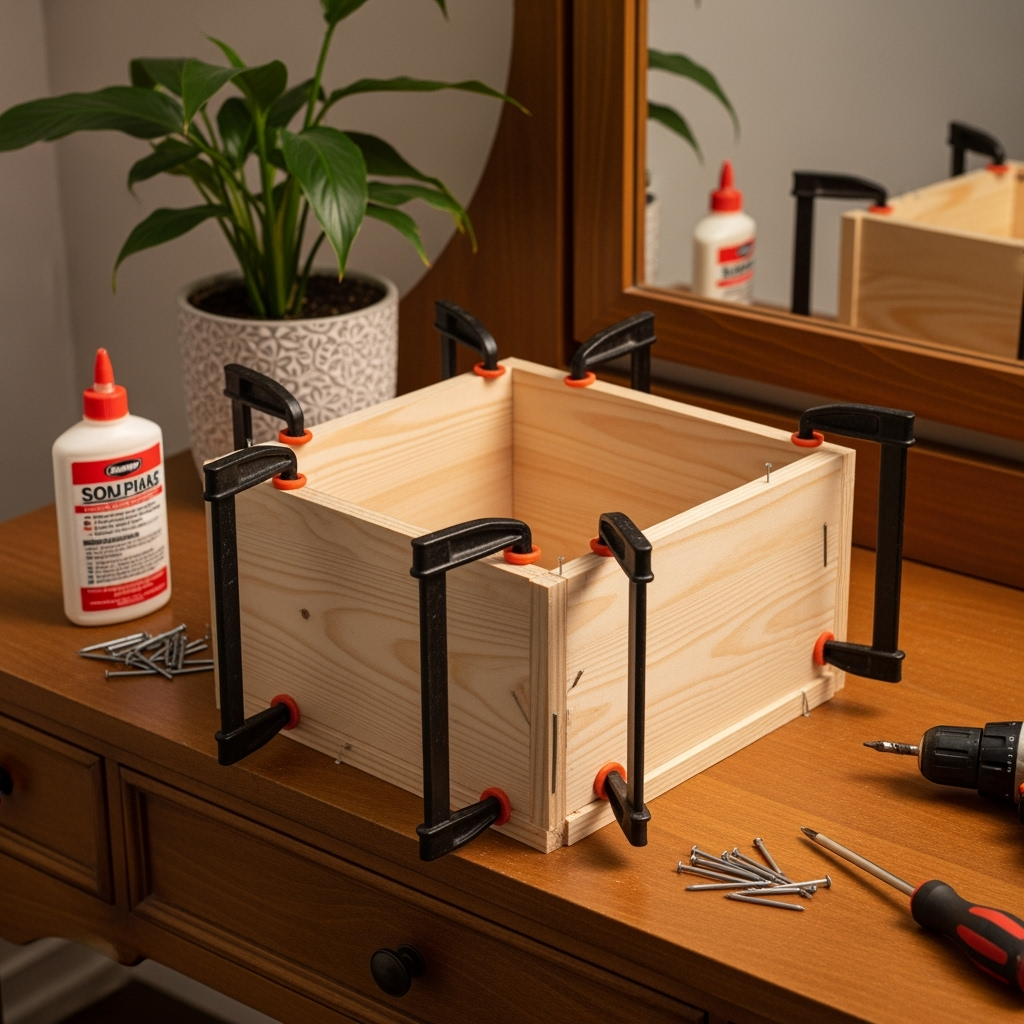
Step 2: Assemble the Box Body
Dry fit the pieces of your DIY jewelry box together first. Once everything lines up, glue and nail the sides together. Pop the bottom on, then clamp till dry.
Step 3: Attach the Lid
Use small hinges for a smooth open-and-close. You can use a bit of sandpaper between the lid and box to get that perfect ‘fit’ feeling.
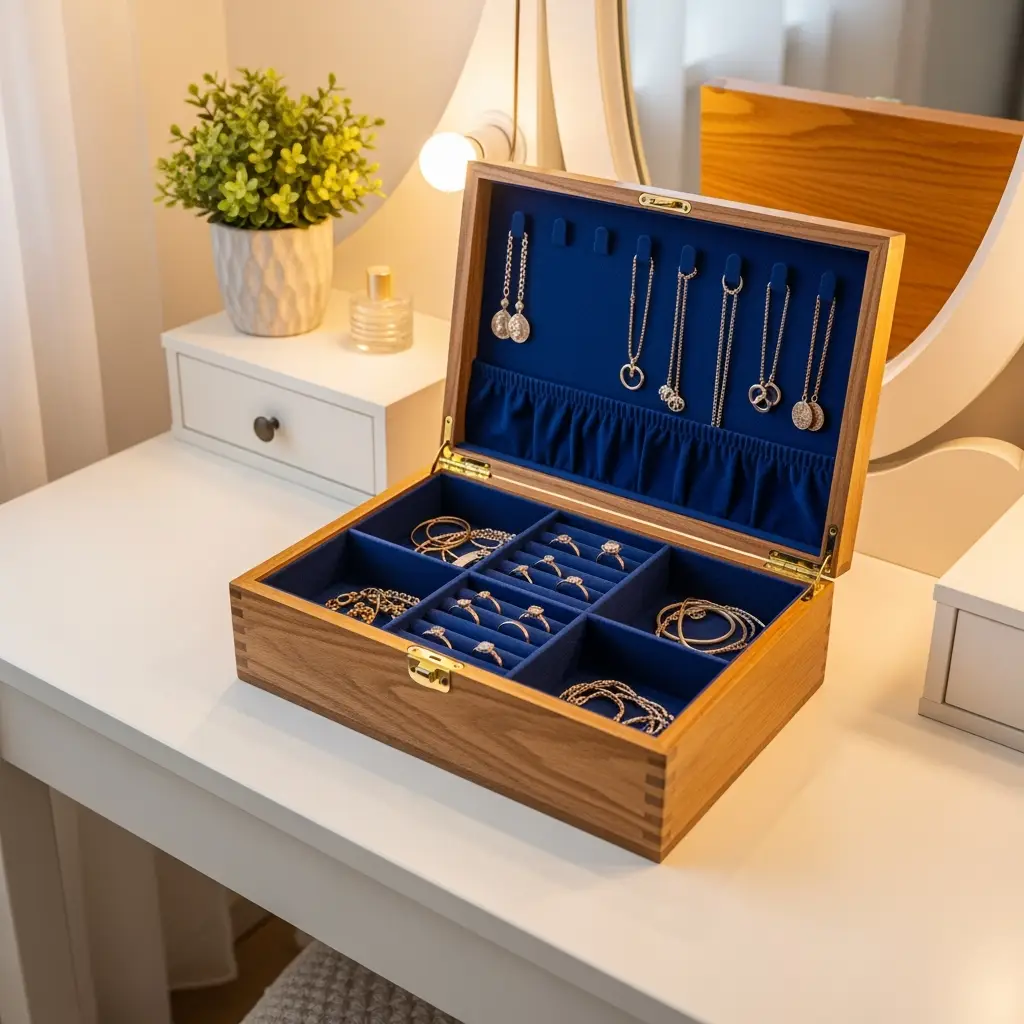
Step 4: Prep the Interior
Now it’s time for the interior of your DIY jewelry box to shine. Decide on trays, dividers, ring rolls, and lining.
- Use thin pieces of wood or solid cardboard covered with fabric for dividers.
- For ring rolls, wrap soft foam with velvet, then glue them side by side in a tray.
- Stick felt or velvet to the bottom and sides with spray adhesive for a pro finish.
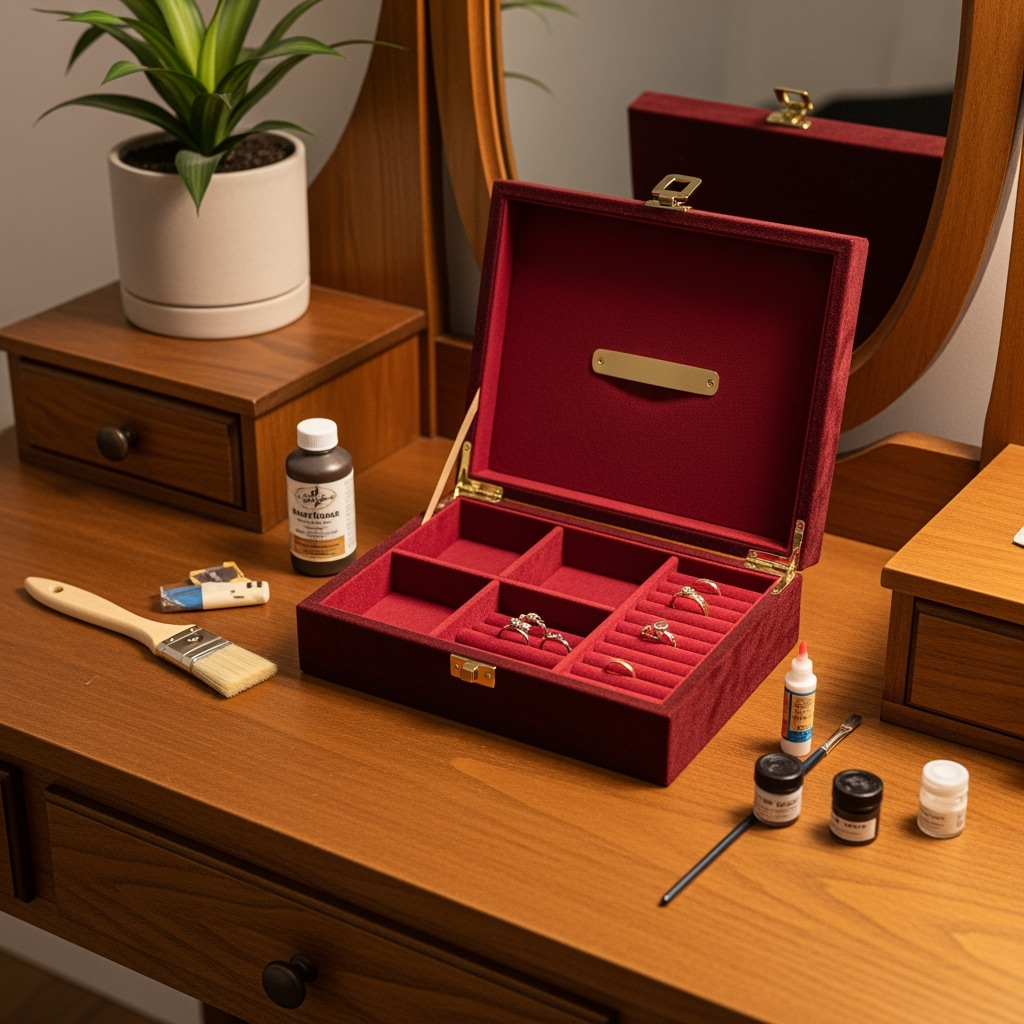
Step 5: Add Finishing Touches
Want your DIY jewelry box to match your room? Paint or stain to suit your taste. Stencils, woodburning, or hardware (vintage handles, anyone?) take it up a notch. Finish your box with a protective coat to keep it pretty for years.

Personalizing Your DIY Jewelry Box
Your DIY jewelry box isn’t just a place to stash shiny stuff. Make it personal! Here’s how:
- Monograms: Paint or carve your initials—or someone else’s, if it’s a gift.
- Custom compartments: Got dangly earrings or big bangles? Adjust the sections for your unique collection.
- Photos or trinkets: Stick a snapshot inside, or embed small treasures right on the lid.
- Creative hardware: Swap boring knobs for quirky finds from thrift stores.
Advanced DIY Jewelry Box Ideas and Hacks
Go Modular
Create stackable trays that fit together inside your DIY jewelry box. Perfect if your collection keeps growing (and c’mon, whose doesn’t?).
Magnetic Closures
Instead of a standard latch, tuck tiny magnets into the wood for a sleeker, modern feel for your DIY jewelry box.
Hidden Spaces
Add a secret compartment below the main tray. It’s perf for super precious treasures or keepsakes.

Repurposed Materials
Old cigar boxes, vintage sewing boxes, or even sturdy shoeboxes can be transformed into wicked original DIY jewelry box projects. Paint, decorate, and add compartments—boom, new life!
LED Lighting
Add a strip of tiny battery-powered LEDs inside your DIY jewelry box for serious glam. Just make sure you tuck the wiring neatly so nothing snags.
Caring for Your DIY Jewelry Box
A DIY jewelry box needs a little love to stay looking sharp. Here’s how:
- Dust the outside weekly with a soft cloth.
- For wood finishes, polish with a dab of furniture oil a couple times a year.
- Don’t let wet or tarnished jewelry chill inside; always clean your pieces before putting them back.
- Keep outta direct sunlight to prevent fading or warping.
Gifting a DIY Jewelry Box: Tips for Wow Factor
A handcrafted DIY jewelry box makes an insanely thoughtful gift—birthday, anniversary, or just because. Surprise your fave human and knock their socks off with these little touches:
- Hide a small piece of jewelry inside when you gift it
- Paint a personal message under the lid
- Use their favorite colors, patterns, or motifs
- Wrap it with a super luxe ribbon or handmade tag
FAQ: All About DIY Jewelry Boxes
How long does it take to make a DIY jewelry box?
Honestly, depends on the complexity! A simple DIY jewelry box can come together in an afternoon, but fancier designs with trays, dividers, and finishes can take a weekend (especially if you gotta wait for paint or glue to dry). Don’t rush the fun, though!
Is it expensive to make your own DIY jewelry box?
Nah, it’s usually much cheaper than buying a designer box. Grab scrap wood or upcycle materials to save even more. DIY jewelry box wins again, baby!
Can I make a DIY jewelry box without power tools?
Yup! Hand tools work just fine for most boxes, especially small or medium-sized ones. Just make sure you sand the edges smooth and nail everything tight (no loose trays, please).
How do I organize small jewelry in my DIY jewelry box?
- Add foam ring rolls for rings
- Use tiny divided trays for stud earrings
- Hang necklaces from hooks or little wooden dowels in the lid
- DIY mini pouches for delicate chains
Wrapping Up: Your DIY Jewelry Box Awaits!
Building a DIY jewelry box is kinda the perfect project. It’s practical, creative, and lets you show off your skills every time you reach for a ring or pair of earrings. Plus, you can ace home organization—and who doesn’t love finding exactly what you need when you want it? No more rummaging through tangled piles, just sweet, custom-made order.
So next time your jewelry pile is outta control, skip the store and get building. Your dream DIY jewelry box is just a few steps away. Grab your wood, glue, and a bit of patience, and you’ll soon have a personalized masterpiece that’ll make everyone say, “Whoa, you MADE that?”—and yep, you totally did!


