
Ready to totally flip the vibe of your room without dropping a fortune? A DIY gallery wall setup is honestly one of the easiest ways to infuse mega personality into any space. Whether you’re a first time wall curator or you’ve been swapping out art since you were knee-high, this is the creative project that pays off big time—both in style points and self-satisfaction. So let’s cut the small talk and dive right into the world of DIY gallery wall setup. I’m about to spill my best tips, least annoying hacks, and a bunch of rookie mistakes you def wanna avoid. Trust me, you don’t wanna hang stuff crooked and regret it every day. Cool? Let’s get after it!
Why a DIY Gallery Wall Setup is the Ultimate Room Upgrade
If you’re craving personality, style, and a dose of “you” on those blank walls, a DIY gallery wall setup hits all those marks. Not only does it let you show off meaningful art, family snapshots, or your wildest thrift store finds, but it also—no joke—makes your space look way more professionally designed. And the best part? You don’t have to be an interior designer or have cash to burn. All you need are a few basic supplies, a vision (or not, honestly—sometimes winging it creates the BEST vibe), and a smidge of patience.
Planning Your DIY Gallery Wall Setup: Don’t Skip This
Before you go hammer happy, planning is crucial for that dream DIY gallery wall setup. Here’s how to get started without melting down:
- Pick Your Wall: Living rooms, halls, bedrooms—even bathrooms. As long as you have wall space, you’re golden.
- Gather Artwork: Not just fancy paintings. Think photos, prints, cool fabrics, souvenirs, kid art… anything that says “you.”
- Choose a Theme or Go Eclectic: Match frames? Go wild with colors? Black-and-white? Decide now.
- Layout Options: Grid, linear, or organic shapes. There’s no “right,” but more on that below!
- Frame Game: Mix sizes and styles for interest, or keep it neat with one type.
Visualizing Your DIY Gallery Wall Setup
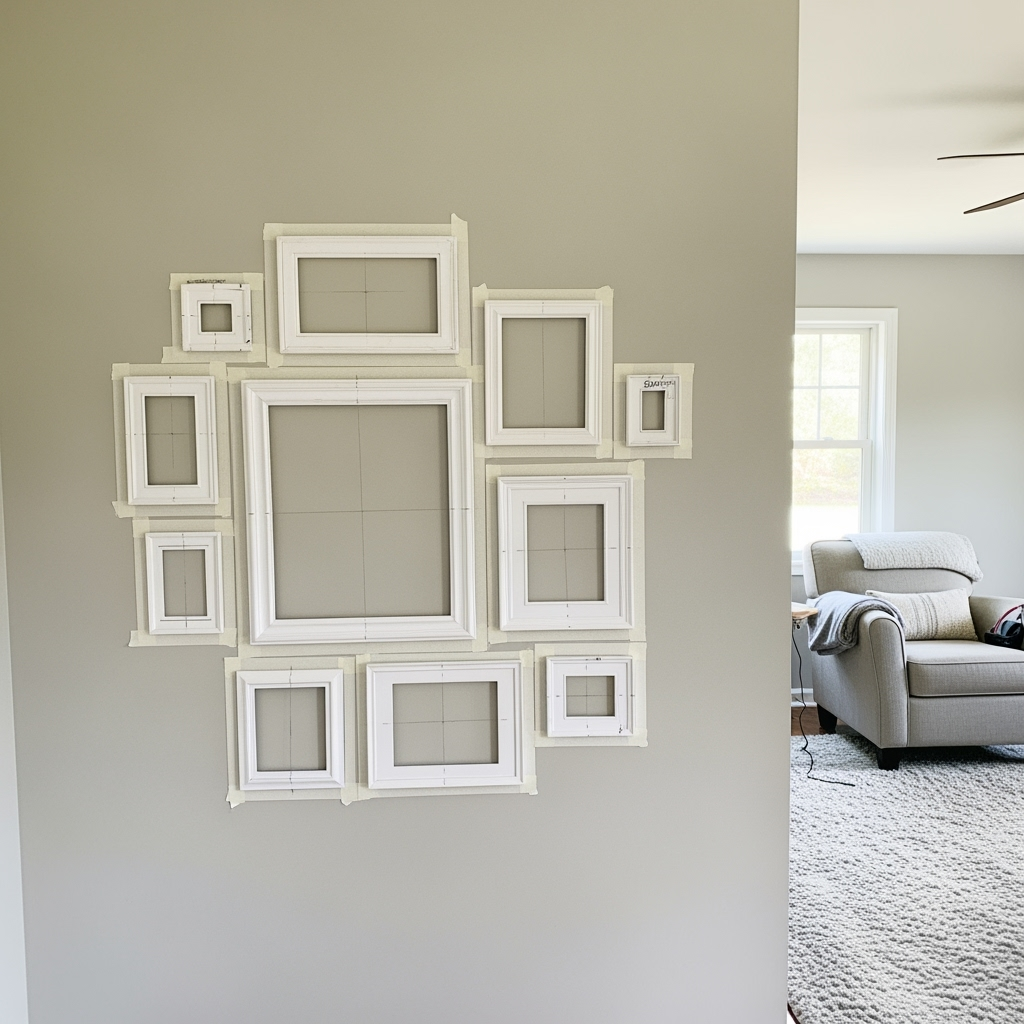
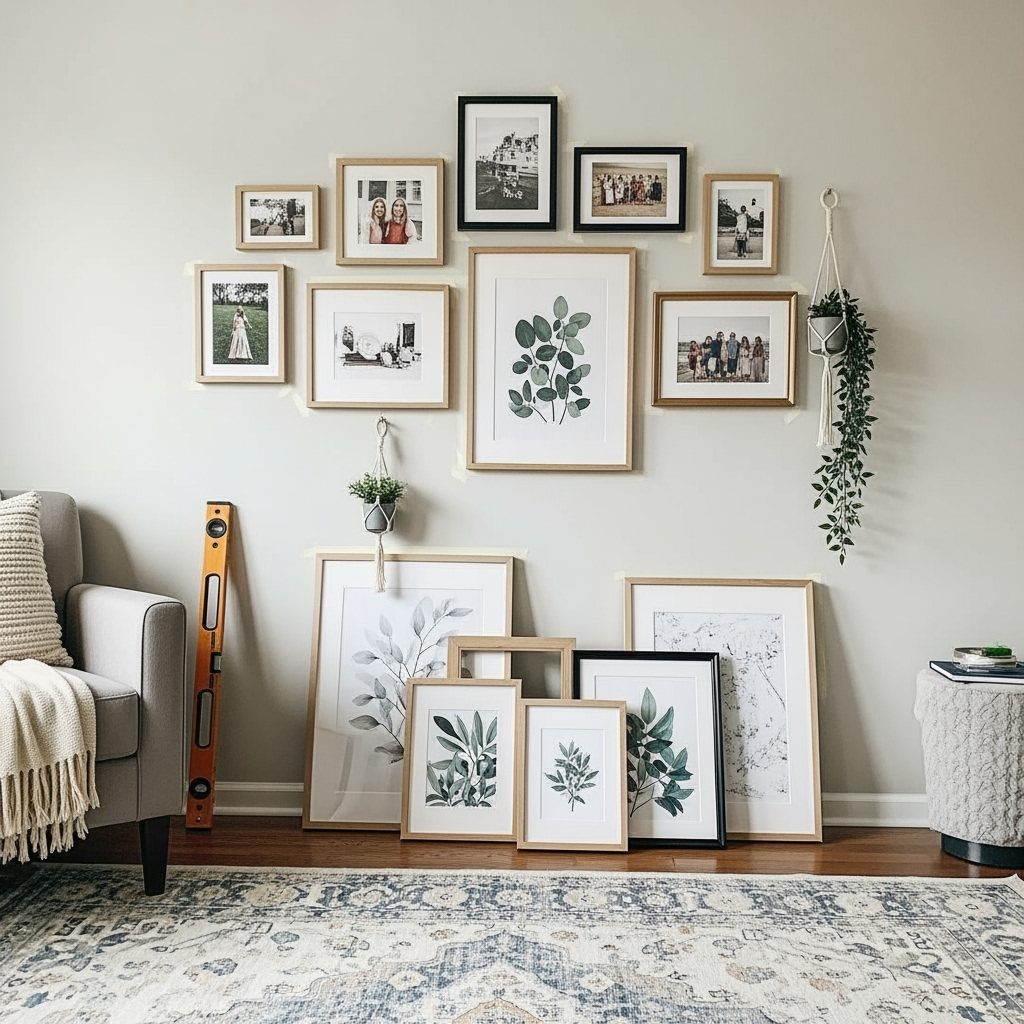
I can’t stress enough—laying stuff out on the floor before you hang anything is a life saver. Move frames around until it just feels right. If you need more help visualizing, use painter’s tape on the actual wall to mark out frame sizes. This step in your DIY gallery wall setup is a TOTAL game-changer. You catch weird gaps, awkward frame combos, and you save yourself from regret holes in your drywall.

Gathering the Must-Have Tools for a DIY Gallery Wall Setup

Don’t get halfway through your DIY gallery wall setup and realize you’re missing the important stuff. Here’s your DIY tool checklist:
- Hammer
- Nails & Picture Hanging Hooks
- Measuring Tape
- Pencil (for marking frames…not drawing mustaches)
- Level (unless you’re going “organic” and tilting stuff on purpose!)
- Command Strips (if you rent or hate holes)
- Painters Tape
- Paper Templates for frames (super useful for tricky layouts!)
The Game Plan: Laying Out Your DIY Gallery Wall Setup
Okay, now for the actual layout. With DIY gallery wall setup, you’ve got options galore:

- The Grid: For clean, Pinterest-worthy vibes. Same-size frames, evenly spaced—great for modern spaces.
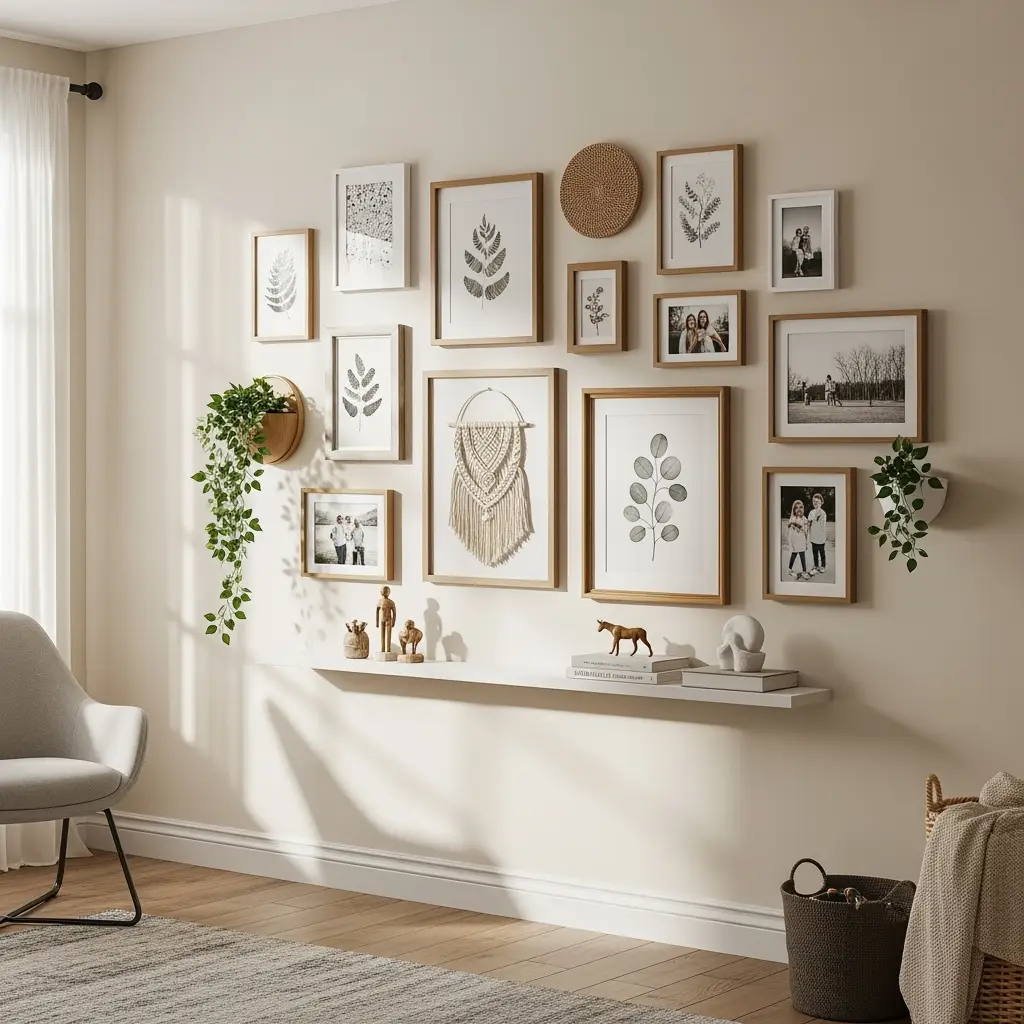
- The Organic Cluster: Super chill, mix up sizes and orientations. Organic layouts give boho or lived-in feels.
- Linear Row: Perfect for hallways or above furniture. Align frames either by top, bottom, or center for a sleek look.
- Central Anchor Piece: Start with your biggest piece in the middle, then orbit smaller ones around it.
Whatever you choose, keep your DIY gallery wall setup balanced visually. Step back often! If a frame pops out (in a bad way), swap it or rebalance with something else.
Spacing: The Secret Sauce
This is where many folks mess up their DIY gallery wall setup. Try keeping all frames about 2 to 4 inches apart—tight enough to relate, loose enough to breathe. For the grid look, use the same distance everywhere for that sharp finish.
Pro Tips to Nail Hanging Without Losing Your Mind
- Work from Center Out: For anything other than a strict grid, start in the center and build outwards. That way your DIY gallery wall setup looks centered on your wall, even if your measuring skills are…iffy.
- Templates Save Walls: Cut out paper shapes of your frames, tape them up, adjust until perfect. Poke holes for nail marks, then swap paper for real frames.
- Level Up: A level is your BFF, especially for grid layouts. Eyeballing is fine for boho walls, but uneven grids look NUTS.
- Stagger Heights: Place some frames slightly higher or lower for that intentional, cozy vibe.
- Mix Textures & Media: Mirrors, 3D objects, baskets, clocks—layer in the unexpected for more interest!
Quick Fixes for Epic DIY Gallery Wall Setup Disasters
Let’s be real, even pros botch up DIY gallery wall setups. Here’s how to fix the most common flops:
- Too Many Holes: Use spackle, let dry, touch up paint. No big deal, nobody’ll know!
- Frame Keeps Crooking: One word—wall putty. Dab a tiny bit under the frame corner.
- Crooked Rows: Sometimes, it helps to step back every couple frames and check from a distance, or get a second set of eyes.
- Spaced Too Far Apart: Close the gaps gradually, or add mini art pieces to fill in the awkward spots.
Ideas for Unforgettable DIY Gallery Wall Setup Styles
Need some inspo for making your DIY gallery wall setup utterly jaw-dropping? Here’s what’s poppin’ right now:
- Monochromatic Walls: Same color frames, art in black and white. Super chic.
- All About the Memories: Only personal photos, tickets, notes—uber sentimental.
- Pop Culture Power Wall: Album covers, comic art, funky prints.
- Textural Mash-Up: Blend canvas, macrame, metal, and wood art for a dynamic wall.
- Plant Power: Add mini wall planters or faux vines between the art. Insta-worthy for sure.
- DIY Painted Frames: Grab cheap frames, go wild with spray paint or washi tape for a budget refresh.
Mixing Frame Styles Like a Pro

Are you team “matchy-matchy” or “the wilder the better”? For a slick, put-together gallery, use all the same color and finish frames. If you love a storybook, collected-over-time vibe, mix wood, metal, vintage, and modern. A great rule for any DIY gallery wall setup: repeat certain elements (like color or material) a couple times so everything looks intentional.
Tricks for Keeping Your DIY Gallery Wall Setup Fresh Over Time
Your DIY gallery wall setup doesn’t have to stay static! Make it flexible like the rest of your life:
- Swappable Art: Use easily openable frames so you can rotate art with the seasons (or your mood!).
- Tack Up Inspiration: Add cork boards as part of your wall so you can pin inspo, photos, or notes.
- Layer With Shelves: Add skinny ledge shelves as part of your DIY gallery wall setup for books, mini sculptures, or constantly changing accessories.
The Budget Side: Saving Cash on Your DIY Gallery Wall Setup
You don’t need to raid your wallet to create a magazine-worthy DIY gallery wall setup. Here’s how to do it for cheap:
- Thrifted Frames: Mix and match what you find at flea markets or thrift stores—spray paint ties them together.
- Free Printables: A million sites offer downloadable, printable art for free. Just print and go!
- DIY Art: Make your own with paint, collage, or even digital designs. Anything looks cool in a crisp frame.
- Reuse & Repurpose: Recycle old calendars, pages from art books, funky fabric scraps—the sky’s literally the limit for your DIY gallery wall setup.
Keeping the Fun and Flair in Your DIY Gallery Wall Setup
This is supposed to be YOUR creative time, not just a task on your to-do list. Crank up good tunes, invite a buddy over, make it a pizza night. The best DIY gallery wall setups reflect real life—not perfection, but personality.

Lighting Up Your DIY Gallery Wall Setup
Want your art to pop—like, museum style? Good lighting is a total game-changer for a DIY gallery wall setup. Try these:
- Clip-on picture lights for pro vibes
- LED wall washers or light strips for modern drama
- Simple battery spotlights above major frames
If new wiring isn’t possible, there’s a ton of battery-operated and stick-on solutions that work like magic.
Common FAQ on DIY Gallery Wall Setup
- How high to hang? Eye level is a win (about 57 inches from the floor to center, if you wanna get mathy).
- Can renters do this? 100%! Use Command Strips or removable hooks to skip the drama with your landlord.
- Mixing art styles? Absolutely! As long as there’s a nod to color or vibe harmony somewhere, it’ll work.
- Is it ever “done”? Nope. Add, swap, or tweak your DIY gallery wall setup whenever you want.
Troubleshooting Your DIY Gallery Wall Setup Flops
- Nothing feels right? It’s cool. Take everything down, start fresh on the floor, and try a totally different layout.
- Feels boring? Add something odd, like a mirror, odd-shaped art, or mix up your frame colors.
- Gaps look weird? Fill them with tiny art, a cool sconce, or even a faux plant.
Level Up: Add Meaning to Your DIY Gallery Wall Setup
If you want your space to be uniquely yours, choose pieces that tell your story. Maybe you snag a cool print from your last trip, a hand-written note from a loved one, or your kiddo’s first doodle. Your DIY gallery wall setup doesn’t just look good—it feels good every time you walk by. That’s wall power, baby!
Final Thoughts: Why a DIY Gallery Wall Setup is the Move Your Room Needs
So, let’s run it back—creating a jaw-dropping DIY gallery wall setup is way less scary than folks think. Plan a little, play a lot, and don’t stress perfection. The best walls have heart, surprise, and YOUR unique flavor. Get wild, stay stoked, and always step back (literally) to admire your handiwork. Your DIY gallery wall setup isn’t just decor—it’s daily happiness on display. Now get to it and blow your own mind… and let’s be honest, make your friends a little jealous too.


