
So, you’ve finally had it with all those muddy shoes, messy bags, and the chaos right by your door every time you come home. You keep telling yourself, ‘One day, I’m gonna build a DIY entryway bench and take back control of this mess.’ Guess what? Today might just be that day, my friend! Whether you’re a woodworking newbie or a total tool-slingin’ pro, building a DIY entryway bench isn’t just doable, it’s a freakin’ game-changer for your home.
Why a DIY Entryway Bench Is the Smartest Upgrade
First off, let’s break down why a DIY entryway bench rocks. We’re not only talking about killer looks here, but also about next-level functionality. With a DIY entryway bench, you can say goodbye to stumbling over sneakers, flinging coats at random, or ferociously searching for lost keys. It serves as a nifty spot to sit while you tie shoes, throw down backpacks, and even stash those rogue winter gloves that keep disappearing! And the best part—you get to customize it totally for your space, vibe, and needs.
Planning Your Perfect DIY Entryway Bench
Alrighty, before you fire up the saw or grab your hammer, take a minute to figure out what you want from your DIY entryway bench. Every home (and entryway!) is different. Here are a few must-ask questions to nail down your project:
- How much space ya got? Measure twice, build once. Entryways can be weirdly narrow or super wide, so grab your tape measure. Don’t eyeball it, trust me!
- What do you wanna store? Shoes, umbrellas, dog leashes, mail? Write it down so you don’t forget during construction.
- What’s your style? Modern, farmhouse, industrial, whatever floats your boat. There’s no wrong answer here.
- Do you want extra features? Think about cubbies, a shoe rack, coat hooks, baskets, drawers, or maybe a sweet back panel.
Once you’ve sorted that out, sketch out your vision, or scour Pinterest and Insta for inspo. Make sure your DIY entryway bench is gonna fit with your home’s flair.

Essential Tools and Materials for Your DIY Entryway Bench
Get your gear in order so you don’t find yourself mid-project and missing a freaking screw! Building a DIY entryway bench doesn’t have to break the bank—or your back. Here’s what you’ll probably need (your mileage may vary based on your bench design):
- Tape measure & pencil
- Saw (circular saw, miter saw, or even a hand saw if you’re hardcore)
- Power drill + bits
- Screwdriver
- Screws and nails
- Wood glue (this stuff’s magic)
- Speed square
- Sandpaper or orbital sander
- Paint, wood stain, or sealer
- Paintbrushes or rollers
- Wood boards (2x4s, plywood, or whatever you’ve picked out)
- Baskets or bins (if adding storage)
P.S. Rummage through your garage or basement—you might already have most of this stuff stashed away from previous projects.
Step-by-Step: Building Your DIY Entryway Bench
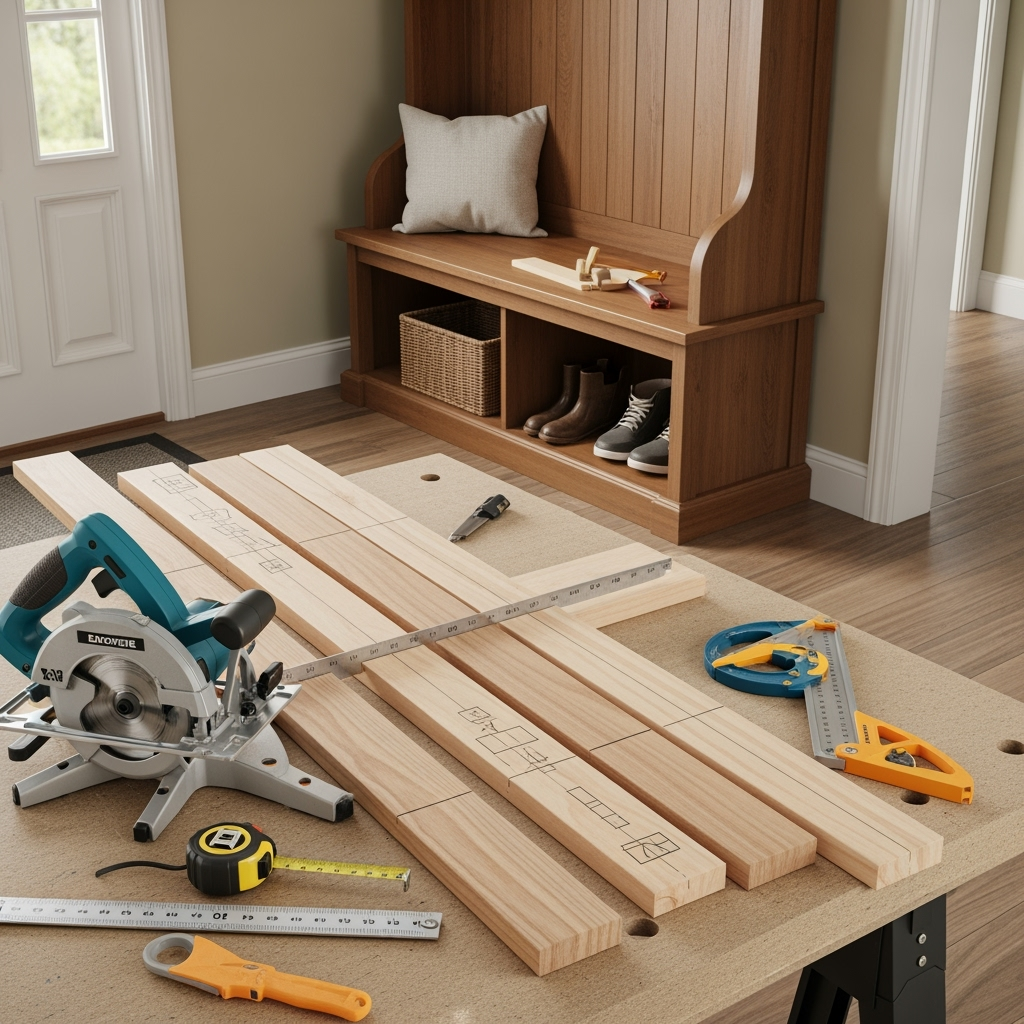
Step 1: Cut Your Wood
After you’ve measured your entryway and finalized your design, it’s time to cut your boards. This is where your nifty tape measure comes in handy. Mark out each piece you’ll need for the frame, seat, and any storage cubbies. Make sure your cuts are straight, and always double-check those measurements. Trust me, nothing’s more annoying than a lopsided bench.

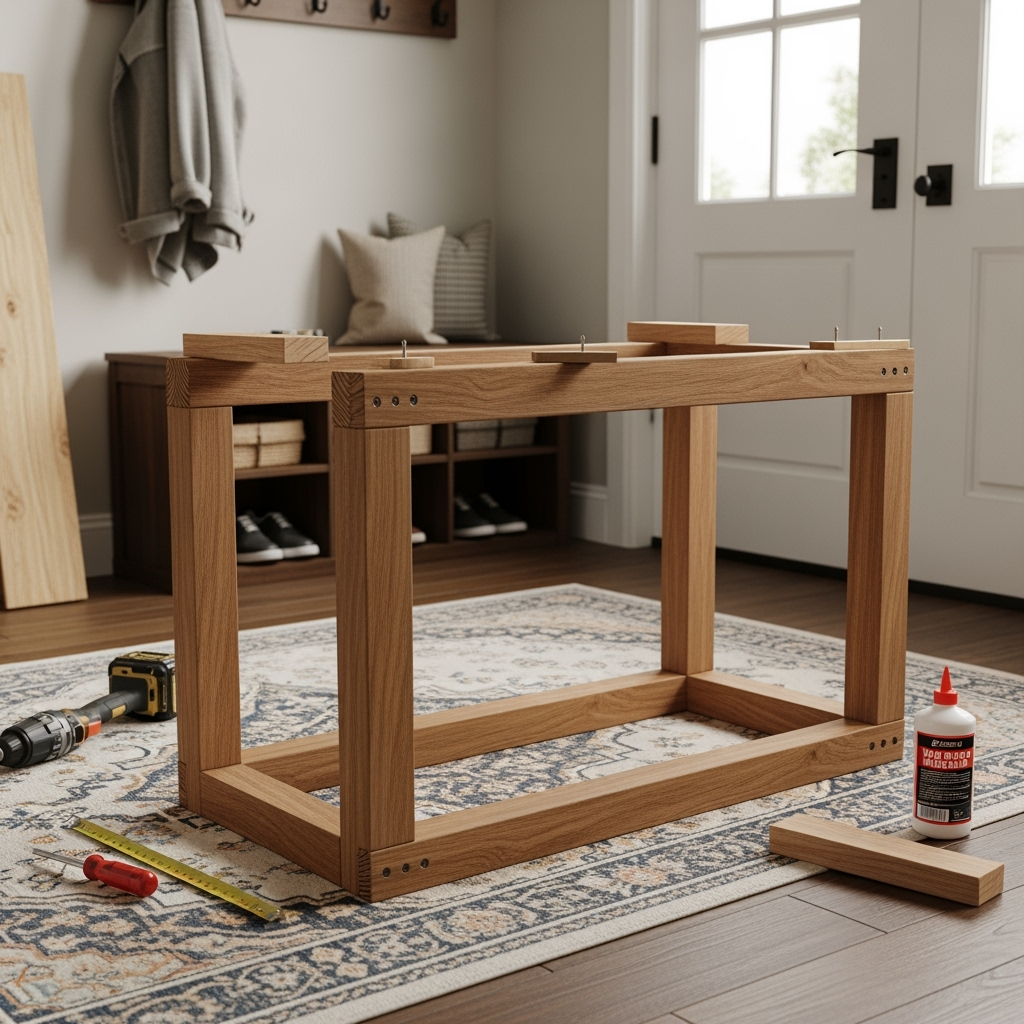
Step 2: Build the Bench Frame
Grab your wood glue and screws, then assemble the base frame on a flat surface. The frame will give your DIY entryway bench its strength and stability. Use a speed square to keep your corners at perfect right angles, and pre-drill pilot holes to prevent splitting.
Step 3: Attach the Seat
Time to slap on the top! Your seat should fit snugly on the frame. Attach it with sturdy wood screws or hidden fasteners if you want a cleaner look. For extra polish, consider trimming the seat with some decorative wood edging.
Step 4: Build in Storage (Optional)
If you want shoe cubbies, drawers, or baskets below the seat, cut extra dividers and secure them underneath. Structure is key here; use both glue and screws for lasting results. For baskets, make sure the openings are the right size for standard bins or whatever you found on sale at Target.
Step 5: Add a Backrest or Coat Rack (Also Optional)
For that next-level entryway bench, add a tall back panel with hooks for coats, hats, or keys. Use sturdy hooks, mount them into studs (that jacket pile gets heavy, yo), and get creative with shelf additions for sunglasses, vases, or plants.

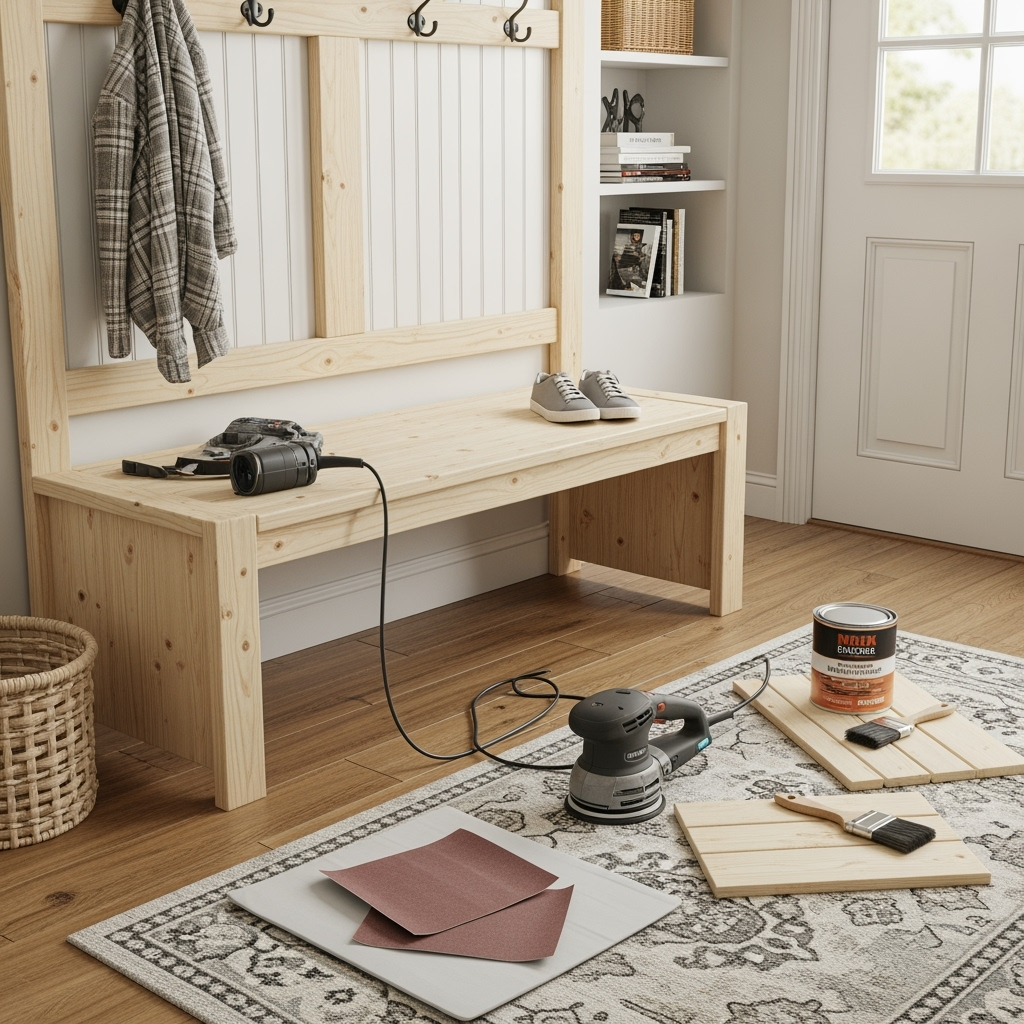
Step 6: Sand and Prep for Finish
No one likes splinters. Sand everything until smooth, starting with a coarser grit, then finishing up with something fine. Dust off the bench and inspect for rough spots. Patch screw holes with wood filler if you want a slick surface.
Step 7: Paint, Stain, or Seal
Give your DIY entryway bench some personality! Whether you go vibrant with bold paint or classic with a wood stain, make sure to apply a protective coat—especially if your bench is gonna see wet shoes or dripping umbrellas. Multiple thin coats are better than one gloppy mess.
Step 8: Final Touches and Styling
After your finish dries, it’s time to level up the styling. Throw on some cute cushions, slide in baskets, or add a pop of greenery. This is where you personalize it and make your DIY entryway bench reflect you.

DIY Entryway Bench Plans You’ll Want to Try
One of the best things about a DIY entryway bench is all the epic plans online. Here are some fan-favorite ideas to get you pumped and ready to roll:
- Simple Shoe Cubbies: Open cubbies keep sneakers, boots, and slippers wrangled and easy to grab.
- Rustic Farmhouse Bench: Grab reclaimed wood or hit the lumber rack for wide planks and rough cuts. Stack some baskets underneath for storage.
- Modern Floating Bench: Wall-mounted benches give a super sleek look and they’re easy to sweep under!
- Lockers and Hooks Bench: Add vertical boards between seating areas for locker-style separation (super handy if you’ve got kids).
- Hidden Storage Lift-Top Bench: Totally genius for storing gloves, hats, or the dog’s leash. Build with a hinged seat for a clutter-free vibe.
Whichever plan you pick, make sure it fits your daily routine. Customization is the whole point of DIY!
Common Mistakes—and How to Dodge ‘Em
Even seasoned woodworkers mess up. Here are a few classic flubs (that I’ve totally made myself) and tips to avoid them when building your DIY entryway bench:
- Not measuring your entryway right. Double (or triple) check before you cut or assemble anything.
- Skipping pre-drilled holes. It saves time and your wood from splitting. Pro move.
- Rushing the sanding. Smooth wood = happy bums and no splinters. Don’t get lazy here.
- Using the wrong wood. Soft woods dent easy. Hardwoods look great but cost more. Pick what works for your budget and style.
- Forgetting about the floor. Add felt pads if your bench will sit on wood or tile so you don’t scratch it up every time you scoot it.
Don’t sweat messing up though. Worst case, you just patch it up or try again—DIY is about learning as you roll!
Maxing Out Storage with Your DIY Entryway Bench
The storage possibilities with a DIY entryway bench are basically endless. Here are some pro tips for maximizing every inch:
- Use baskets or bins. They slide in and out easily, look tidy, and come in all shapes and sizes.
- Vertical shoe cubbies. Stack shoes up instead of out for more room.
- Overhead shelves. Mount shelves above your bench for hats, bags, or seasonal stuff.
- Hooks galore. The more, the merrier. Hang everything from dog leashes to umbrellas.
- Drawer dividers. If you add drawers, use dividers to keep small stuff from getting lost.
Make your DIY entryway bench do heavy lifting—it can corral a scary amount of clutter when designed right.
Choosing the Right Materials for Durability
Your DIY entryway bench takes a beating—muddy shoes, wet coats, jumpy kiddos and pets. Get materials that’ll hold up. Here’s what I recommend:
- Hardwood (like oak, maple, or hickory) for heavy-duty, long-lasting benches.
- Pine or fir if you’re watching your wallet—just add more support underneath depending on bench size.
- Plywood or MDF core for painted benches—less shrink and movement versus solid wood.
- Outdoor paints or sealers for water resistance and longevity (especially for muddy, high-traffic zones).
Don’t forget about comfort, too. A cushion on your DIY entryway bench makes slipping shoes on way cushier.
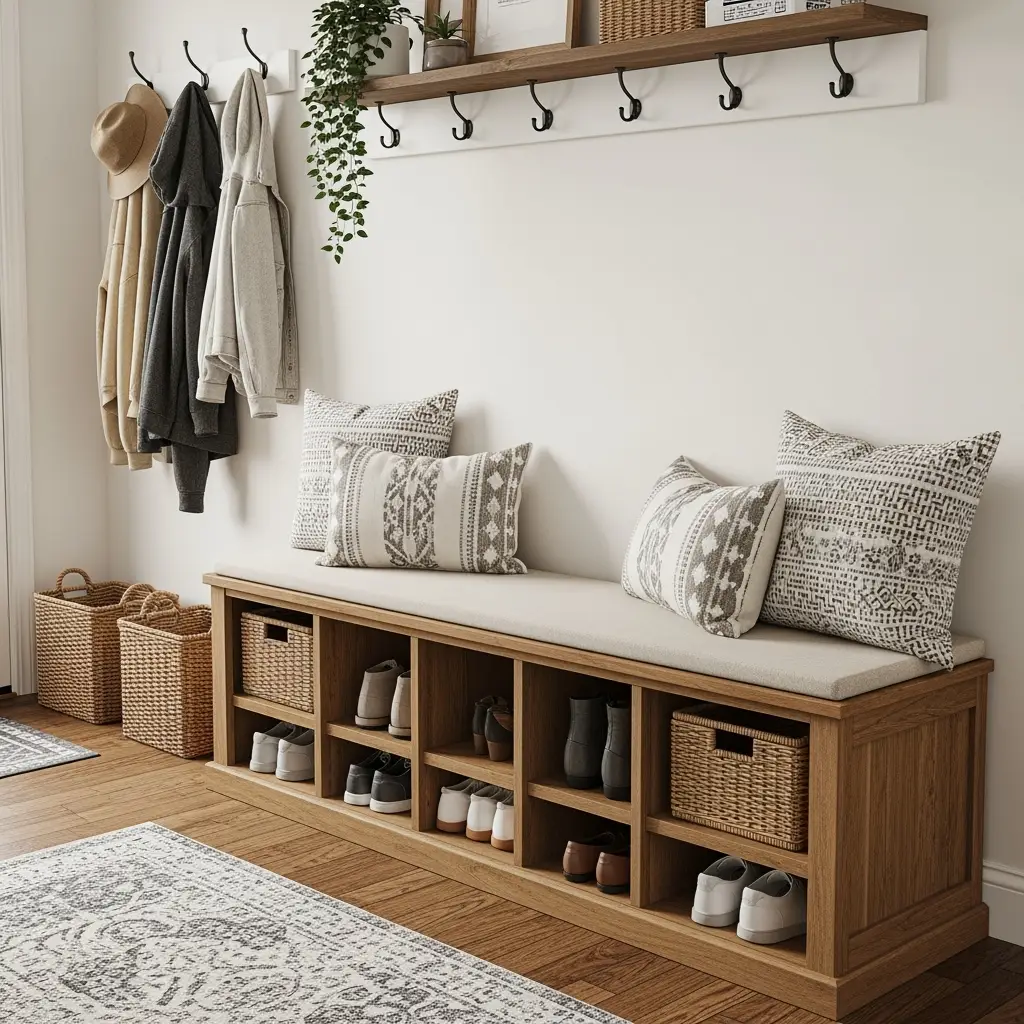
Ideas to Style and Accessorize Your DIY Entryway Bench
Alright, your DIY entryway bench is built, sturdy, and ready—but the real fun is making it look HOT in your entryway. Here’s how:
- Pile on pillows and cushions. Go monochrome or get wild with patterns!
- Throw blankets. Cozy never goes outta style.
- Baskets below. Wicker, metal, colored plastic—they all add up to serious storage and style.
- Add a statement rug underneath. Defines the entry space and hides dirt.
- Hang art or mirrors above. Reflects light and makes your entryway look bigger (heyyy, bonus hack!).
- LED string lights. Kitschy? Maybe. But super welcoming on a rainy day.
Match your accessories to the rest of your decor for a seamless look, or go funky if you wanna make your DIY entryway bench the statement piece.
FAQs: Your Top DIY Entryway Bench Questions Answered
- How long does it take to build a DIY entryway bench? Many folks finish theirs in a weekend, even with drying times. Simpler benches go up faster, while detailed designs might take a bit longer. Don’t rush—enjoy the build!
- Can I make a DIY entryway bench without power tools? Yep! It’s slower, but all hand tools are totally doable. Just be prepared for a decent arm workout.
- How much does a DIY entryway bench cost? It depends on size, wood type, and hardware. Bargain builds can be done for around $50 with smart shopping. Fancier hardwood benches might cost $200+.
- Is it easy to customize a DIY entryway bench? Absolutely. Change the length, height, color, or add/remove storage. That’s the whole fun of DIY!
Conclusion: Take the Plunge—Your DIY Entryway Bench Awaits
Look, building your own DIY entryway bench isn’t just about the furniture—it’s about turning chaos into calm, showing off your style, and getting that sweet rush of accomplishment every time you walk through your door. Plus, you’ll have a practical, beautiful piece you built with your own two hands (and maybe a bruised thumb or two—worth it!).
So grab your plans, lay out your tools, and get started. After you ace your DIY entryway bench, you’ll be eyeing the rest of your home, itching to tackle your next big project. Go on, make your entryway the envy of the block!


