
If you’ve ever been knee-deep in sawdust after an epic DIY woodworking session, you know the struggle’s real. Whether you’re churning out simple shelving units or going all in on custom furniture, airborne dust and wood chips are a nightmare. Seriously, having clouds of dust swirling around isn’t just bad for your lungs, but it’s a pain when you wanna keep your tools and projects clean. That’s why every passionate woodworker needs a super effective DIY dust collection system in their workshop. In this post, I’ll walk ya through everything you need to know to create your own dust-slaying setup at home — step-by-step, on a budget, and totally beginner-friendly.
So, if you’re tired of sneezing, sweeping for hours, or getting told by your spouse that your workshop is a no-fly zone, let’s dive into the world of DIY dust collection system and see how you can crush workshop cleanup for good.
What Exactly is a DIY Dust Collection System?
A DIY dust collection system is your homemade solution to a workshop full of sawdust, wood chips, and all sorts of annoying debris that flies every time your power tools fire up. While big commercial shops use massive (and expensive) systems, you can make your own cost-effective setup that works brilliantly for a home garage or basement woodshop. DIY dust collection systems usually hook up to your various tools, use vacuums or blowers to suck up dust, and either filter or trap it in a dedicated bin. Way better than vacuuming after the fact, right?
Why Bother With a DIY Dust Collection System?
You might ask yourself — is a DIY dust collection system really worth it? I’ll tell ya, it’s not a luxury; it’s a necessity. Here’s why:

- Health Protection: Wood dust is not just messy; it can be hazardous to your lungs. It’s all about keeping that air breathable.
- Cleaner Workshop: Less dust on everything means less cleanup and less wear and tear on your projects and tools.
- Fire Safety: Sawdust is flammable! Good collection means a safer shop.
- Longer Tool Life: Sawdust can kill power tools over time. A DIY dust collection system extends their lives big time.
- Better Results: Dust-free surfaces = better finishes on your woodworking projects, every single time.
Basically, investing in a homemade DIY dust collection system is a no-brainer. And no, it doesn’t have to be complicated or expensive — promise!
How Does a DIY Dust Collection System Work?
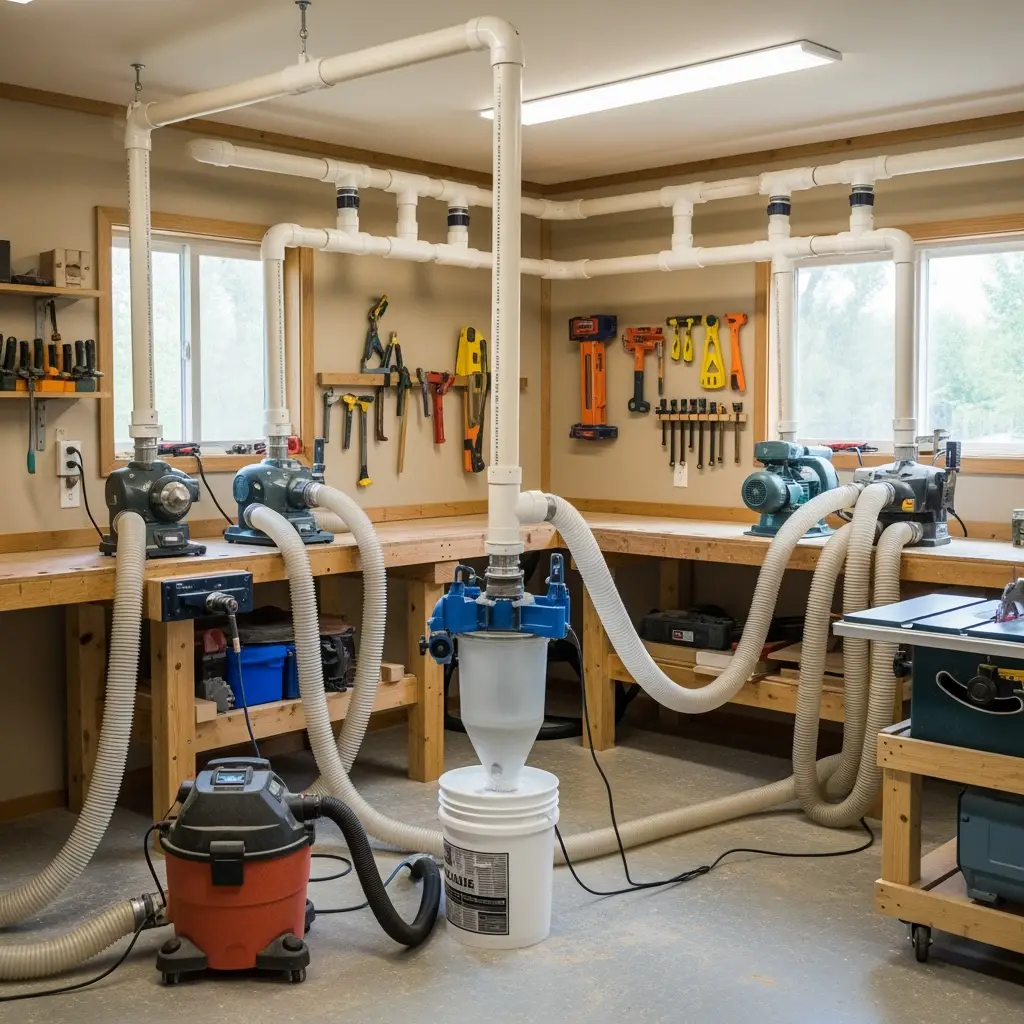
Let’s break it down quick. The backbone of any solid DIY dust collection system is suction — you need a vacuum (or blower) to move dust away from your tools while you work. The dust moves through a network of hoses or pipes (think PVC, for cheap and cheerful setups!) toward a collector. Here, the larger stuff drops down in a bin (sometimes called a dust separator or cyclone), while the finer particles may go through a filter or even outside, depending on your design. The result? Workshop bliss and way less mess.
Key Components of a DIY Dust Collection System
Every solid DIY dust collection system has a few key parts. Here’s what you’ll probably need (you can skip or combine parts depending on your setup):

- Shop Vacuum or Blower: The suction power for your system. Many folks use a sturdy shop vacuum at first. You can upgrade later if you want insane airflow.
- Dust Separator/Cyclone: Catches the big chunks and keeps your vacuum filter from clogging up every five minutes. Stuff like the “Dust Deputy,” or make your own with buckets and a funnel!
- Piping or Hoses: These direct dust from your machines to the collector. PVC pipe is cheap, easy, and works for most small shops.
- Blast Gates: Little sliding doors that let you control airflow to each tool. This helps maintain maximum suction and keeps the system efficient.
- Filters: Critical for capturing the finest dust. HEPA filters are ideal if you wanna avoid breathing stuff that’s invisible (and dangerous).
- Collection Bin: Where all that sawdust and debris ends up. Often just a 5-gallon bucket or trash can.

Planning Your DIY Dust Collection System
This is where the magic really happens. Your DIY dust collection system will only be as good as your workshop layout and tools allow, so here’s what you gotta map out:
- Count Your Main Dust Sources: Table saw, band saw, miter saw, sanders — which tools throw the most mess?
- Workshop Size: If you’re in a one-car garage, you can get away with a single shop vac and short hose lengths. Larger shops might need more power and longer pipes.
- Tool Mobility: Is everything on wheels? Then maybe use longer flexible hoses. Fixed stations? Hard piping is neater and usually pulls more dust.
- Power: Can your shop vacuum or blower handle running all day? Check the ratings! Nothing worse than a fried vacuum mid-project.
Pro Tip:
Sketch a quick floor plan and figure where your dust-making tools live. This makes it way easier to design your DIY dust collection system layout and see what bits you’ll need on your shopping list.
Essential Tools and Materials You’ll Need
If you’re ready to start building your DIY dust collection system, here’s what to grab from the hardware store (or your junk pile — recycle away):
- Shop vacuum or blower (at least 5HP recommended for most setups)
- PVC pipe (2 inch is standard, but larger if possible)
- PVC elbows, T joints, and couplers
- Flexible vacuum hoses
- Blast gates (buy or DIY from scrap material)
- Rubber couplings and clamps
- Buckets (5-gallon or 10-gallon) for the dust bin
- Lids with holes cut for PVC piping
- Dust cyclone or separator (buy a kit or build one from plans online)
- HEPA or good-quality filter for your vacuum
- Mounting brackets and hardware (to attach everything neatly to your shop walls or machines)
Don’t forget some basic hand tools: saws for cutting PVC, screwdrivers, hole saw or jigsaw for bucket lids, and tape measure.

Step-by-Step Guide: Building Your DIY Dust Collection System
Time for action, mate. Here’s a proven method for making a killer DIY dust collection system, even if it’s your first try. Seriously, if I can do it (I’m not always the most organized), you got this.
Step 1: Decide Where Your Dust Collector Lives
Pick a central spot in your workshop that’s close to most of your tools. The closer you keep your vacuum/blower and dust separator, the better your suction will be across the shop. Usually, a back corner or just inside the garage door works best.
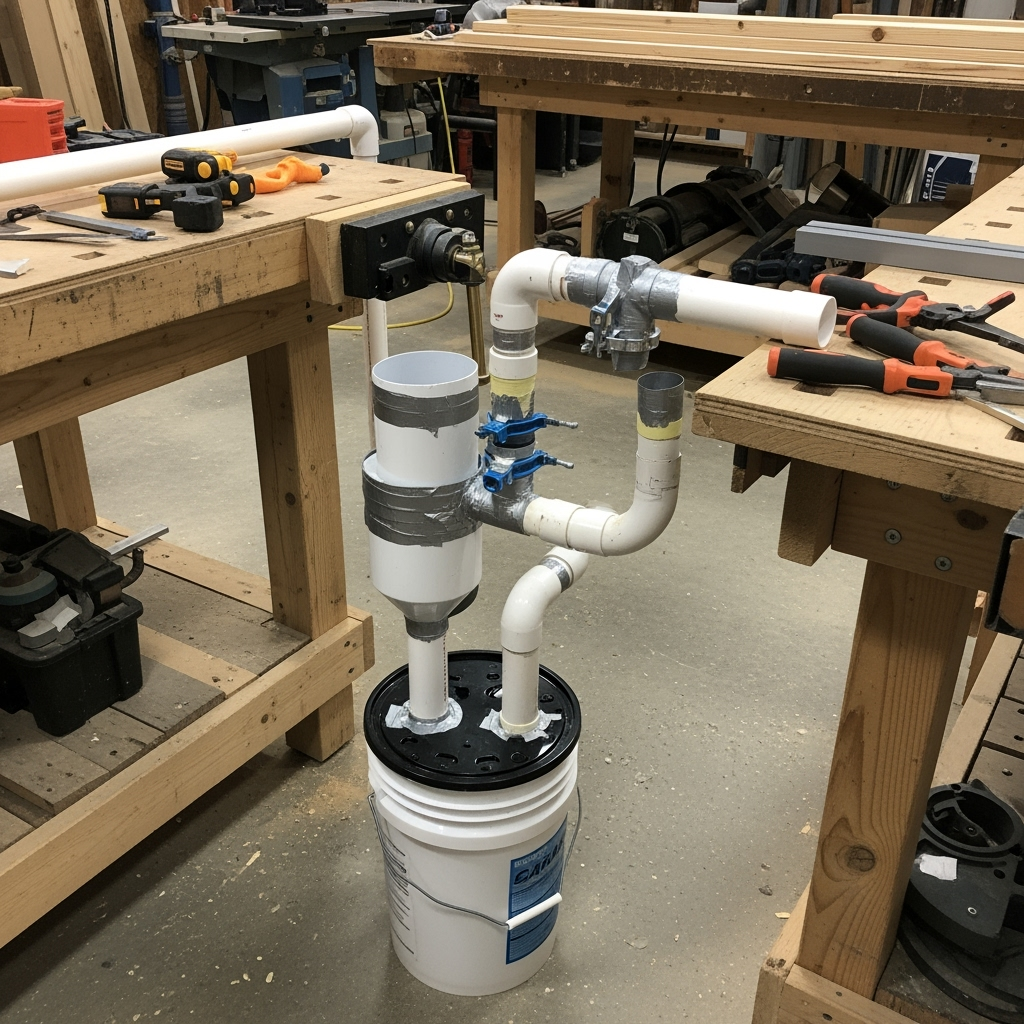
Step 2: Install the Cyclone or Separator First
Mount your cyclone or separator on top of your dust bin (usually a sturdy bucket or trash can). If you’re making DIY, cut holes in the lid: one for incoming dust (from your tools) and one for outgoing air to your vacuum. Secure with clamps and make it airtight as possible — duct tape and silicone work wonders for stopping air leaks.
Step 3: Set Up Your Shop Vacuum or Blower
Connect your vacuum hose to the output of the cyclone/separator. This way, large debris never even gets close to your vacuum filter (meaning it needs cleaning way less). Make sure everything fits snugly — again, check for any leaks because leaks destroy suction.

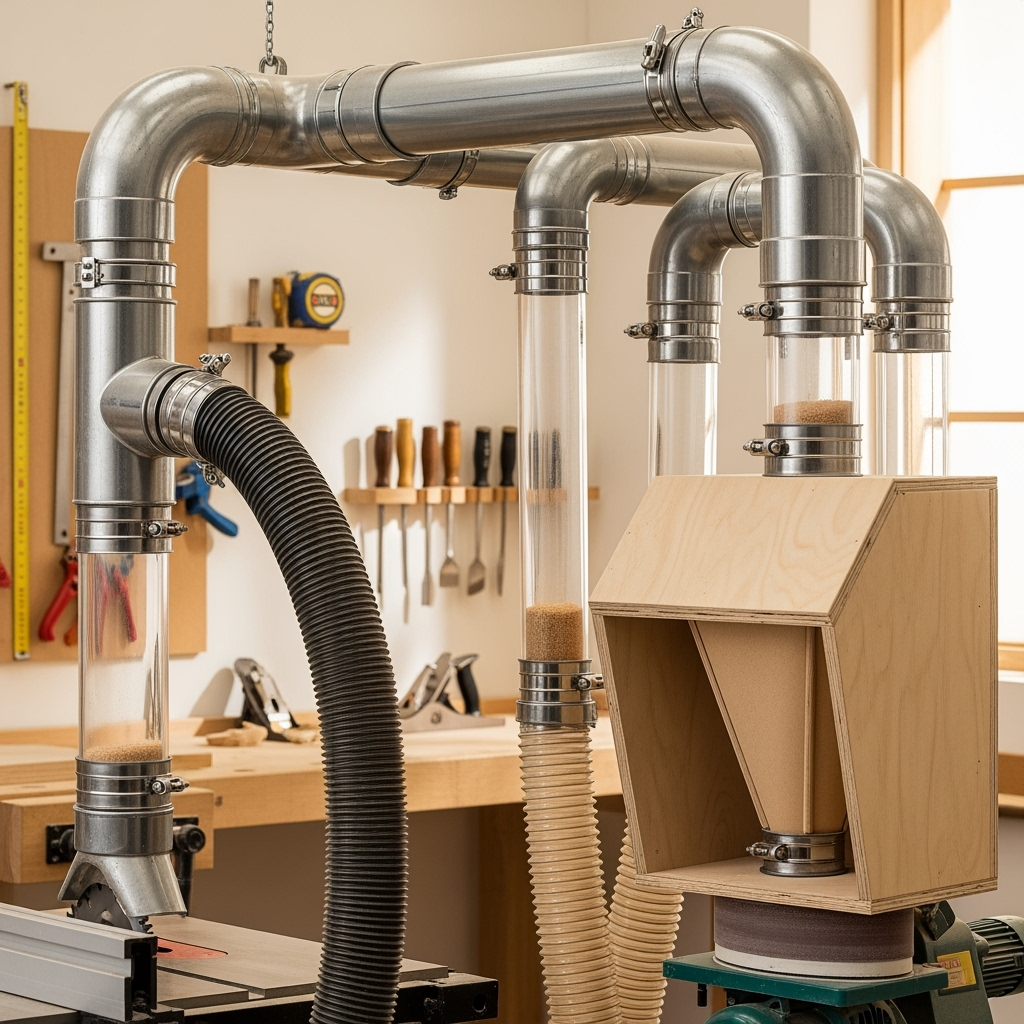
Step 4: Pipe It Up
Now, use your PVC pipes (or hoses) to run lines out to your woodworking machines. Secure pipes to the wall or ceiling using brackets and clamps every couple of feet for neatness. If you want to DIY your blast gates, cut slots in your pipes or hoses and insert sliding pieces of thin plywood, then seal around for an airtight fit.
Step 5: Attach to Each Tool
At each major machine, attach a hose or pipe so the dust port lines up with the blast gate inlet. Some machines might not have built-in outlets — in that case, grab a universal dust hood or make your own from plywood and scrap plastic. Flex hose works great if your tools move around, especially on rolling bases.
Step 6: Add Filtration (Optional, But Smart!)
If you wanna collect even the finest particles (the stuff that floats for hours and gets into your lungs), add a HEPA filter at the exhaust end of your DIY dust collection system. Could be in your vacuum, or you can rig one onto your blower’s exhaust pipe.
Step 7: Test and Seal It Up
Fire up your new DIY dust collection system and open each blast gate one at a time to check suction at each tool. If you find anywhere with weak pull, check for air leaks or clogs and tighten things up. Trust me, a little extra sealing now = way less frustration down the road. Add labels to each gate if you have a memory like mine!
Top Tips to Maximize Your DIY Dust Collection System
- Keep Hose Runs Short: The shorter your pipes or hoses, the better the suction at your tools.
- Limit Elbows and Bends: Too many sharp turns in your system kill suction. Use gentle curves wherever possible.
- Empty Regularly: Don’t wait until the bin is overflowing with dust. Empty after big sessions to keep the system performing well.
- Clean Filters Routinely: A clogged filter can make your shop vac totally useless. Make it a habit after every big project or every week, whichever comes first.
- Check and Replace Hoses: Cheap hoses can tear or collapse over time. Upgrade if you notice airflow issues around your more-used machines.
- Go Modular if Space is Tight: If your shop is tiny, build your DIY dust collection system in portable sections. Move them as needed for each project.
Common Mistakes in DIY Dust Collection System Builds (And How to Avoid ‘Em!)
- Using Too Small a Vacuum: Underpowered vacuums can’t keep up. Err on the side of more horsepower when in doubt.
- Poor Sealing: Air leaks (especially in homemade blast gates and cyclone sections) kill suction. Triple-check seals!
- Not Enough Blast Gates: You want to isolate suction to one machine at a time. Add extra gates to boost flow where you need it.
- Ignoring Fine Dust: Failing to add good filtration or venting outside can risk serious health issues over time. Don’t skip it, mate.
- Neglecting Maintenance: Like any tool, your DIY dust collection system needs love. Clean and inspect often and don’t let little issues pile up.
Upgrade Ideas for Your DIY Dust Collection System
Ready to go all out? Here are some killer upgrades for your DIY dust collection system once you’ve got the basics rocking:
- Remote Switch: Install a wireless power switch so you can turn your shop vac/blower on and off from anywhere in the shop.
- Automatic Blast Gates: These little beauties open and close with your tools, so you don’t gotta walk around every time you move machines.
- Wall-Mounted Hose Reels: Super neat, keeps hoses off the floor (no more tripping during cleanup binges).
- Bigger Cyclone Separator: Build a larger or dual-stage separator for epic sessions or planing operations.
- Permanently Plumbed Exhaust: Vent filtered air outside to get rid of even the tiniest dust particles.
Sky’s the limit, and with a DIY mindset, you can keep tweaking forever to make your DIY dust collection system fit your workshop perfectly!
Real Woodworking Wins with a DIY Dust Collection System
No lie, when you finally get your DIY dust collection system finished and running sweet, it feels like a game-changer (it totally is, btw). Here are just a few ways your woodworking life gets better:
- Less Time Sweeping, More Time Building: Clean as you work equals more projects done — period.
- Breath Easy: Air feels fresh, and your lungs (and family) thank you for ditching the fine dust.
- Better-Looking Finishes: Dust-free surfaces mean smoother stains, paints, and polyurethane jobs.
- Proud Shop Owner Vibes: Visitors (and workshop buddies) will be mega impressed at how pro your space looks and feels.
Frequently Asked Questions About DIY Dust Collection System
- Is PVC Pipe Safe for a DIY Dust Collection System?
PVC works great for suction at home-shop levels. Static electricity is rarely an issue in a one-person shop, but if you’re worried, run a copper wire inside the pipe. - How Much Will It Cost?
You can build a basic DIY dust collection system for as little $100 if you have a decent vacuum already. Fancier systems with cyclones and filters will run more, but still way less than pro shop builds. - Can I Use a Regular House Vacuum?
Nope, don’t do it. They usually can’t handle bulky debris or long hours. Stick with a shop vac or dedicated dust extractor for your DIY dust collection system. - What If My Tools Don’t Have Dust Ports?
DIY a hood or shroud from plywood or plastic! Loads of plans out there for every kinda tool. - How Quiet Are These Systems?
Shop vacs are noisy, but clever mufflers and insulation can bring the racket down. Still, a small price for a clean shop!
Conclusion: Why You Need a DIY Dust Collection System Now
Hopefully, you’re stoked to build your own DIY dust collection system and say “later!” to sawdust clouds. Building this system isn’t just about a cleaner space — it’s about safety, health, and shop pride. With a few supplies and a free weekend, you can totally transform your workspace and make woodworking way more fun and productive.
So grab those buckets and hoses, hit up the hardware store, and start hustling your DIY dust collection system build today. Your future self (and your lungs) will thank you!


