
If you’re always juggling where to hang your jackets, bags, or even hats, then hold up – you’re in the right place. Today, we’re diving deep into the world of DIY coat rack woodworking. Whether you’re a seasoned woodworker or someone who’s never picked up more than a glue stick, this blog’s got you. And trust me, your entryway is about to get waaay more organized (and awesome looking) with some super practical, eye-candy-worthy diy coat rack woodworking projects.
Why DIY Coat Rack Woodworking is a Game Changer
Let’s be real, store-bought coat racks are usually boring, overpriced, and… Well, just don’t bring that personal touch that makes your space stand out. With diy coat rack woodworking, you not only save money, but you also get to flex that creative muscle, turning a bland corner into a wow-moment spot. Plus, building your own coat rack means it’ll fit your exact vibe and space – hallway, mudroom, or even bedroom.
Benefits of Choosing DIY Coat Rack Woodworking
- Affordable: Most projects use scrap wood or repurposed materials.
- Customizable: You pick the size, shape, and style.
- Durability: Home-made usually = built to last, especially with quality wood.
- Skill-Building: Practice makes perfect in woodworking, and this is a great starter.
What You Need to Start Your DIY Coat Rack Woodworking Journey
Before sawdust starts flying, let’s cover the basic materials and tools for most diy coat rack woodworking projects. Don’t stress if you don’t have fancy stuff – even basic tools can make killer racks!
- Wood: Pine, oak, repurposed pallets, or even reclaimed barn wood.
- Hooks: Metal, wooden pegs, antique handles, or even funky doorknobs.
- Tools: Saw (hand saw or mitre/saber saw), drill, screw driver, measuring tape, sandpaper, level.
- Extras: Wood stain, paint, varnish, screws, wood glue.

Top 5 DIY Coat Rack Woodworking Projects to Try
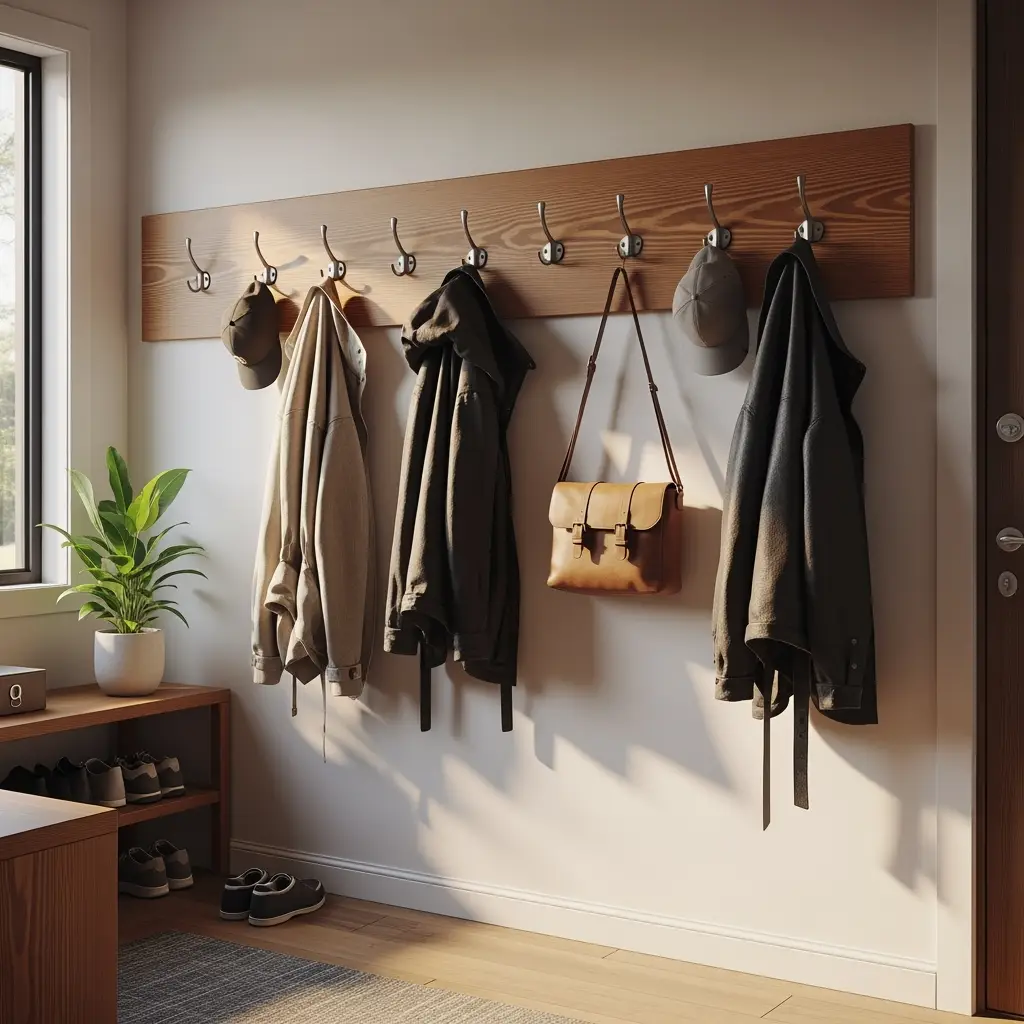
1. Classic Wall-Mounted Wooden Coat Rack
This one’s a solid beginner project in diy coat rack woodworking. Grab a sturdy plank, sand those edges, drill in some evenly spaced holes, and attach coat hooks. Paint, stain, or leave it natural depending on your décor.
- Measure your wall space, and cut wood to fit.
- Sand with medium, then fine-grit paper.
- Mark positions, then screw in hooks or pegs.
- Mount using wall anchors for heavy loads.
2. Rustic Branch Coat Rack
Bring nature inside! Find a thick, curvy branch (always check for bugs lol), clean it up, sand down the bark, and secure it to a stained base plank. The unique shapes make each rack one-of-a-kind. Perfect for cabin vibes or boho rooms, this diy coat rack woodworking spin will stand out.
3. Entryway Bench With Built-in Coat Rack
If you’ve got more time (and more jackets), why not combine seating and storage? Create a bench from 2x4s or plywood, then attach an upright board with hooks. Shoes underneath, coats above – total space saver. For more inspiration and detailed steps, check out our entryway bench plans.

- Build a sturdy bench using simple box construction.
- Attach backboard (wide plank or slats) with screws.
- Install hooks at practical heights for kids and adults.
4. Minimalist Floating Peg Rack
Sometimes less is more. Drill holes in a slim plank, insert dowels with wood glue, and you’ve got a Scandi-inspired diy coat rack woodworking statement! Great for small spaces, bathrooms, or kids’ rooms.
5. Vintage Board With Assorted Hooks
Hit up thrift stores or flea markets for antique hooks/handles/knobs. Screw them into a salvaged piece of barn wood or a painted board. The mix-n-match look adds instant character and tells a story. All made possible by diy coat rack woodworking magic.
Design Inspiration: Unleashing Your Creativity
There’s literally no limit to what you can do with diy coat rack woodworking. Here’s some ideas to spark your creative brain:
- Paint geometric patterns, stripes, or floral designs
- Personalize with stencils or family names
- Add a shelf above for hats, mail, or plants
- Use copper or brass hooks for a modern twist
- Add lighting (like LED strips) for a high-end touch
Step-by-Step Guide: DIY Coat Rack Woodworking Basics
Alright, ready to get sawdusty? Here’s a simple yet versatile step-by-step guide that you can tweak for any of the diy coat rack woodworking projects mentioned above.

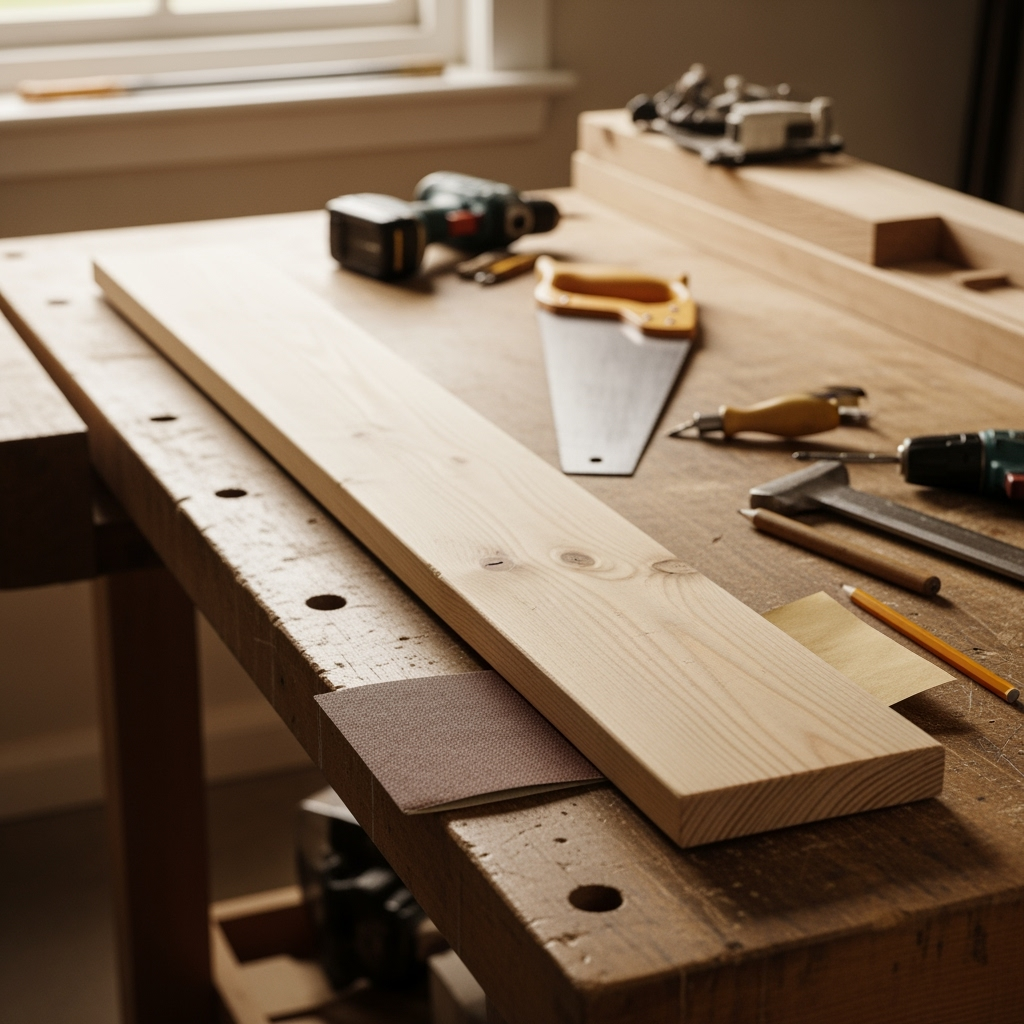
Step 1: Choose Your Wood and Finish
Decide on your style and pick a wood type. Pine is affordable and easy to work with, while oak or maple adds luxury and strength. Cut your plank to size – typically 2-4 feet long for wall racks.
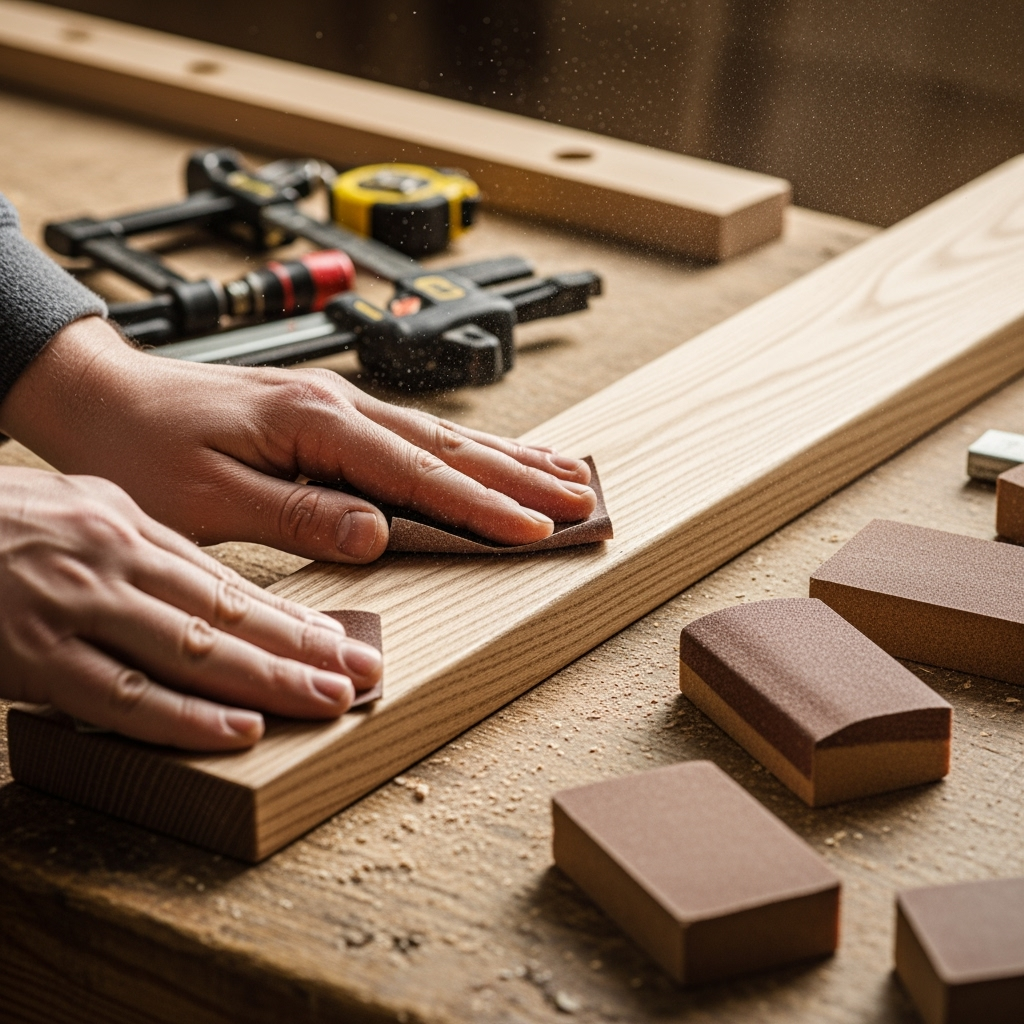
Step 2: Sanding for Smoothness
You do not wanna get splinters every time you hang up your coat. Sand all sides and edges thoroughly, starting with rough grit and finishing with fine grit sandpaper.
Step 3: Finishing Touches
Apply wood stain or paint according to your decor. Let dry completely before handling. For a glossy, pro finish, use two coats of polyurethane varnish (optional, but looks sick!).
Step 4: Mark and Attach Hooks
Measure equal distances for each hook or peg. Mark them clearly – use a pencil or masking tape. Pre-drill holes to avoid wood splitting, then attach hooks with screws. If you’re DIYing wooden pegs, glue them in place and let them set overnight.

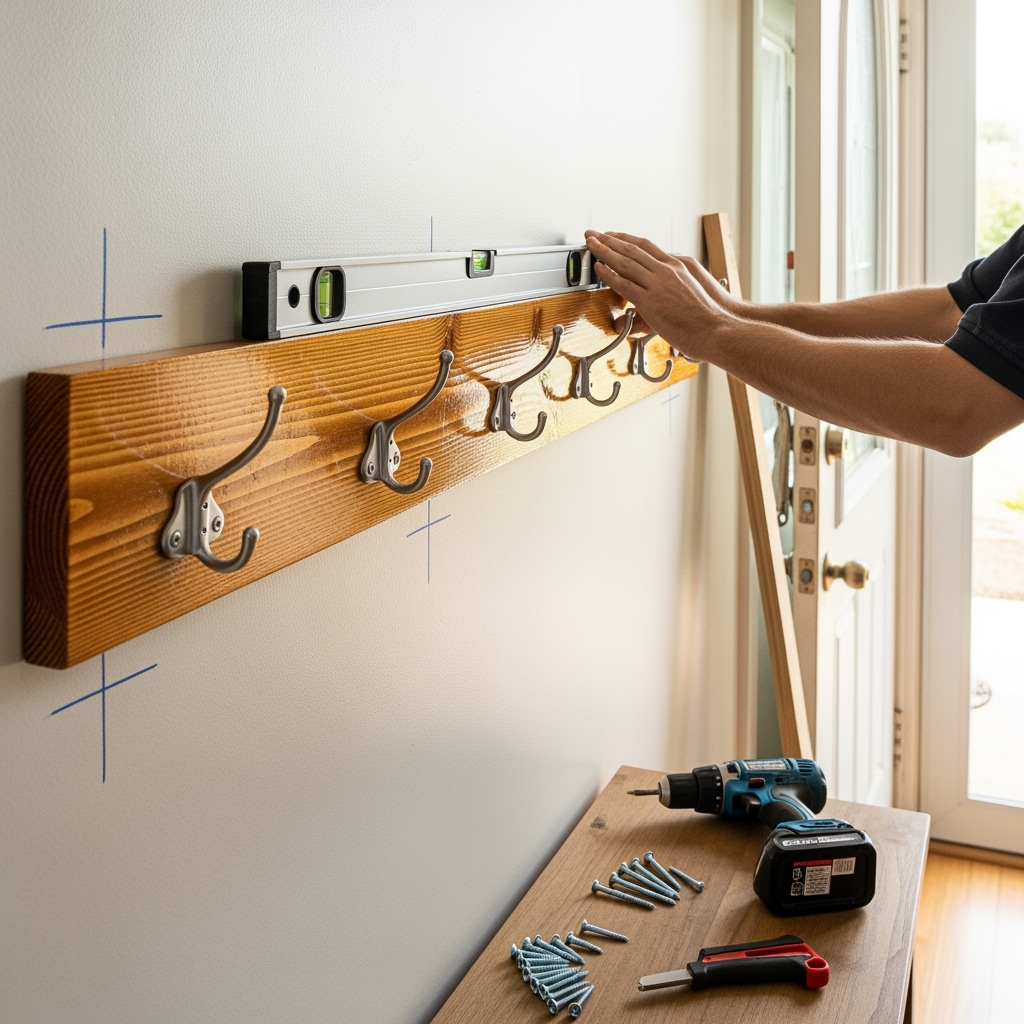
Step 5: Mount on the Wall
- Find wall studs – most coats are pretty heavy, don’t wanna rip out drywall.
- Use a level for straight installation (slanted racks are a pain in the neck, trust me).
- Secure with sturdy screws or brackets rated for your coat rack’s weight.
Bam! Stand back and admire your masterpiece. That’s the essence of diy coat rack woodworking – practical, awesome looking, and hands-on fun.
Pro Tips for Killer DIY Coat Rack Woodworking Results
- Double Check Measurements: Better to measure twice than end up with crooked hooks. (Embarrassing, but I’ve been there.)
- Test Hook Placement: Lay out coats on the table to make sure everyone has enough space – nobody likes crowded pegs.
- Support Heavy Loads: If you’re hanging heavy backpacks, install directly into studs or use heavy-duty molly bolts.
- Mix Materials: Combine woods, metals, and textures for unique effects.
- Finish Edges: Rounded or beveled edges look professional and are less likely to chip.
DIY Coat Rack Woodworking for Small Spaces
Living in a compact apartment? No sweat, diy coat rack woodworking can be designed like a pro for even the tightest areas. Try vertical racks, over-the-door hooks, or corner-mounted systems. Floating mini-pegs or pop-out racks are a smart way to maximize every inch. Stow umbrellas, keys, and leashes together so you’re not scrambling out the door.
Budget-Friendly DIY Coat Rack Woodworking Hacks
- Use pallet wood (free on Craigslist or behind stores) for that trendy reclaimed look.
- Repurpose old furniture – broken chairs make great racks with slats or rungs for hooks.
- Spray-paint cheap hooks in matte black or gold for a luxe upgrade.
- Check your local salvage yard for unique woods or vintage hardware.
Safety Tips for DIY Coat Rack Woodworking
Look, diy coat rack woodworking is awesome, but always keep it safe:
- Wear safety goggles while cutting or drilling.
- Use dust masks when sanding – wood dust gets everywhere, and your lungs will thank you.
- Work on a stable surface and keep tools organized.
- Check that finishes and adhesives are safe, especially in homes with kids or pets.
Adding Storage: Beyond Just Coats!
The beauty of diy coat rack woodworking is that you can go beyond just hanging coats. Integrate cubbies for shoes, mail slots, baskets for gloves and hats, even charging stations for your gear. You could also include a wooden storage crate for extra organization. The more functional, the better!
Finishing & Styling Your DIY Coat Rack
When your rack is up and ready, take a second to style it for Insta-worthy results.
- Add greenery – hanging plants or succulents refresh any space.
- Use baskets or crates below for shoes or kid gear.
- Hang artwork above or next to your rack to tie it into your decor.
- Install a mirror for those last-minute outfit checks.
Common Mistakes in DIY Coat Rack Woodworking (And How to Avoid ‘Em!)
- Bad installation: Always use anchors or find a stud, otherwise you risk the whole thing crashing down.
- Cheap hardware: Low-quality hooks bend and break. Invest in solid ones for long life.
- Poor finishing: Always let paint or varnish dry fully. Rushing leads to sticky coats and fingerprints forever.
- Ignoring function: Make sure there’s enough room for every family member’s gear!
Show Off Your DIY Coat Rack Woodworking Skills
Now that you’ve nailed down diy coat rack woodworking, show it off! Post your project on socials, brag to your buddies, or even start making these as gifts. They’re killer for new parents (tiny hooks for tiny coats) or friends moving places.
Frequently Asked Questions About DIY Coat Rack Woodworking
What’s the easiest DIY coat rack woodworking project for total beginners?
The basic wall-mounted plank with screw-in hooks is about as simple as it gets. Start there and get fancy as you go.
How much does it cost to make a DIY coat rack?
Anywhere from $10 (using reclaimed wood and cheap hooks) to $50 or more with higher-end hardware.
Can I make diy coat rack woodworking projects without power tools?
Yup, totally. A hand saw and screwdriver are plenty for most options.
How do I refinish an old rack?
Sand off the old finish, patch holes, and start fresh with new stain, paint, or hooks.
Wrapping It Up: Why DIY Coat Rack Woodworking Rocks
Honestly, diy coat rack woodworking is where style meets function. You get storage, personality, and a killer sense of accomplishment every time you hang up your jacket. No more boring entryways, no more scrambled mornings searching for backpacks or hats. Whether you go rustic, modern, or straight-up quirky, there’s a diy coat rack woodworking project screaming your name.
So grab some wood, fire up your tools, and let’s make your home as organized (and envy-worthy) as it was meant to be. You got this!


