
Ever tripped over a pile of clamps or spent waaay too long searching for the right clamp in the middle of a project? If you’re nodding your head or already peeking under your bench for missing pieces, you’re in the right place. Today we’re diving all in on building a super practical, wallet-friendly, and straight-up life-changing DIY clamp rack that will turbo-charge your workspace. Whether you’re a newbie woodworker or seasoned sawdust producer, an organized shop is key, and a DIY clamp rack is the secret weapon you never knew you needed. Don’t worry, it’s not rocket science—we’ll go step-by-step, with tips, common mistakes, and even a few ‘facepalm’ stories that I picked up while wrangling my own mountain of clamps. So, roll up your sleeves and let’s tackle that chaos!
Why You Absolutely Need a DIY Clamp Rack
- Organization: With a DIY clamp rack, your clamps finally have a home. No more random clamps hiding in every corner.
- Space Saver: Storing clamps on a wall gets them off benches and floors, opening up valuable workspace!
- Accessibility: A DIY clamp rack puts all your clamps right in arm’s reach, making glue-ups smoother (and faster! Yeah!).
- Safety: No more tripping over loose metal. The DIY clamp rack keeps your shop safe and less clunky.
- Pride: There’s a weird sense of joy and pride every time you look over and see those clamps lined up perfectly!
Types of Clamps and Rack Styles
Before we dive in, let’s quickly chat about types of clamps and racks. Every woodworker’s clamp collection is a little different, so your DIY clamp rack should fit your gear and your space. Here’s the lowdown:
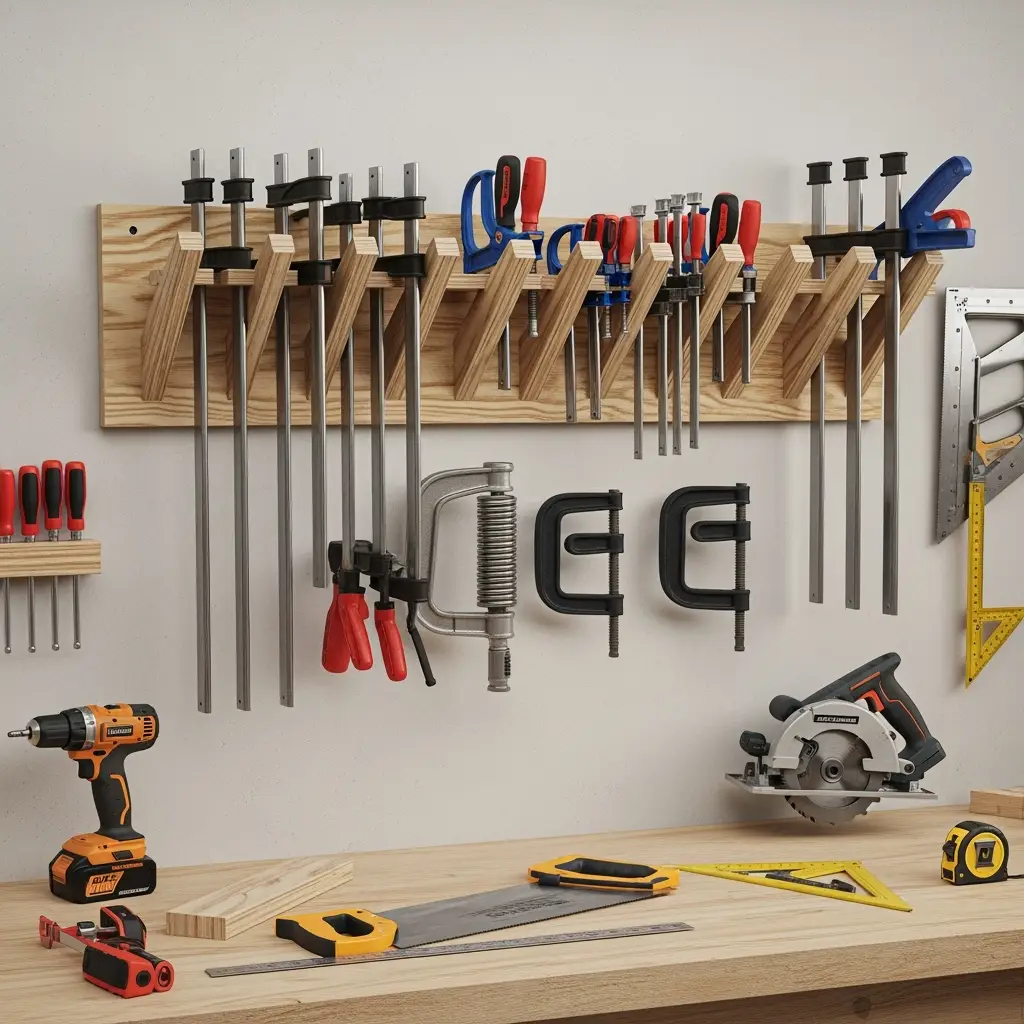
- Bar Clamps & Pipe Clamps: These are long and heavy—ideal for wall-mounted DIY clamp racks with deep supports.
- F-Style or Quick Grips: Lighter, so you can use shallower shelves or pegboard hooks on your DIY clamp rack.
- Spring Clamps: Super light—pegboard or a strip of wood will do.
- C-Clamps & Others: Small but mighty; cluster these guys together for efficient use of your DIY clamp rack.
When you’re sketching out your DIY clamp rack, measure your collection first (that way, you won’t run out of space or end up with a rack totally unsuitable for your biggest clamp pals).

Must-Have Materials and Tools for Your DIY Clamp Rack
- Plywood or 2×4 lumber (I prefer ¾” plywood for this DIY clamp rack, but hey, use what you got.)
- Wood screws
- Drill/driver
- Saw – circular, table, or even a hand saw
- Tape measure, pencil, and square (no more angled racks, oops!)
- Level (unless you dig that ‘leaning tower’ vibe on your DIY clamp rack)
- Sandpaper
- Stud finder, wall anchors, or French cleat hardware for mounting
Depending on how zesty you wanna get, you could add hooks, magnets, or even little storage bins to your DIY clamp rack for extra organization points. Bonus cool factor!
Simple Step-By-Step Instructions for Building a DIY Clamp Rack
1. Measure and Plan
Okay, don’t skip this! Start by clumping all your clamps together and line ‘em up. Figure out how much wall or bench space you’ve got for the DIY clamp rack. Are you hanging lots of long clamps? Factor in the overhang! Sketch your idea on paper, marking the number and size of clamps you need to fit onto the DIY clamp rack.
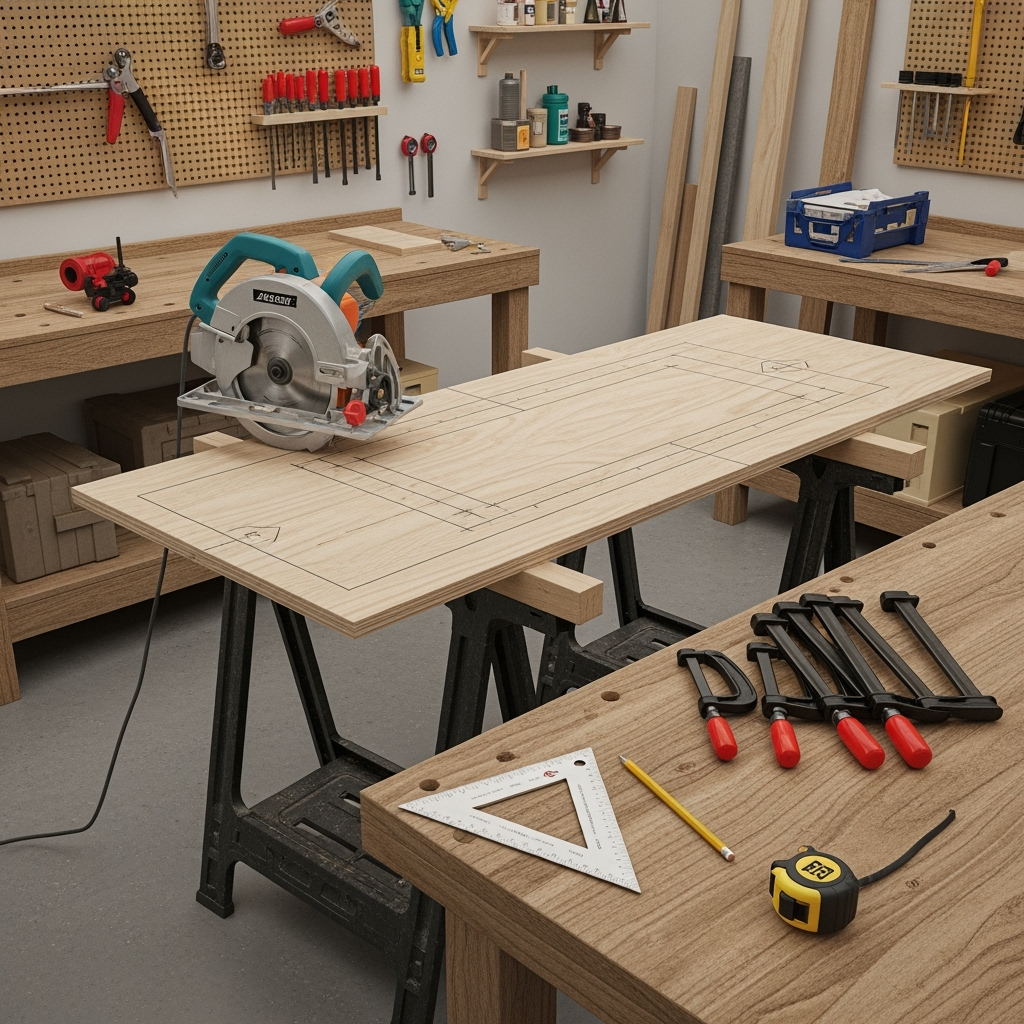
2. Cutting the Main Rack Pieces
For most DIY clamp rack styles, you’ll need a horizontal base and a few angled or vertical dividers. For wall racks, a single length of ¾” plywood works wonders as a backer piece. Measure, mark, and cut the main board to size, plus any supports or prongs. Don’t worry if your first cut isn’t perfect—nobody gets it right the first time… except maybe Norm Abram.

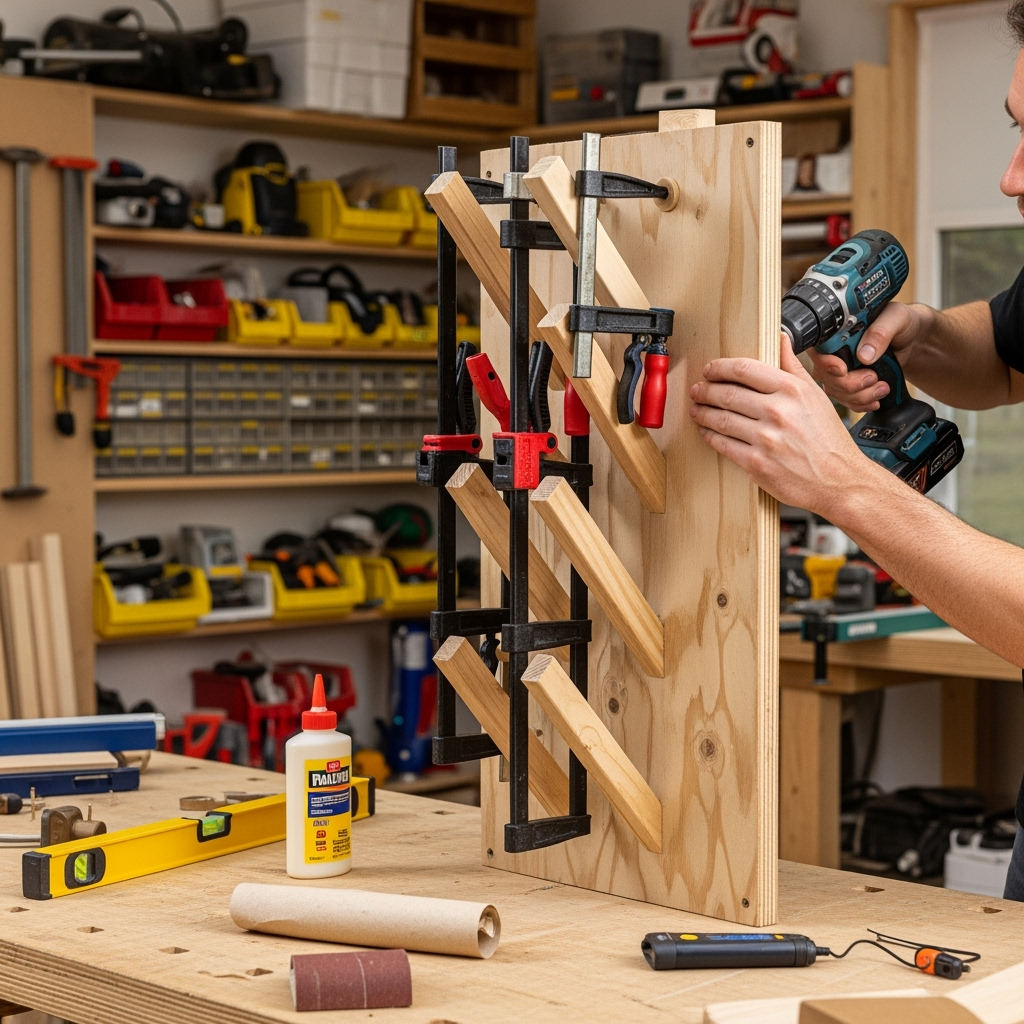
3. Assembly Time: Building the Rack
- Start by attaching the supports or prongs to the main backboard for your DIY clamp rack. Angle them up slightly to help the clamps stay put.
- Screw from the back whenever possible for a clean look, but if you’re feeling fancy, wood glue + clamps = next-level strength.
- If you’re building for really heavy clamps, double up your supports or use thicker wood so you don’t wake up to clamps on your floor.
Pro tip: Lay your clamps between each prong or divider as you go. It’s way easier to adjust spacing at this stage instead of after mounting that DIY clamp rack.
4. Sand and Finish
This part’s easy to skip, but nothing ruins Saturday shop vibes like a splinter lodged in your hand. So, hit all your DIY clamp rack surfaces with sandpaper, rounding off the sharp corners. If you wanna look real pro, slap on a clear sealer or leftover paint so glue doesn’t stick to your masterpiece rack.
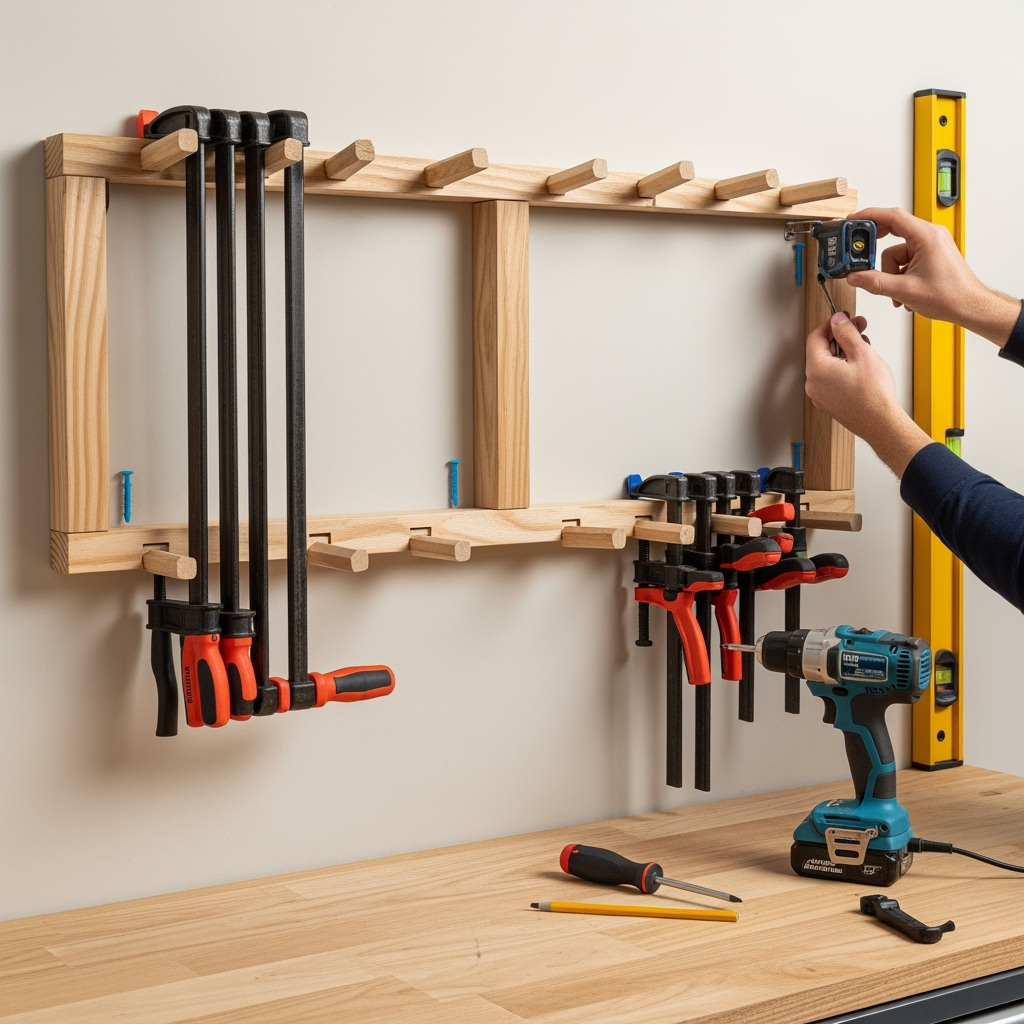
5. Wall Mount Like a Boss
- Find the wall studs with your stud finder.
- Hold your DIY clamp rack up (get a bud to help if it’s big) and mark where it’ll go.
- Drill it into place with wood screws or use a French cleat—these make the DIY clamp rack removable for cleaning or rearranging.
- Wiggle it to check stability. Nothing’s more embarrassing than your DIY clamp rack crashing to the ground mid-project!
Creative Ideas to Upgrade Your DIY Clamp Rack
- Sliding Rails: Get snazzy by adding adjustable rails to your DIY clamp rack so you can resize as your clamp stash grows!
- Magnetic strips: Slap on a magnetic strip for quick-grab small clamps or tools.
- Integrated glue & brush shelf: Mount a mini shelf above the DIY clamp rack for your gluing essentials and avoid those messy hunts.
- Hooks and baskets: Attach these under your DIY clamp rack for tape, squares, or weird leftover clamp bits.
- Label Everything: If you’re type-A (or wish you were), label spots so every clamp has a home on your DIY clamp rack!
Pitfalls and Rookie Mistakes to Avoid with Your DIY Clamp Rack
- Overcrowding: Trying to stuff too many clamps onto a short rack makes it kinda useless. Space your DIY clamp rack generously.
- Weak wall mounting: You don’t wanna hear a ‘crash’ two days after setup. Use anchors or hit the studs—seriously.
- Ignoring clamp types: Mixing big heavy bar clamps with spring clamps on the same DIY clamp rack creates chaos. Group by type or size.
- Mounting too high/low: Put your DIY clamp rack at chest or shoulder height for easy access (not next to the ceiling unless you like ladders).
- Wobbly construction: Don’t skimp on supports for your DIY clamp rack—trust me, I once tried to “save time” and spent more fixing it later. Ugh.
Frequently Asked Questions About DIY Clamp Racks
Can I use scraps or cheap wood for my DIY clamp rack?
Definitely! A DIY clamp rack isn’t a fine furniture piece, so use whatever sturdy scraps you have. Just make sure it’s strong enough for your heaviest clamps.
How do I know how big to make my DIY clamp rack?
Total up your clamps, add 25% (for those new ones you’ll buy), then measure. It’s way less hassle to build a slightly too big DIY clamp rack than a too small one!

What’s the easiest style for beginners?
A single straight board with notched supports or pegs is the easiest DIY clamp rack to build. No fancy cuts—just screw or glue n’ go!
Will wall mounting damage my shop walls?
As long as you screw into studs or use proper anchors, your walls will be fine. The DIY clamp rack spreads out the weight and is way safer than a pile on the floor.
Should I epoxy or paint my DIY clamp rack?
Not required, but it helps with longevity and looks cool (bonus: less glue build-up over time).
My Personal DIY Clamp Rack Failures… And What You Can Learn
Confession: my first DIY clamp rack was a disaster. I used particle board scraps that bowed over time, so my heavy clamps started slipping off like they were on a slippery slide. Plus, I didn’t check for wall studs, so one side ripped out of the drywall at 2 am. Yeah, I learned the hard way! Make sure your DIY clamp rack uses strong, straight wood, with real support and solid mounting. You’ll thank yourself for spending an extra 10 minutes getting it right!

What Other Woodworkers Say About Their DIY Clamp Rack
Scroll any woodworking forum or check YouTube comments, and you’ll see almost every pro and hobbyist SWEARS by a solid DIY clamp rack. Folks show off wall-length versions, mini mobile versions on caster wheels, even under-bench racks. The bottom line is, however you build it, making your own DIY clamp rack is a massive shop upgrade you’ll wonder how you ever lived without. Plus, you get to show off those clamps you slowly acquired (and managed to hide spending money on from your spouse… just saying!).
Conclusion: Time to Build That DIY Clamp Rack!
If you got this far, you’re probably already eyeballing that messy clamp pile or shelf in your shop. After tackling your clamp rack, consider building a DIY wooden toolbox to organize your other tools. Don’t wait—grab those scraps, charge your drill, and start your own DIY clamp rack project. It’s basically the shop equivalent of organizing your closet—everything is faster, smoother, and way more fun when you know where your stuff is. Whether you go for a mega wall-mounted masterpiece or a mini mobile rack, the DIY clamp rack will absolutely transform your workflow and your sanity. Go get it, and show us your build (and maybe your clamp collection, we won’t judge)!


