
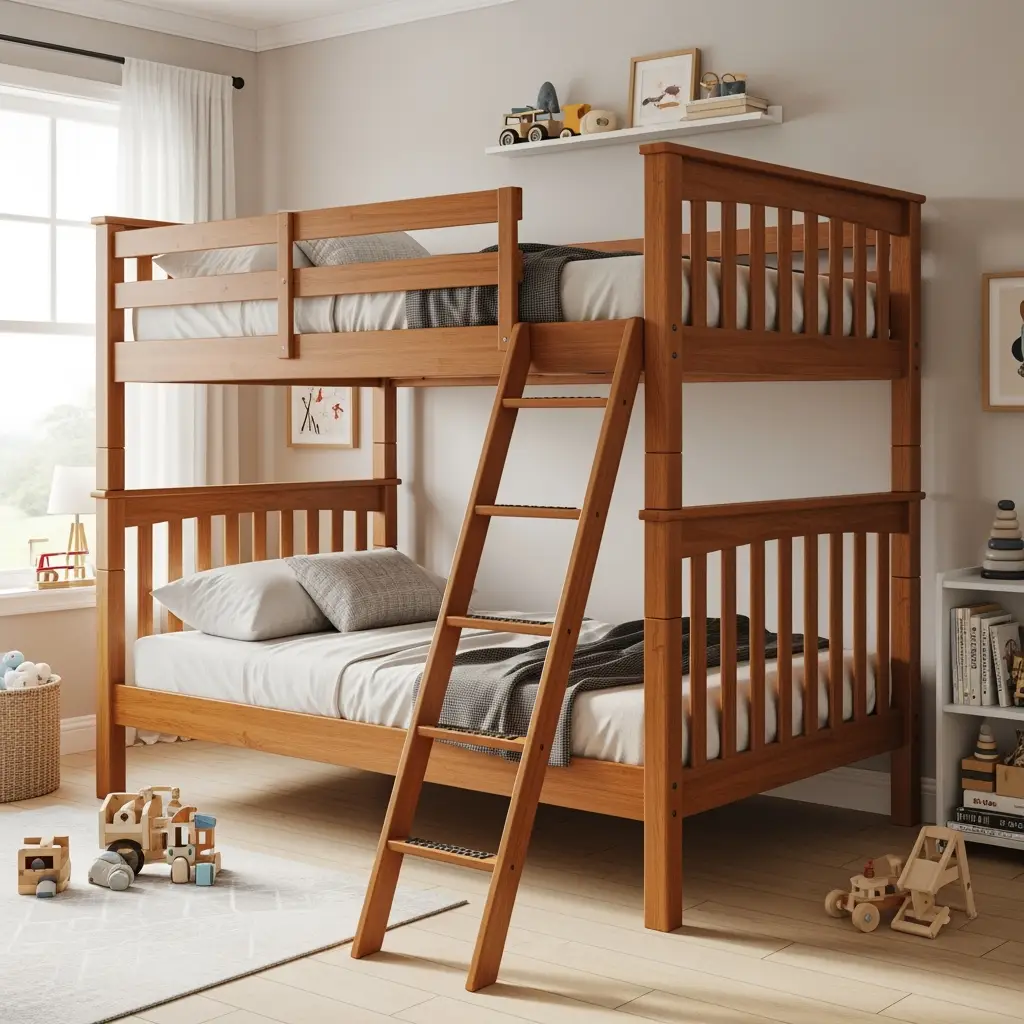
Yo, gather ’round DIY lovers and home heroes! If you’re on the hunt for a wicked project that’ll save you cash, impress your crew, and flex your handy skills, you need to check out the magic of DIY bunk bed plans. Whether you’re lookin’ to maximize a tiny kids’ room, prep a sweet guest nook, or just keep your space hella organized, these bunk beds are the ultimate hack. Pull up a chair, grab your notepad, and let’s get into how DIY bunk bed plans can totally revamp your home. Trust, by the end, you’ll know all the ins, outs, and sneaky tricks the pros keep to themselves.
Why Choose DIY Bunk Bed Plans Over Store-Bought?
Y’know that feeling when you wander the furniture store, jaw dropping at those price tags? With DIY bunk bed plans, you can cut that pain in half—even less, actually. These plans let you build custom bunks with your own two hands, using wood and materials YOU choose, guaranteed to fit your space and style. Let’s break down the big reasons why so many folks (including yours truly) are turning to DIY bunk bed plans instead of cookie-cutter store beds:
- Budget-Friendly: Tackle the project for a fraction of store prices—save that paycheck for other fun stuff!
- Customization: Want a pirate ship? A princess castle? Fancy ladders, drawers, or desks? Your call!
- Quality Control: When you use DIY bunk bed plans, you pick the wood, the finishes, and you know those joints are rock solid.
- Family Bonding: Bring the squad together for this project. It’s a memory-maker, trust me.
- Room Optimization: No more wasted corners or awkward furniture layouts. These plans are all about smart design.
Understanding the Basics of DIY Bunk Bed Plans
Alright, before you sprint to the tool shed, you gotta nail down the basics. Solid DIY bunk bed plans start with a few critical questions:
- Who’s using it? (Kids, adults, guests??)
- What’s your room size and ceiling height?
- Any extra features you want?
This step sets your entire project up for success. DIY bunk bed plans usually include:

- Lumber lists: What sizes and types of wood you need.
- Hardware guides: Screws, bolts, and brackets—don’t skimp here.
- Cut diagrams: Where to make every chop for max efficiency.
- Assembly steps: Clear, numbered actions so you’re not guessing (no more mystery parts at the end!).
Choosing the Right DIY Bunk Bed Plans for Your Needs
There’s a boatload of options for DIY bunk bed plans. The right one depends on your vibe. Here are some top picks:
Classic Twin-Over-Twin Bunk
- Best for: Kids sharing a room or regular sleepovers
- Style: Clean lines, simple ladder, can separate into two twins later—genius!
L-Shaped Bunk Bed Plans
- Best for: Teams wanting extra floor space
- Perk: Open spot underneath for storage, a desk, or a reading nook
Loft Bed with Desk Underneath
- Best for: Teens or college students needing workstation space
- Key: Compact and efficient—great for smaller rooms
Triple Bunk Bed Plans
- Best for: Big families or vacation homes
- Caution: Needs high ceilings and sturdy framing—safety first!
Each type of DIY bunk bed plans comes with a different layout, material needs, and build time. Think about who’s climbing up there—safety and stability are everything, so don’t cheap out on quality wood or hardware, ya feel me?

Step-by-Step Guide: Building Your DIY Bunk Bed
Here it is—the main event! We’re diving into a classic twin-over-twin build, ‘cause it’s versatile and always in demand. When you follow DIY bunk bed plans like these, you’re setting yourself up for straight success.
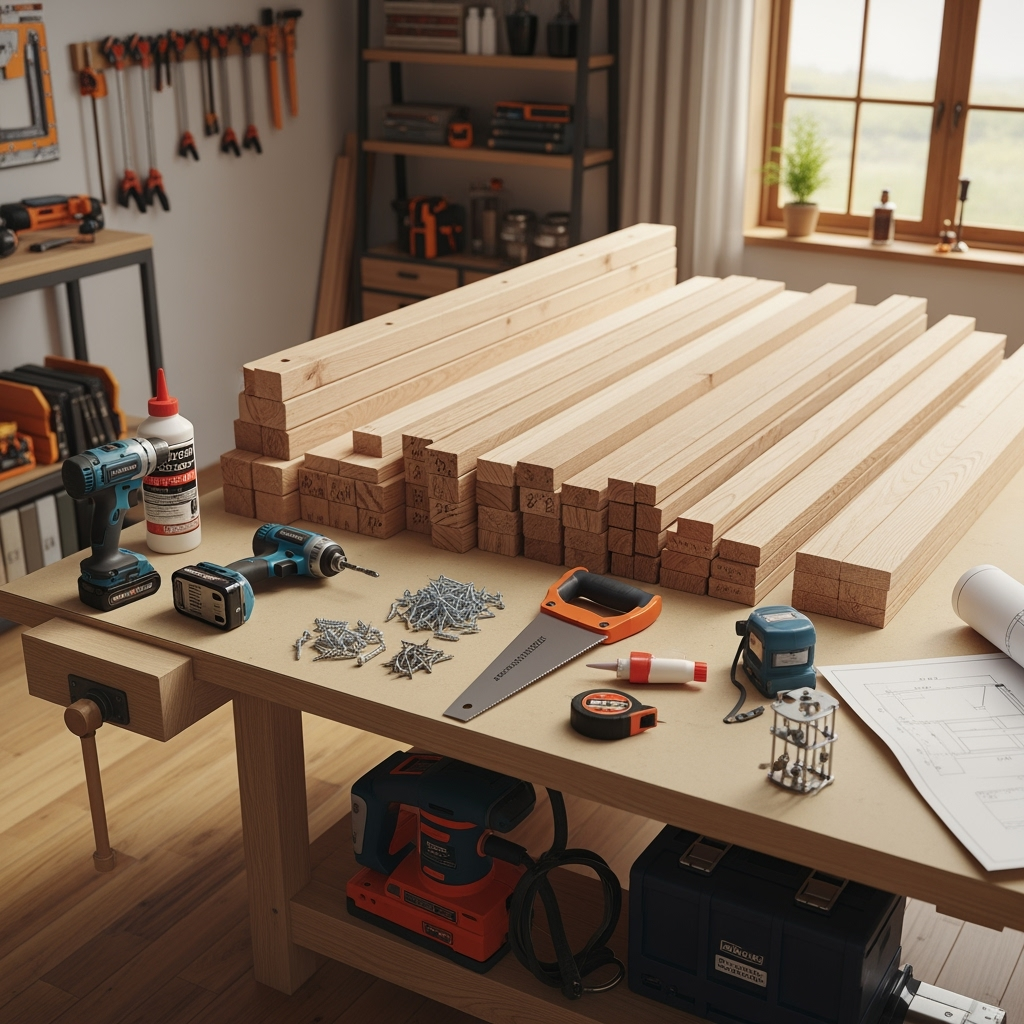
Step 1: Gather Your Materials
- Lumber (check your plans for exact measurements—usually 2x4s, 2x6s, 1x6s)
- Wood screws (at least 3-inch)
- Bunk bed ladder hardware or wood for custom rungs
- Drill, impact driver, saw, sander, square, level, measuring tape
- Wood glue, wood filler, finish of your choice (paint, stain, poly)
- Pocket hole jig (recommended for strength, not required)
Pro tip: Pre-cut your lumber at the hardware store if you don’t have a saw. Saves time and clean-up—yeah, learn from my mistakes, lol.
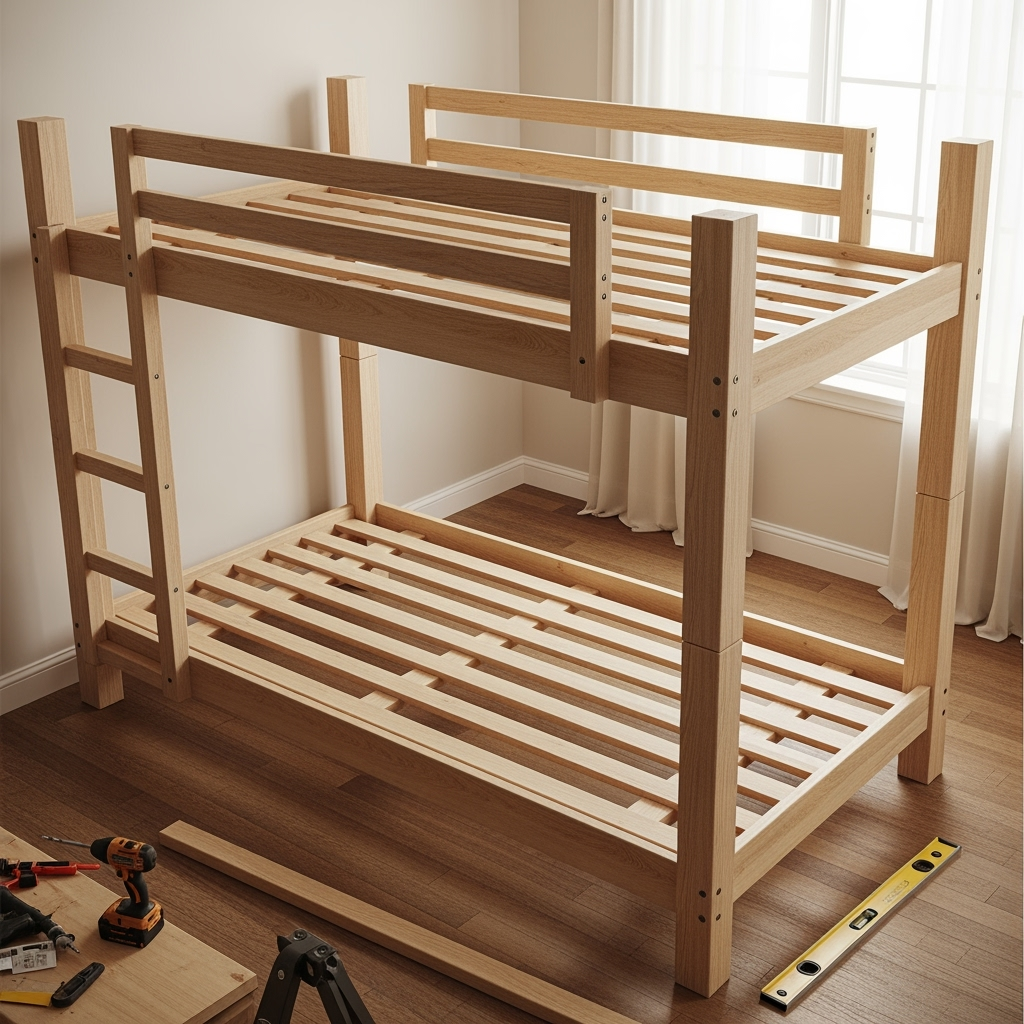
Step 2: Build the Bed Frames
- Lay out the side rails and end pieces for both bunks.
- Screw together using either butt joints or pocket holes for max strength. Follow the numbers on your DIY bunk bed plans for an exact fit.
- Attach bed slats evenly across each frame, using wood glue and screws to avoid squeaks and wobbles later.
Step 3: Construct the Support Posts
- Usually made of 2x4s or 4x4s. These bad boys need to be straight and sturdy—inspect for warps!
- Sand the wood smooth to avoid splinters.
- Fasten frames to the posts, double checking alignment. Level is your BFF here!
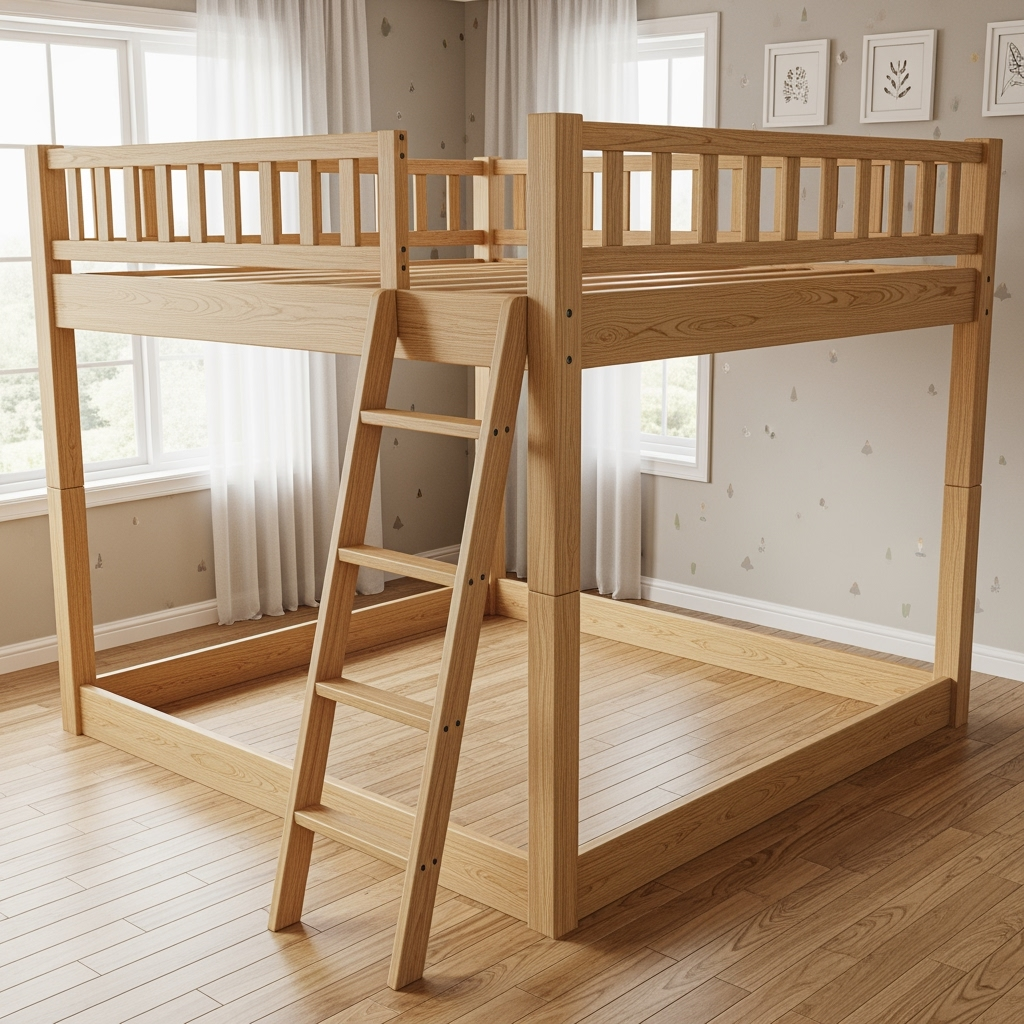
Step 4: Attach Guard Rails and Ladder
- Most DIY bunk bed plans recommend 5″ guard rails above the top of the mattress for safety. Don’t skip this—seriously.
- Install ladder securely, angling it or adding grippy rungs for safer climbing.
Step 5: Sand, Finish, and Assemble
- Go over every inch with medium, then fine sandpaper.
- Fill holes and touch up any knots or cracks with wood filler.
- Paint or stain as desired, then layer on a clear coat for toughness. Let it dry up nice and long!
- Assemble the parts inside the room—trust, you won’t wanna carry a finished bunk up the stairs.
The best part about following these DIY bunk bed plans? You get a killer bed built with love—and some serious bragging rights.
Essential Safety Considerations for DIY Bunk Bed Plans
Can’t stress this enough, y’all: safety is everything. Don’t cut corners—especially with kids. Here are the must-dos in any DIY bunk bed plans:

- Use heavy-duty wood and hardware—pressure-treated or solid pine is solid. Steer clear of crumbly stuff!
- Every bed must have secure guardrails, no gaps bigger than 3.5″.
- Ladders need solid rungs and should not be slippery. Think about including grippy strips if you paint.
- Always bolt the frames together, not just screws. Your bunk bed shouldn’t wiggle, ever.
- If unsure, anchor to a wall for extra security—especially if kids are bouncy.
Double check your DIY bunk bed plans for any upper weight limits, and test the bunks yourself before letting anyone sleep on them. (Yup, climb up there and give it the ol’ bounce test!)
Pimp Your Bunk! Cool Upgrades for DIY Bunk Bed Plans
Why stop at just a basic frame? DIY bunk bed plans are the perfect blank canvas to flex your creative flair. Here’s a hit list of upgrades that’ll turn your bunk into a legend:
- Under-bed drawers: Use rolling kicks for toys, books, or off-season clothes.
- Built-in shelves: Give each sleeper a spot for books, a lamp, or even a secret snack stash.
- Slide escape: For the coolest kids on the block, add a slide to the side—playground vibes!
- Theme painting: Pirates, moon base, jungle hut—let your kids go wild, or do your thing.
- Lights: Rope lights under each bunk or clip-on reading lights above—cheap, easy, and rad.
Whatever you add, just make sure it fits within the safe design of your DIY bunk bed plans. No loose parts or sharp edges where heads can bump!
Maintenance & Longevity of DIY Bunk Beds
Want your handiwork to last? Follow these tips:

- Tighten bolts/screws every few months (beds get wiggly over time!)
- Routinely check for splinters, loose guardrails, or cracked wood.
- Keep the bunks dry—use coasters if your kids like to sneak drinks.
- Update paint or finish every few years to keep it looking fresh.
- If your kids outgrow it, don’t toss it—most DIY bunk bed plans allow for separating into single beds. The ultimate upcycle!
Finding and Using the Best DIY Bunk Bed Plans Online
The internet is packed with genius DIY bunk bed plans—free and paid. A few honest tips for grabbing the good stuff:
- Check reviews and user pics before choosing a plan
- Download plans with FULL cut lists and step-by-step diagrams (photos help tons!)
- Favor plans from woodworking sites or creators with real build experience
- If you’re new to woodworking, start with the simplest DIY bunk bed plans—no shame in it, we all start somewhere.
Common Mistakes & How to Dodge Them
I’ve seen a ton—learn from us oldtimers with these rookie mistakes in DIY bunk bed plans:
- Skipping the measuring tape: Even small errors make bunks go wobbly.
- Rushing the sanding: Splinters plus little kids = no bueno.
- Underestimating weight: Always overbuild, never underbuild.
- Forgetting about mattress height: Don’t make your top bunk a squeeze. Check your DIY bunk bed plans for recommended mattress thickness.
Wrapping Up: DIY Bunk Bed Plans for the Win!
Here’s the scoop—using DIY bunk bed plans isn’t just about saving cash, it’s about crafting something epic for your family, totally tailored to your style and needs. You pick the features (or wild add-ons), and if you follow good, proven DIY bunk bed plans, you’ll end up with a sturdy, safe, and smart space solution you’ll be proud to share on Insta.
Ready to start? Gather your plans, your crew, and some solid tunes for the workshop. The magic of DIY bunk bed plans is just waiting for you to make it happen. Got questions? Drop ’em below—happy building!


